Tracking Google Ad Conversions in WordPress

google ads

If you’re a business owner or marketer, you’re likely familiar with Google Ads as a strong way to drive traffic to your website. Setting it up effectively can require some technical know-how, especially when integrating with WordPress. Allow me to walk you through properly integrating Google Ads with Google Analytics and Google Tag Manager, the right way, to maximize your website’s performance and data tracking capabilities.

Why Use Google Ads for Your Website?

Google Ads is an excellent tool for driving targeted traffic to your website. By bidding on keywords relevant to your business, you can show ads to users actively searching for what you offer. But, to really understand the value of that traffic, it’s crucial to track it correctly. That’s where tools like Google Analytics and Google Tag Manager come in.

Option 1: Directly Connect Google Analytics and Google Ads with Custom JavaScript

For many businesses and marketers, a straightforward setup of Google Analytics and Google Ads is enough to track important website interactions without needing a more complex setup. If you’re looking to avoid additional tools or platforms, you can connect Google Analytics and Google Ads directly and use custom JavaScript to track key actions on your website. Here’s how to do it:

Site Kit for WordPress

Step 1: Install Google Analytics (GA4)

To begin, you’ll need to install Google Analytics on your WordPress site. There are a couple of ways to do this:

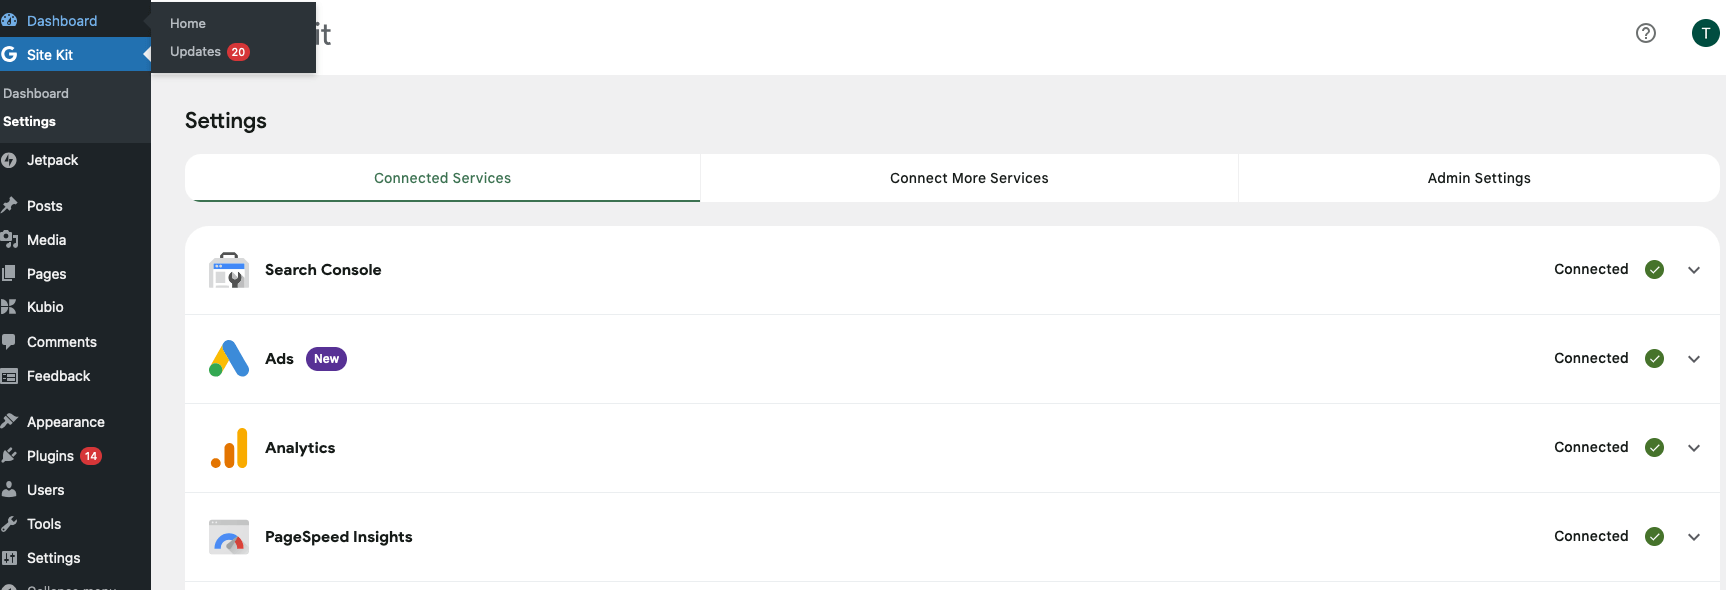
  • Using a Plugin: WordPress plugins like Site Kit by Google simplify the process. After installation, the plugin will automatically insert the Google Analytics tracking code into your website, and you’ll be able to see key data like page views and user behavior within your Google Analytics dashboard.
  • Manual Code Insertion: If you prefer not to use a plugin, you can manually add the GA4 tracking code to your WordPress site. To do this, copy the tracking script from your Google Analytics account and paste it into your site’s header or footer file (usually found in your theme settings or via your website’s code editor). This will start collecting data immediately.

Step 2: Link Google Analytics to Google Ads

Once Google Analytics is set up, the next step is to link it with your Google Ads account. This will allow you to see how your ad campaigns are performing in terms of real user behavior and conversions on your website.

  • In Google Analytics, navigate to the Admin section and find the Google Ads Linking option under the Property settings.
  • Follow the prompts to link your Google Ads account. Once linked, data such as user behavior, conversions, and audience insights will flow between Google Ads and Analytics, allowing you to optimize your campaigns based on how visitors interact with your site.

Step 3: Set Up Custom JavaScript for Conversion Tracking

For more advanced tracking, you can use custom JavaScript to monitor specific actions on your site, like button clicks, form submissions, or external link redirects. Here’s how you can do this:

custom javascript

  • Google Ads Conversion Tracking: Google Ads provides a conversion tracking code that you can place directly into your website’s HTML. For example, if you want to track when users complete a form or click a specific button, you can insert this conversion tracking code into the relevant part of your site’s HTML.
    • Navigate to your Google Ads account, go to Tools & Settings > Conversions, and create a new conversion action.
    • Google Ads will generate a conversion tracking code that includes a JavaScript snippet. You can add this code directly into your website’s HTML (either through your WordPress editor or directly into the page code) to track actions.
  • Tracking Button Clicks: If you want to track a button click (for example, a “Contact Us” button), you can insert the conversion tracking code into the button’s HTML attributes. This will trigger a conversion event each time a user clicks the button, allowing you to monitor how often it leads to valuable actions on your site.
  • Tracking Form Submissions: Similarly, if you want to track when users submit a contact form, you can embed the conversion tracking code into the form’s submission page or thank-you page. This is especially useful for tracking lead generation or contact inquiries.

Here is a sample of the code I used:

<script>
document.addEventListener('DOMContentLoaded', function() {
    var buttons = document.querySelectorAll('.cta-consultation'); // Select all elements with the class 'cta-consultation'

    // Check if there are any buttons to avoid errors
    if (buttons.length > 0) {
        buttons.forEach(function(button) {
            button.addEventListener('click', function() {
                // Fire the Google Ads event
                gtag('event', 'conversion', {
                    'send_to': 'AW-XXX/XXX',
                    'event_callback': function() {
                        console.log('Conversion tracked!'); // Optional: for testing purposes
                    }
                });
            });
        });
    }
});
</script>

Step 4: Monitor and Optimize Conversions

Once the custom JavaScript is in place, Google Analytics will start tracking the data, and you’ll be able to see how users are interacting with your site in the Conversions section of Google Ads. Over time, you can monitor the performance of your campaigns and make adjustments to improve your return on investment (ROI).

Key Advantages of This Approach

Simple and Direct: For small or less complex websites, directly connecting Google Analytics and Google Ads using custom JavaScript is a simple and effective solution.

Option 2: Integrating Google Analytics and Google Ads Using Google Tag Manager

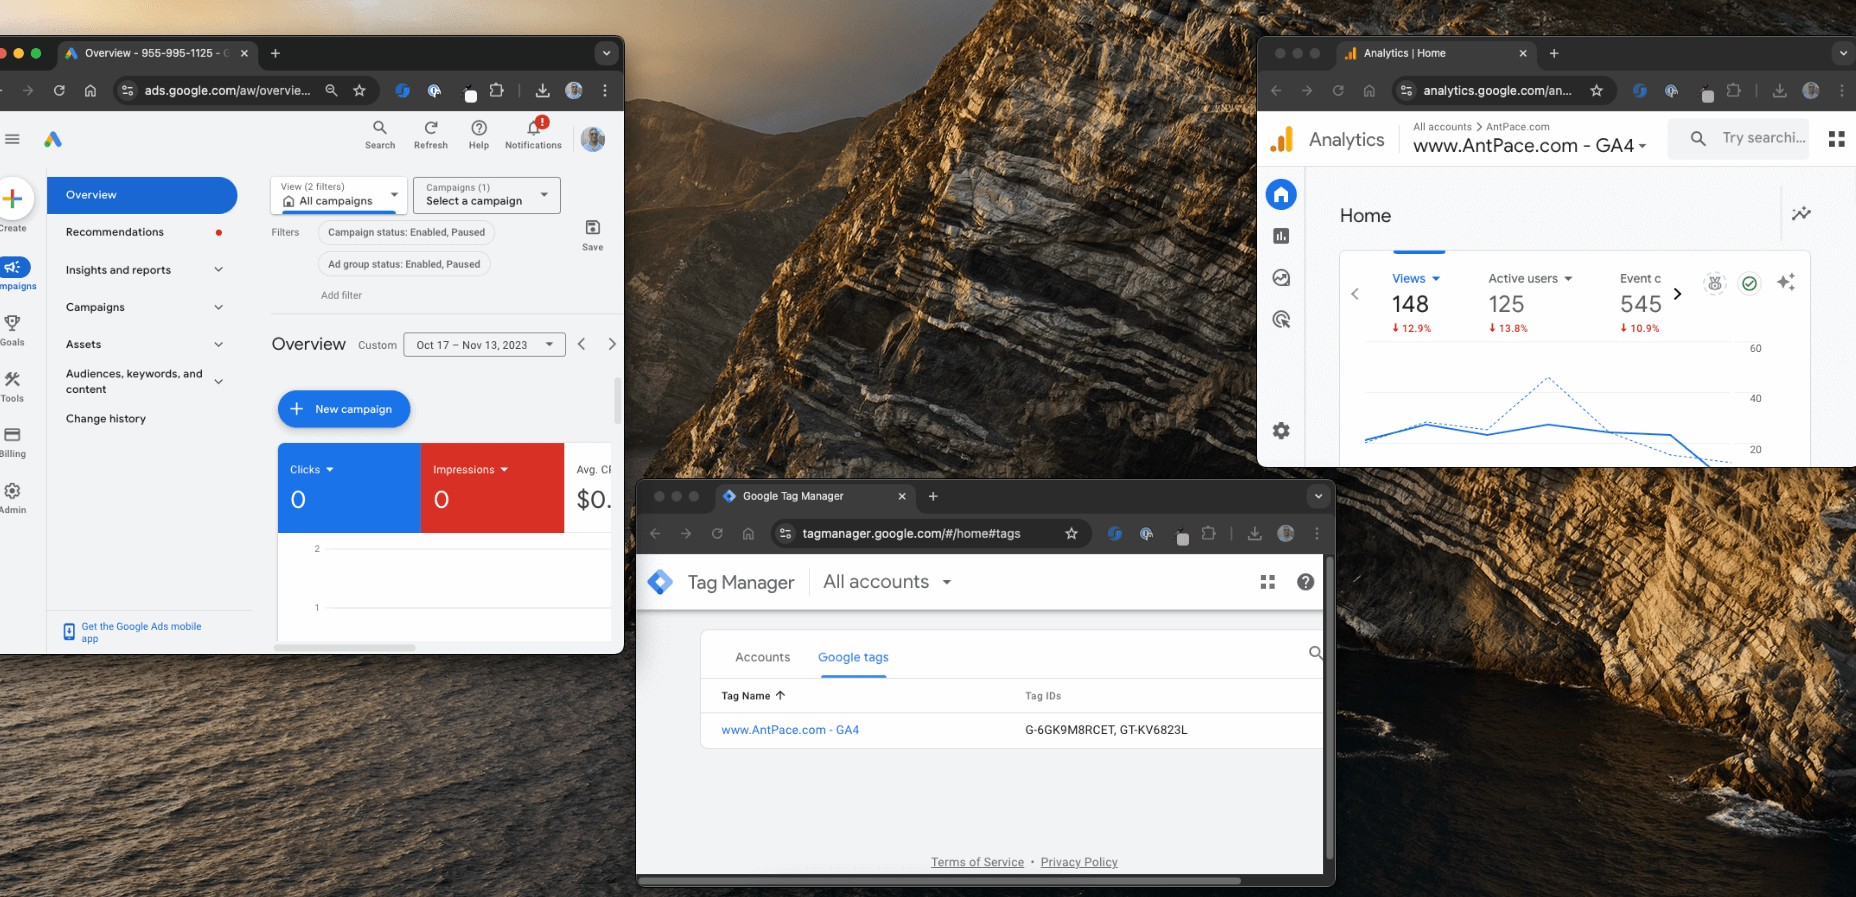
For businesses that want more flexibility and control over their tracking setup, using Google Tag Manager (GTM) offers a more advanced approach compared to directly connecting Google Analytics (GA4) and Google Ads. By connecting GA4 through GTM and setting up Google Ads to pull conversion data from GA4, you can streamline the process and enable more precise tracking, including custom click tracking. Here’s how to do it:

Step 1: Set Up Google Analytics (GA4) Through Google Tag Manager

Instead of directly embedding Google Analytics code into your WordPress site, you can set up GA4 using Google Tag Manager. This allows for more flexibility in managing and customizing tracking tags without manually editing the site code. Be careful to not have it set up twice (once directly on its own, and also in GTM), or else you may see double measurements

Install Google Tag Manager on Your WordPress Site

First, install GTM by either using a plugin like Site Kit by Google or manually adding the GTM container code to your site’s header. This will serve as the foundation for all tracking scripts on your site.

  • Create a GA4 Tag in GTM:
    • In GTM, create a new tag by selecting Google Analytics: GA4 Configuration.
    • Add your GA4 Measurement ID (found in your Google Analytics account) to the tag configuration.
    • Set the trigger to All Pages, so it tracks page views across your entire site.
    • Save and publish the changes in GTM, and your website will now be tracking page views and user behavior through GA4 without needing any code embedded directly in your site.

Step 2: Set Up Custom Click Tracking Through GTM Triggers

One of the major advantages of using Google Tag Manager is the ability to create custom triggers to track specific user interactions, such as button clicks or link clicks, without having to modify the site’s code.

Create a Click Trigger in GTM

To track specific interactions like button clicks, you’ll need to set up a trigger in GTM. In GTM, create a new Trigger and select the Click – All Elements option. Define the conditions for your trigger, such as when a user clicks a specific button or link. For example, if you want to track a button leading to a third-party calendar page, you can set the trigger to fire when a user clicks on the button with that specific URL. My conversion was based on clicking any button or link that led to a Google Calendar scheduling page. Since the editor we were using (Kubio) generated complex HTML around the button, I was having trouble targeting exact clicks. Ultimately, I used a selector that targeted click URLs that contained part of the destination:
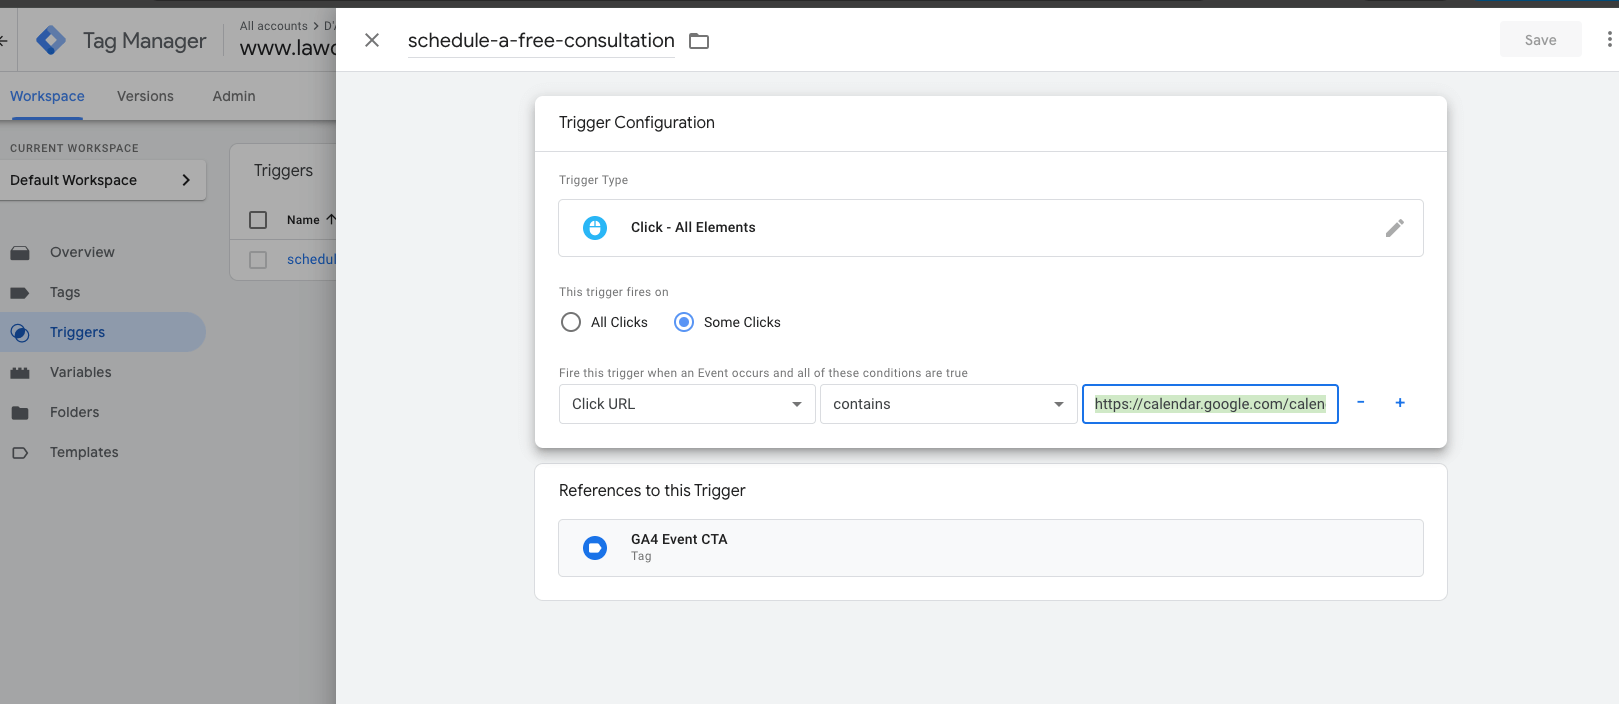
gtm trigger

On another setup, I had to target “Just Links” for the event to fire. Make sure you test in preview mode to make sure it works!
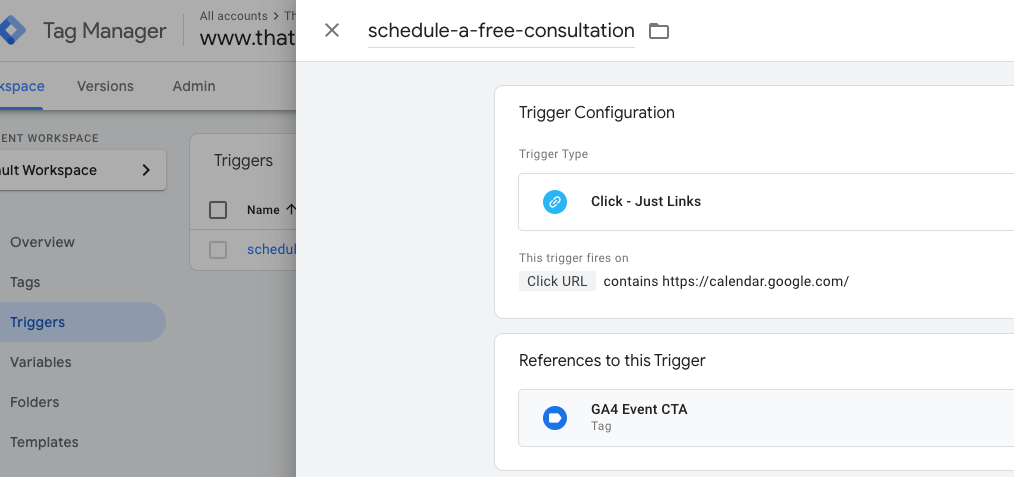
Just links trigger

  • Create a Google Analytics Event Tag:
    • Create a new Google Analytics: GA4 Event tag in GTM.
    • Set the event parameters, such as what action or label you want to track (e.g., “Button Click” or “Contact Form Submission”).
    • Assign the click trigger you just created to this tag, so it fires when the user interaction happens.
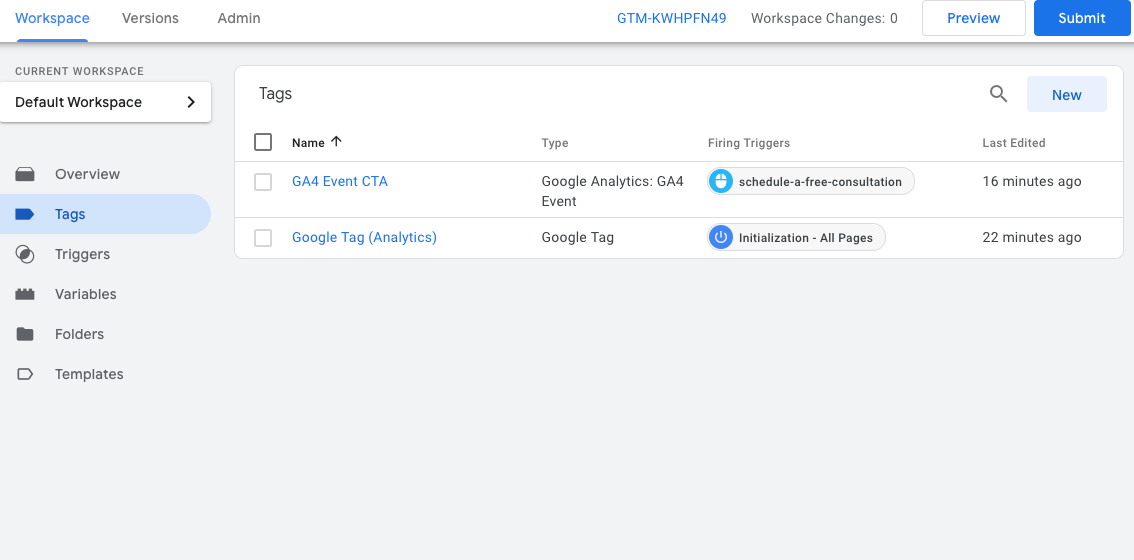
gtm tags

Once your trigger is firing, the event will be recorded in GA4. This allows you to see detailed analytics on how users interact with specific elements on your site. You may have to wait until the next day to see it showing up and to continue the rest of this process.

Step 3: Link Google Ads to GA4 for Conversion Tracking

Once GA4 is collecting conversion data, you’ll want to make sure that Google Ads is also using this data for your ad campaigns. Instead of directly adding Google Ads tracking code to your website, you can import conversions from GA4 into Google Ads. Make sure you mark the event as a ‘Key Event’ in GA4:
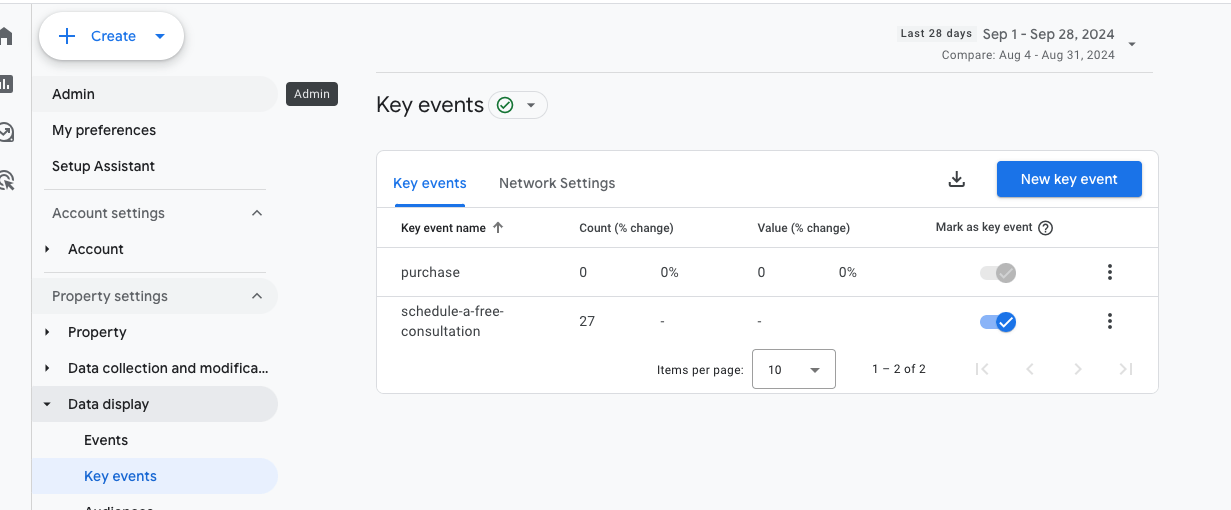
ga4 key event

  • Link Google Ads to GA4: In your Google Analytics admin settings, find the Google Ads Linking option under the Property settings and link your Google Ads account.
  • Import Conversions into Google Ads: In your Google Ads account, navigate to Tools & Settings > Conversions. Click to import conversions from Google Analytics. You will now be able to track and optimize your Google Ads campaigns based on the conversion events recorded in GA4.

Step 5: Set Up Google Ads to Track Click Conversions

With the custom click tracking events flowing into GA4, you can now import these events into Google Ads as conversions.

  • In GA4, mark the click event you created as a Conversion (similar to how you would for other key actions).
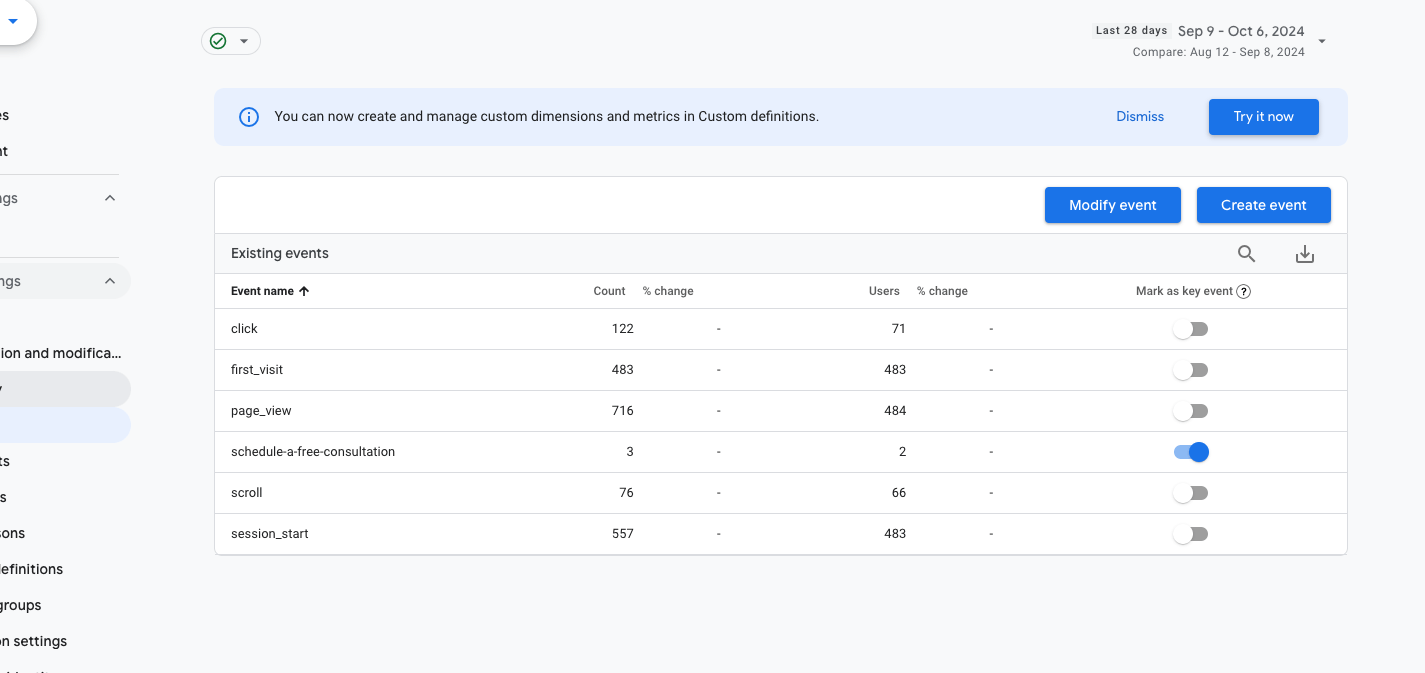
key events

  • Then, in Google Ads, import the conversion from GA4, so your ad campaigns can track the performance of these custom click actions.
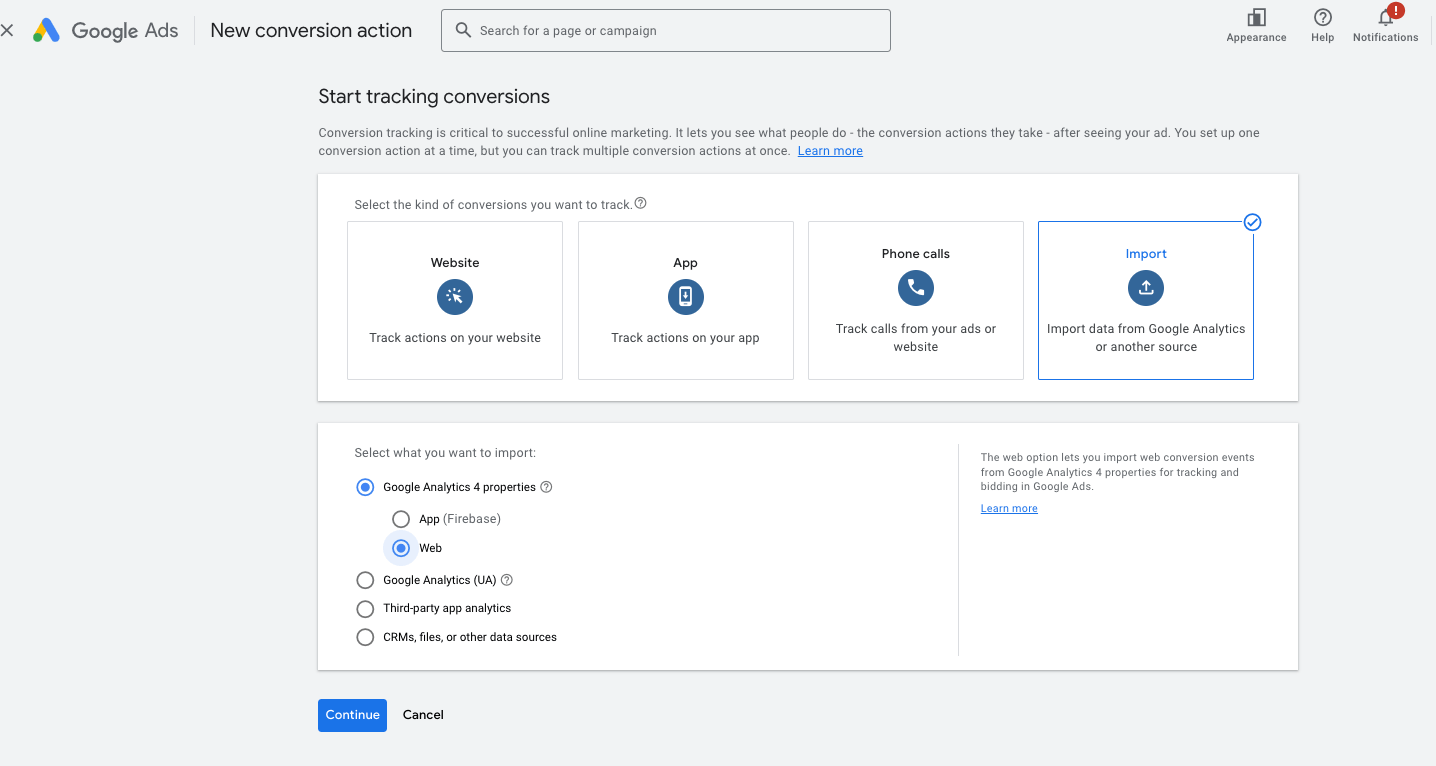
Conversions

This setup allows you to track highly specific user actions (like button clicks or form submissions) and optimize your Google Ads campaigns based on those actions.

GTM allows you to track custom events like button clicks, form submissions, and other interactions without modifying your site’s code. With Google Tag Manager, you can manage all of your tracking codes (for Google Analytics, Google Ads, and other tools) in one place. By pulling conversion data from GA4 into Google Ads, you can optimize your campaigns based on real user actions and get more detailed insights into how users interact with your site.
Case Study: Fixing a WooCommerce Website for a New Client

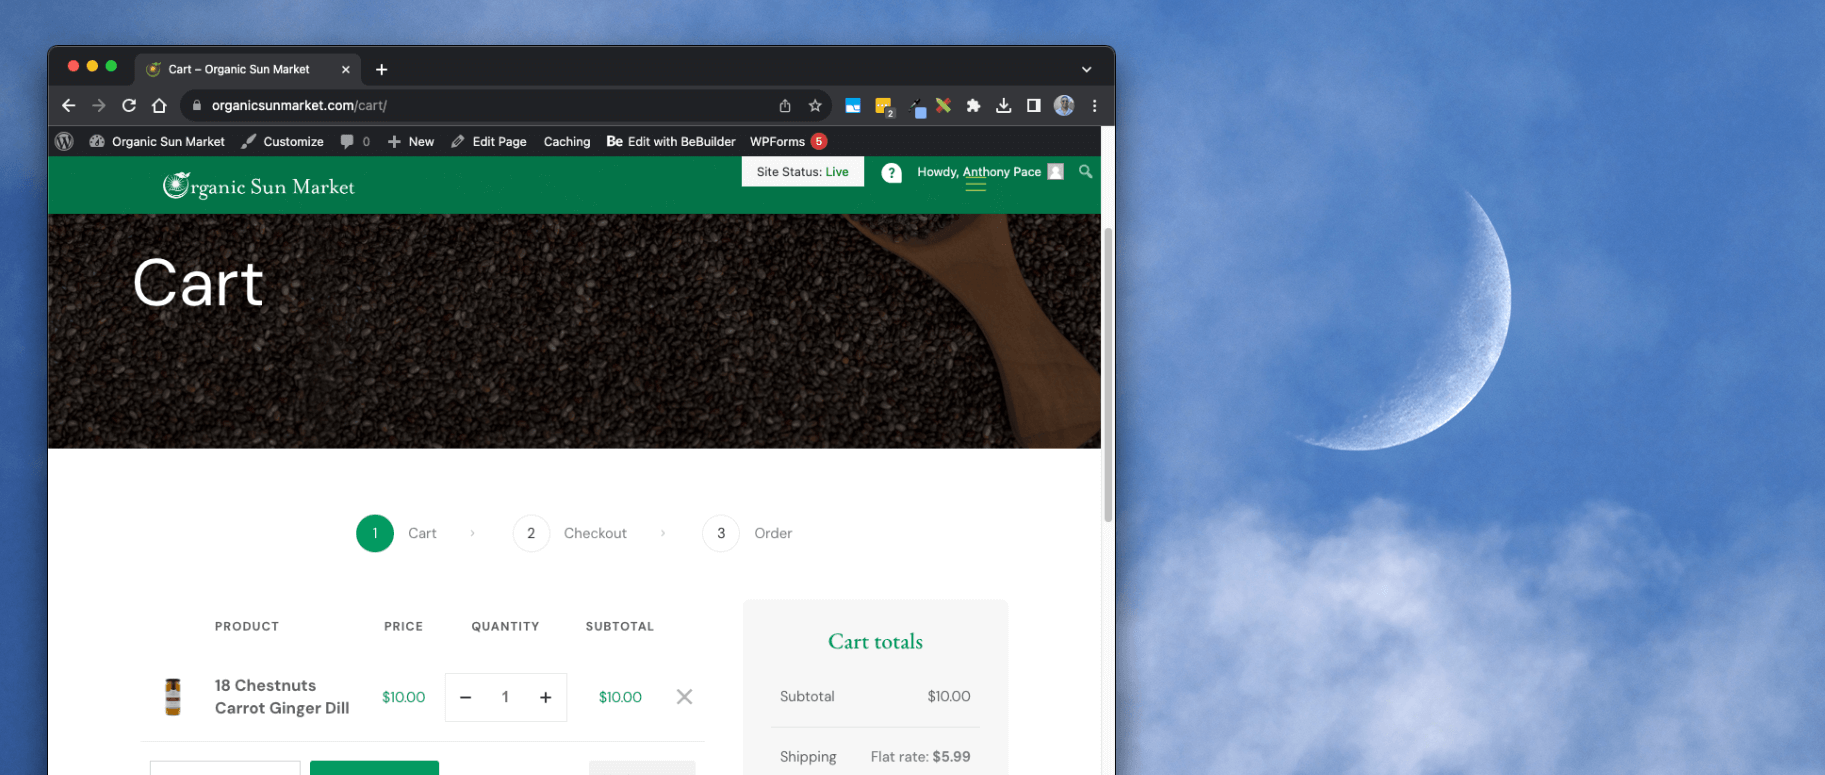
I met Steven at his store on Bloomfield Avenue in Northern New Jersey. After I gave him my business card he told me his website needs help. The checkout wasn’t working, and users couldn’t even add products to their cart. This was how the previous web development vendor left things before their arrangement ended.

The website was powered by WordPress (managed by Bluehost), and used WooCommerce as its ecommerce solution. I helped him create a Stripe account, and connect it to his online store.  I finished configuring a premium WordPress theme called BeTheme, and gave him a multi-week marketing plan to help sales grow.

website screenshot

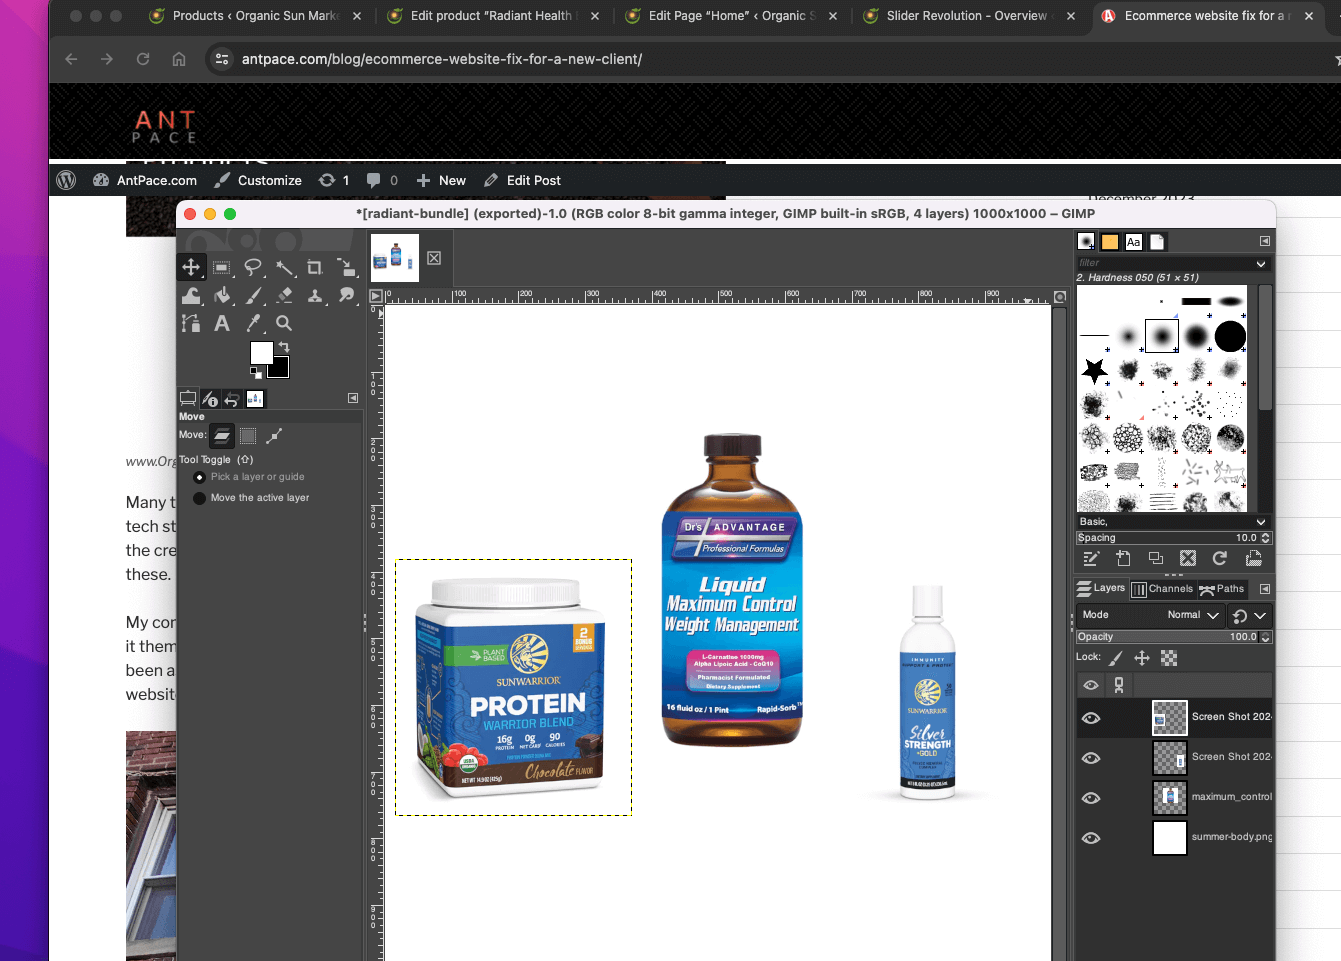
I used an image manipulation program (the GIMP) to create graphic assets used throughout the shop:

website graphic design

Many times I have to pick up where someone else left off. I could tell you another story about inheriting a Frankenstein tech stack from a previous vendor. They left off on non-talking terms after demanding back work payments to release the credentials to my team. My skill in figuring things out, regardless of the technology involved, shines in times like these.

My company tag line is “I can build your website” – it should really be “I can fix your website”. Business owners try to do it themselves, and often make it most of the way. When you need help, I am there to carry it over the finish line. I’ve been asked if services like Wix cuts into my business – it’s actually the opposite. Broken, incomplete, or unoptimized websites created on easy-to-use platforms have provided a solid market for my expertise.

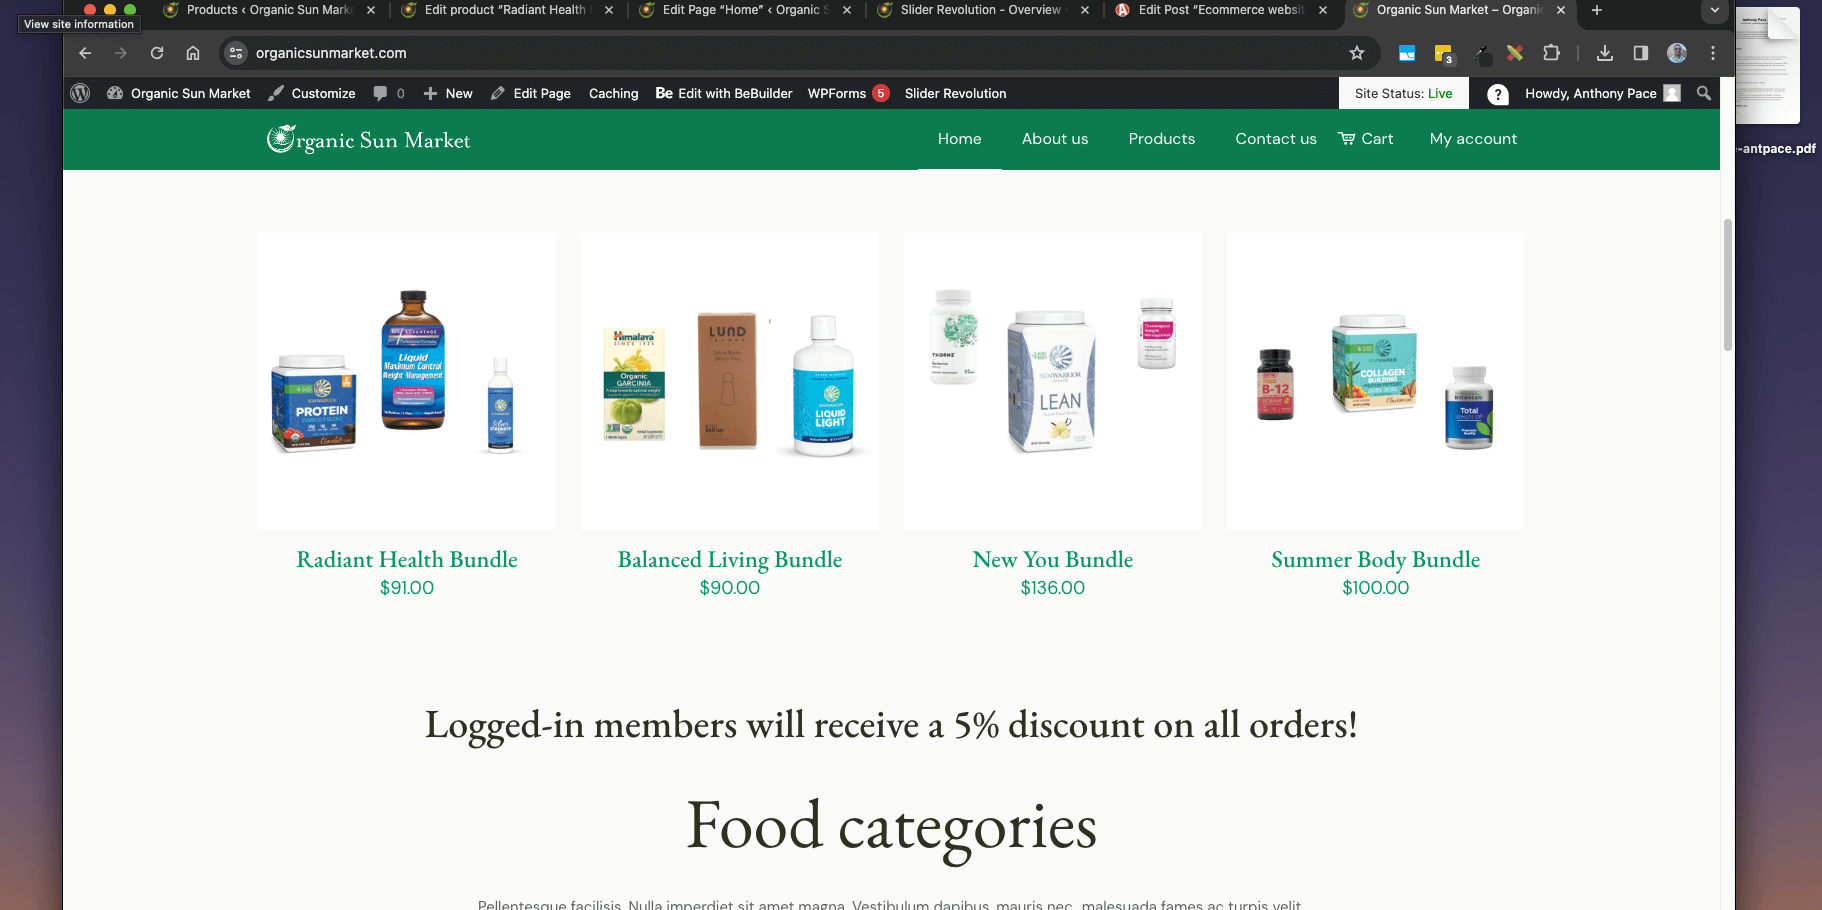
Organic market

Local small businesses are what make neighborhoods unique and give families a chance to make a living themselves. It feels great to help people knowing we can both benefit. You can read more about the plan I use to help businesses with their existing website in another blog post.

Membership Discounts Without a Plugin

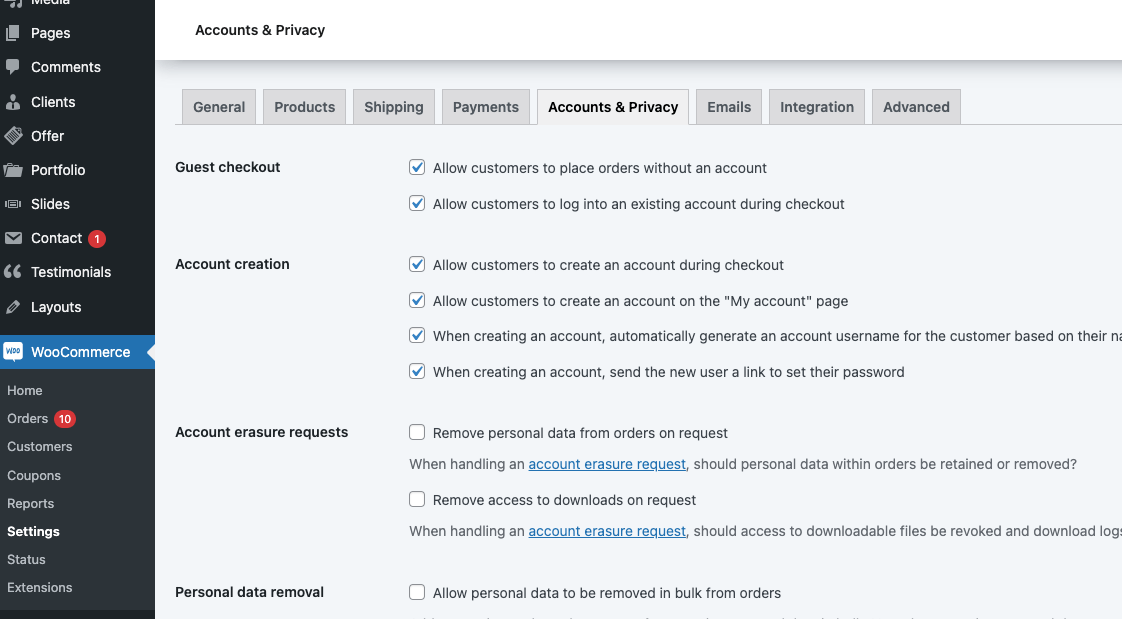
As part of the marketing plan, we decided to add membership accounts to the WordPress ecommerce website for Organic Sun Market. Enabling that capability was a few settings in the dashboard: WooCommerce > Settings > Accounts & Privacy

woocommerce accounts and privacy settings

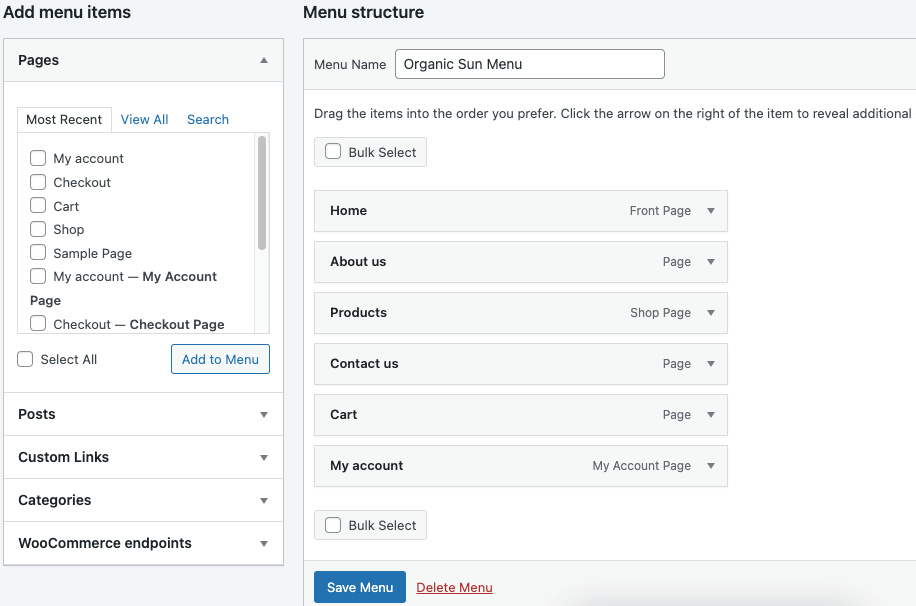
I also added a “My Account” link to the site’s global navigation.

menu in wordpress

By default, WooCommerce provides a “My Account” page where users can log in, view their orders, update their information, and more. You can specify a custom page in the advanced settings: WooCommerce > Settings > Advanced

woocommerce advanced setting

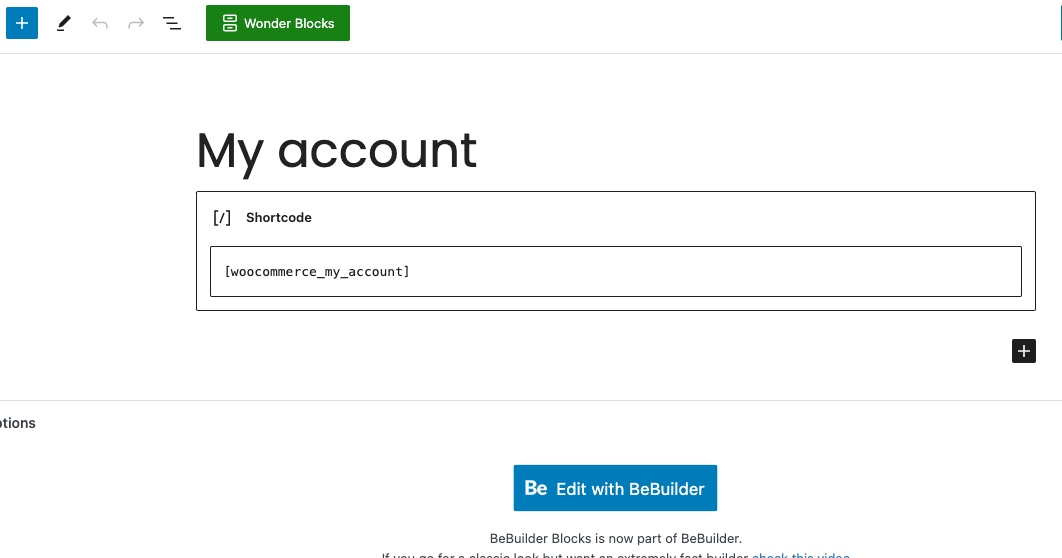
The account page specified uses a WooCommerce short code to handle the content: [woocommerce_my_account]

account page shortcode

Change menu text if user is logged into WordPress

I wanted the “My Account” menu text to change if the user is not logged in. I was able to do this with the WordPress hook `wp_nav_menu` and a simple string replacement PHP function:

add_filter('wp_nav_menu', 'change_my_account_menu_item', 10, 2);

function change_my_account_menu_item($nav_menu, $args) {
// Check if the user is not logged in
    if (!is_user_logged_in()) {
        // Change "My Account" link to "Login/Register"
        $nav_menu = str_replace('My account', 'Login/Register', $nav_menu);
    }
    return $nav_menu;
}

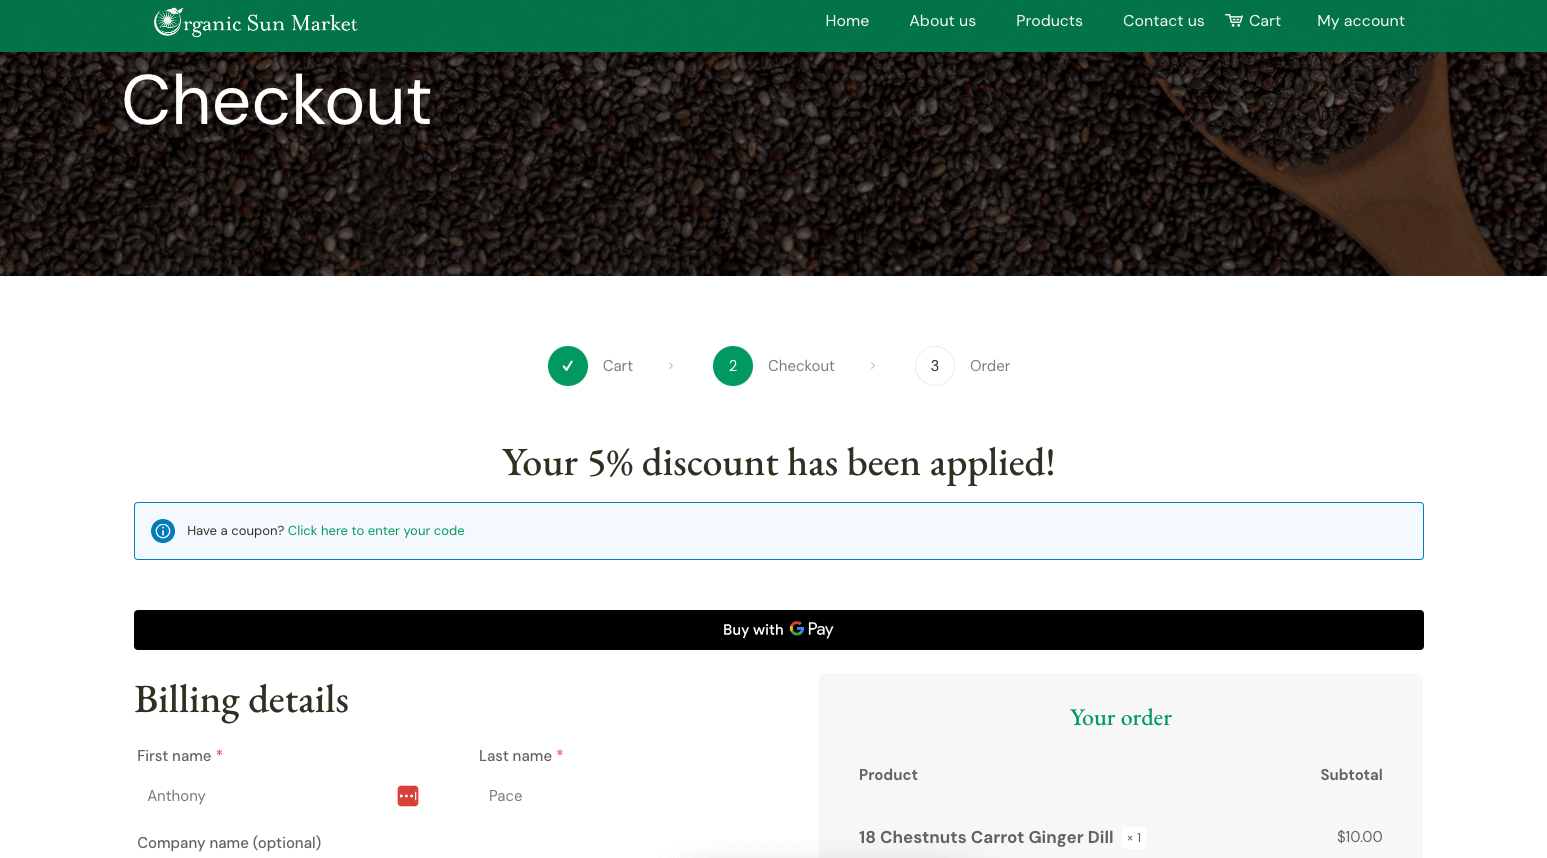
To incentivize users to create an account, we offer a 5% discount to any one logged in. The checkout page contains conditional messaging (depending on wether they are logged in or not) to communicate this incentive.

conditional css messaging on checkout

Hide or show UI elements if user is logged into WordPress

I am able to apply that  style condition with two custom CSS classes, specific to the presence of the WordPress body class ‘logged-in’:

.only-show-while-logged-in{display: none;}
body.logged-in .dont-show-while-logged-in{display:none;}
body.logged-in .only-show-while-logged-in{display:block;}

Apply WooCommerce discount to logged in users

I applied the discount by using custom PHP code in the child theme’s functions.php file with the `woocommerce_before_calculate_totals` hook:

add_action( 'woocommerce_before_calculate_totals', 'no_discount_if_not_logged_in', 10, 1);
function no_discount_if_not_logged_in( $cart ) {
	if (is_user_logged_in()) {              
		foreach ( $cart->get_cart() as $cart_item ) {        
			$discount_eliminate = $cart_item['data']->get_regular_price();
			$discount_percentage = 5; // Set your desired discount percentage
			$discount_amount = $discount_eliminate * ($discount_percentage / 100);
			$new_price = $discount_eliminate - $discount_amount;

			$cart_item['data']->set_price($new_price);
		}
	}
}

Apply WooCommerce discount to logged in users on a specific category of products

Later, we changed the logic to be a 10% discount for logged-in members, but only on products that were part of a specific category called “bundles”.

add_action( 'woocommerce_before_calculate_totals', 'discount_for_specific_category', 10, 1);

function discount_for_specific_category( $cart ) {
    if ( is_user_logged_in() ) {
        // Define the category slug you want to apply the discount to
        $target_category = 'bundles';

        foreach ( $cart->get_cart() as $cart_item ) {
            $product_id = $cart_item['product_id'];

            // Check if the product belongs to the target category
            if ( has_term( $target_category, 'product_cat', $product_id ) ) {
                $discount_eliminate = $cart_item['data']->get_regular_price();
                $discount_percentage = 10; // Set your desired discount percentage
                $discount_amount = $discount_eliminate * ( $discount_percentage / 100 );
                $new_price = $discount_eliminate - $discount_amount;

                $cart_item['data']->set_price( $new_price );
            }
        }
    }
}

Print Design

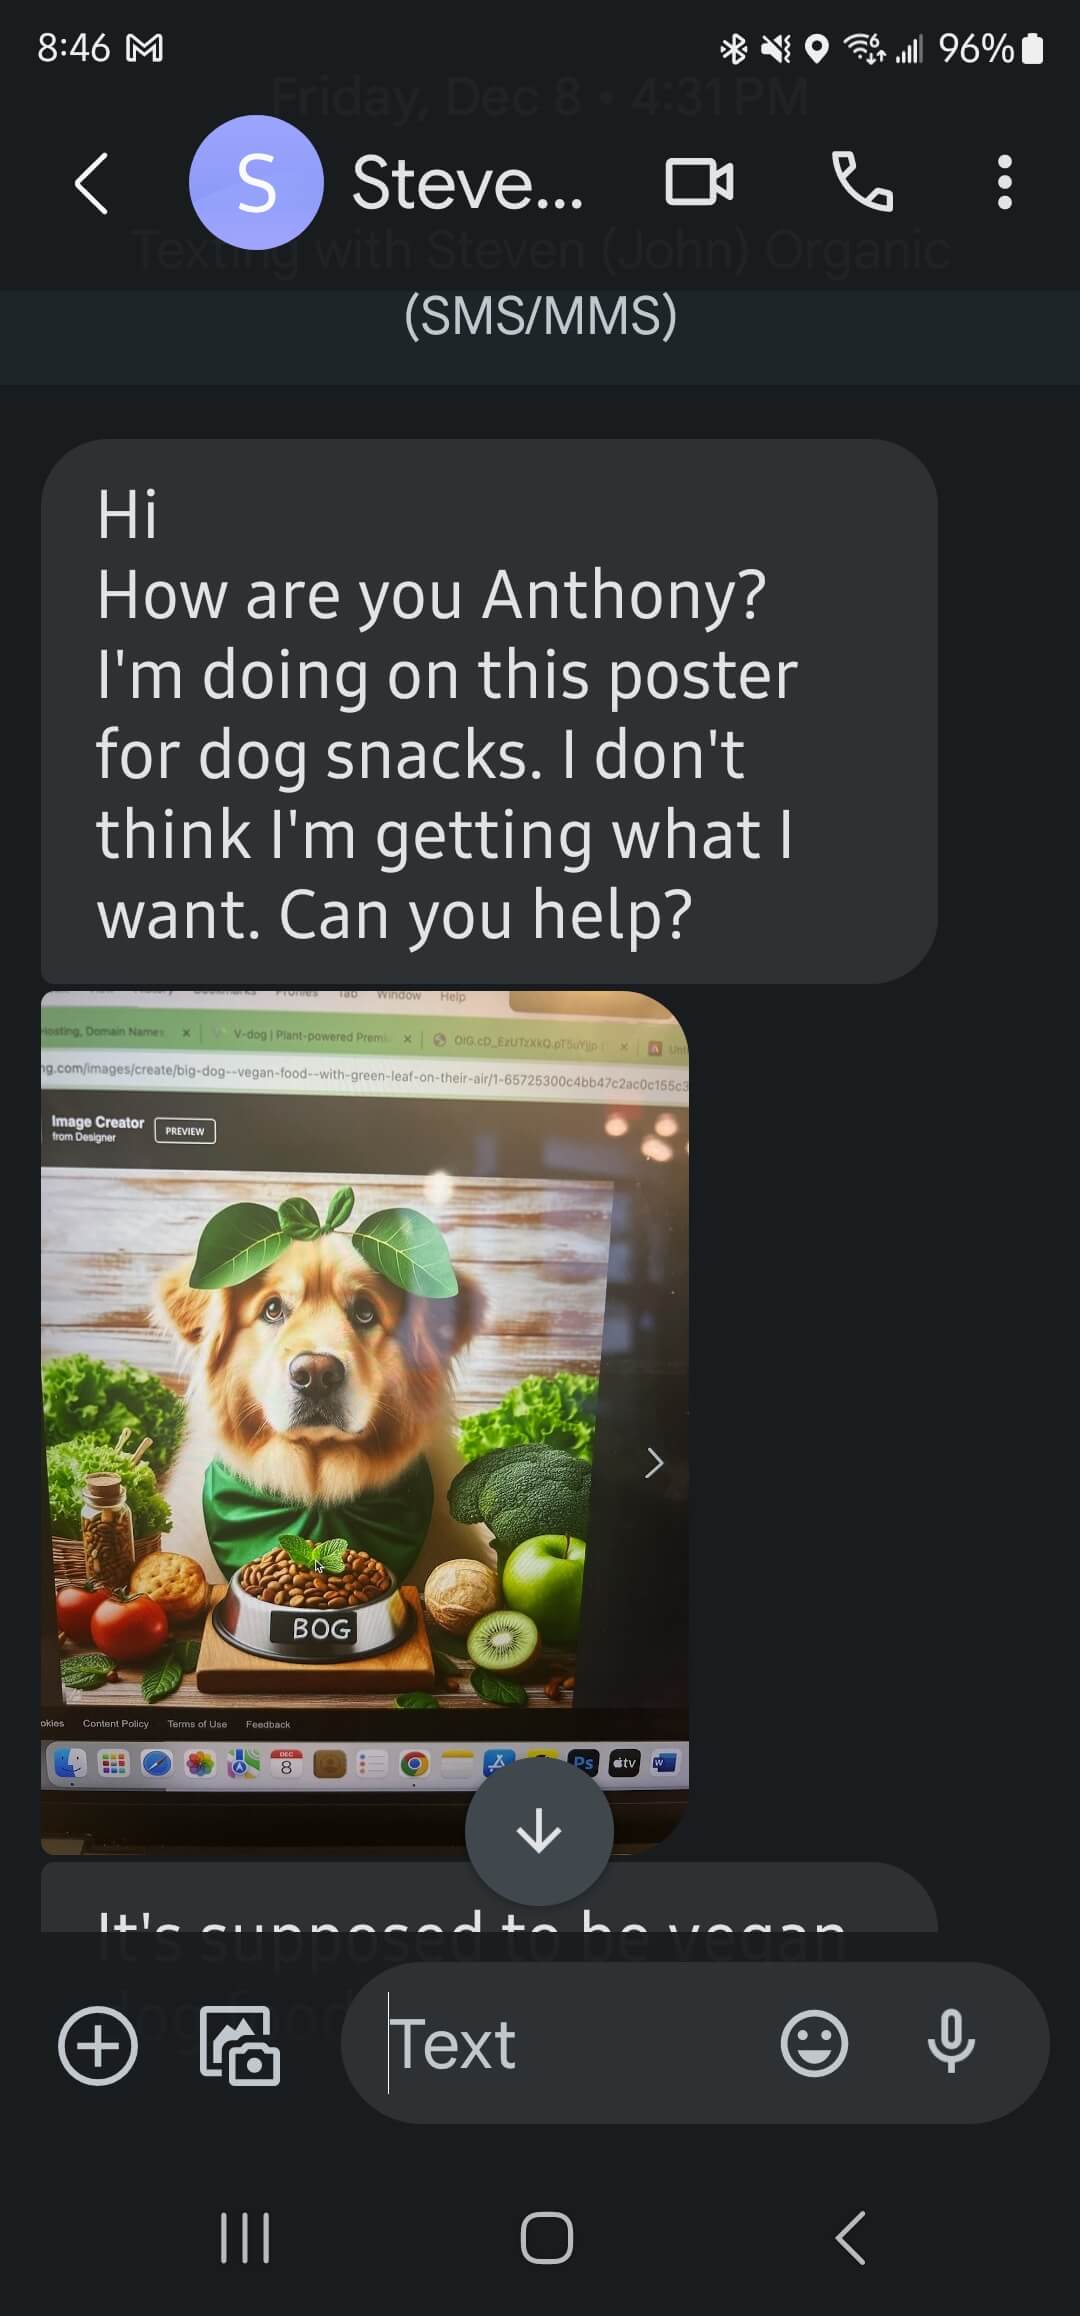
Many local small businesses take their marketing offline and into the real world. Print marketing is a business I have been a part of for almost two decades. I have designed, delivered, and distributed flyers, menus, business cards and more. As the holiday season approached, Steven asked me to create a poster for one of his healthy products.

graphic design request via text message

He sent me a draft he has been working on, along with some inspiration examples that expressed the direction he wanted things to go. This was the final product:

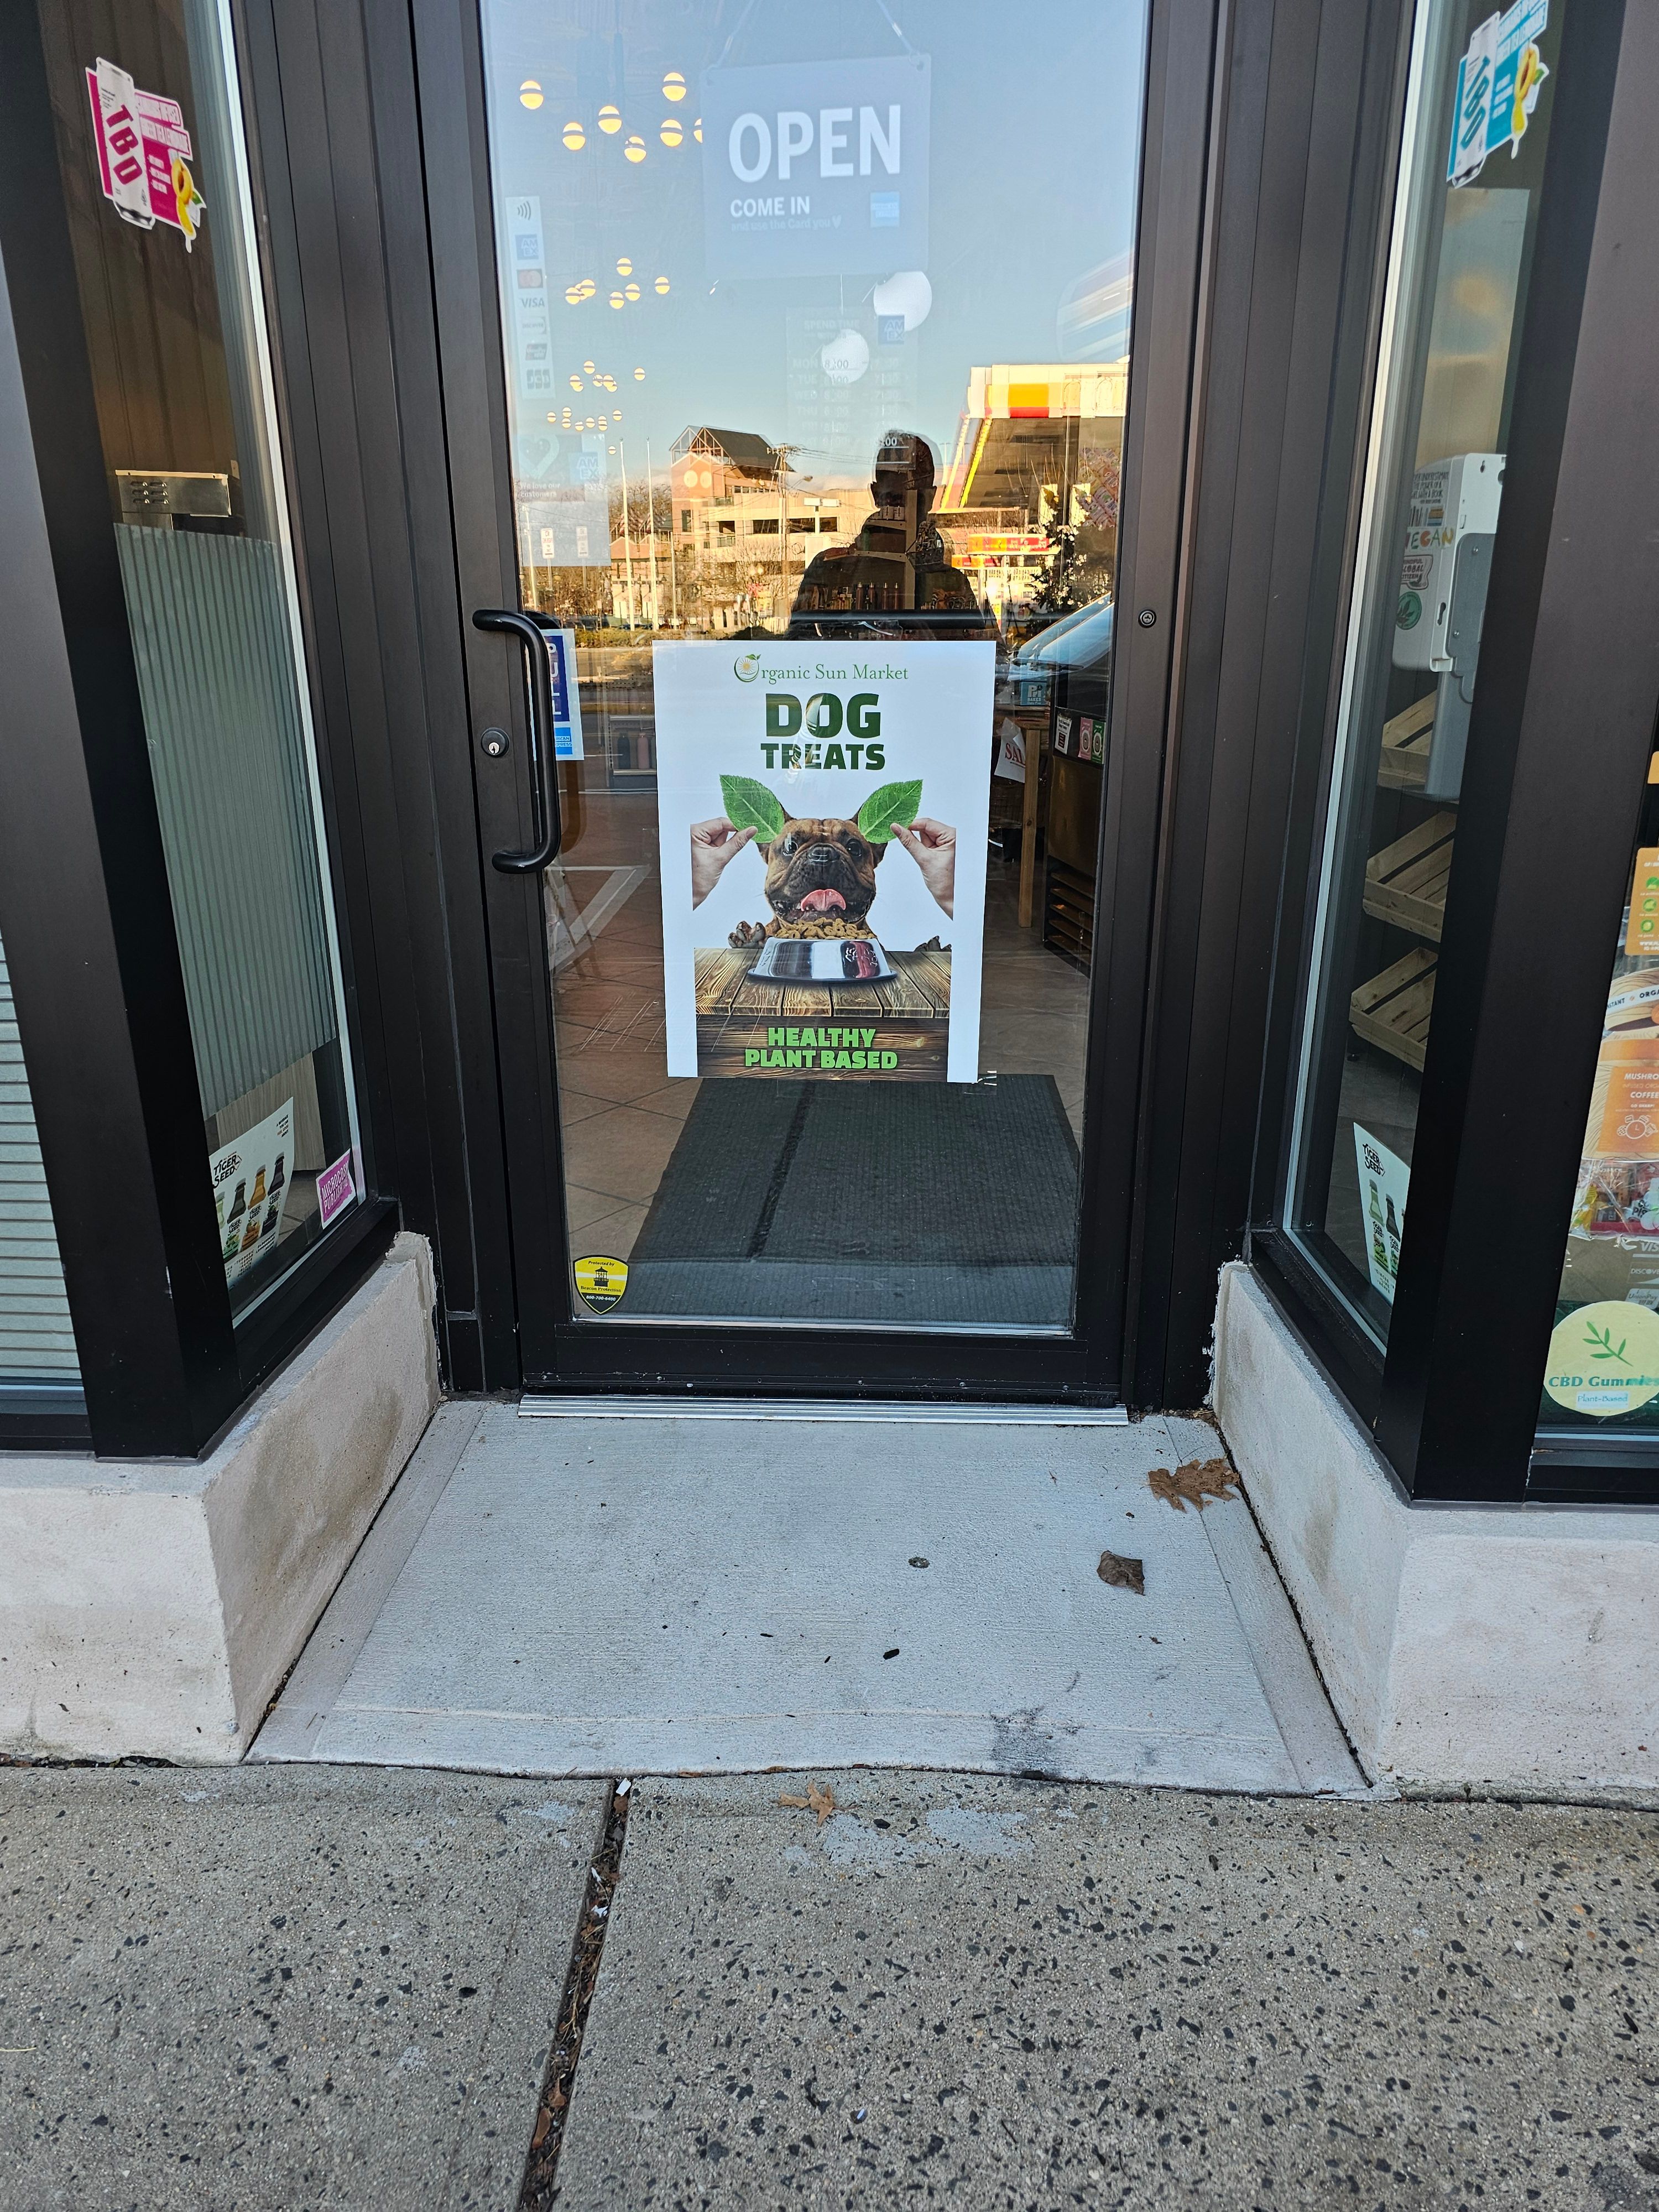
Dog treats poster

And here it is hanging in the store front:

Printed poster design

Why Every Business Needs a Website in 2024

small business websites

Don’t Be Invisible: A Website Puts Your Small Business on the Map

Local small businesses without a brick-and-mortar presence fall into a unique category. They might be service-based businesses like freelance consultants (like myself), home repair services, personal trainers, or cleaning services that operate on a mobile basis or from a home office. These businesses rely heavily on word-of-mouth, local advertising, and community networking to attract and maintain their clientele.

Because this business model does not require a physical storefront, these owners may underestimate the value of a digital presence. They might perceive it as unnecessary, believing that their local reputation and personal customer relationships are sufficient for business growth and sustainability. Consequently, they may neglect their online visibility, not realizing the potential reach and efficiency gains from digital tools.

The digital gap for these businesses can be characterized by a lack of a professional website, minimal social media engagement, and reliance on outdated forms of communication like AOL or Gmail email addresses. While this might maintain a certain level of operation, it limits their ability to scale, reach new markets, and ultimately leaves honey on the table.

By not leveraging the digital space, these businesses miss out on the opportunity to build brand awareness beyond their immediate locality, engage with customers online, and streamline their operations through digital tools (customer management). As a result, they might struggle to compete with others who adopt a more integrated approach to physical and digital business practices.

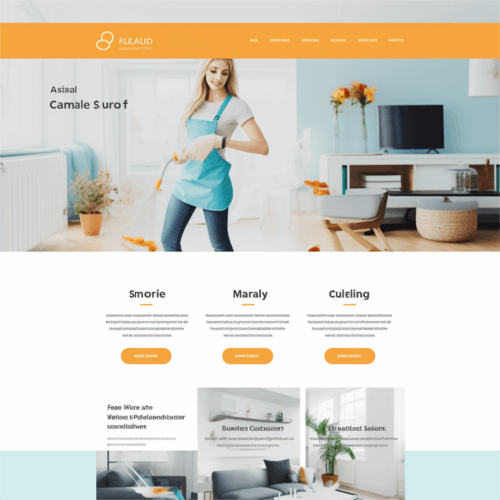
Cleaning website design

Professional Image: Elevate Your Brand

Your website can be the first point of contact between your business and potential customers. Just as you wouldn’t attend a party in pajamas, you shouldn’t let your online presence be represented by a dated AOL email address or non-existent web page. A sleek, user-friendly website tells customers that you are a serious professional who invests in all aspects of your business. I can help you do it right with a custom domain and business email address.

Some businesses rely on on a third-party subdomain or a link-in-bio service. While these options may seem convenient and cost-effective in the short term, it looks unprofessional. It is harder for customers to remember and doesn’t carry the same weight of brand authority as a standalone domain. It’s like to setting up shop in someone else’s store.

Using a personal @aol.com or @gmail.com email address for business communications can inadvertently signal a lack of professionalism and an outdated approach to business. I can assist you in transitioning to a custom domain email that reinforces your credibility. Too often, I walk around and see businesses make the mistake of thinking this detail doesn’t matter.

Testimonials & Social Validation

Word-of-mouth is powerful, but in the digital age, testimonials and portfolios on your website can reach further and speak louder. They serve as a perpetual source of validation for your work, allowing potential customers to see the breadth and quality of your services at any time. It’s the online equivalent of a recommendation from a trusted friend, accessible to everyone, everywhere.

Logo

Having a logo that fits your business image goes beyond digital space. I can show you tips and details for getting it right and making work across online  and print platforms.

A sample web design logo

Organic & Paid Search (Unclaimed Digital Territory)

If you’re running a business without a website and have been relying solely on traditional methods, it’s time to unlock new opportunity. Customers are searching for your service right now!

Organic search refers to the natural listings on search engine results pages (like Google or Bing) that appear because of their relevance to the search terms, as opposed to being advertisements. By not having a website, you’re missing out on the chance to appear in these listings—a place where a significant portion of your potential customers start their journey.

And, this is another reason to get setup with your own domain name if you’re currently using something like Bitly. Search engines like Google give more credibility to websites with a clear, branded domain name, which can significantly impact your search rankings and, by extension, your visibility to potential customers.

On the flip side, paid search advertising allows your website to jump to the top of search results by paying for prime placement. Paid search campaigns through platforms like Google Ads can be tailored to target the exact demographic you want to reach, with the ability to adjust for location, language, and more.

If you’re ready to explore the untapped potential of online search, let’s chat. I’m here to guide you through every step of the journey.

Who needs a website?

A website is your digital calling card and can be a sales generator if we do it right. Here are some of the top industries that I’ve helped grow online:

  • Restauraunt websites: Enjoy commision-free online ordering. With enticing designs and easy navigation, your patrons can effortlessly browse menus, book tables, and more.
  • E-commerce websites: Expand your business horizons by selling online.
  • Wedding websites: Share your love story, manage RSVPs, provide event details, and create lasting memories for you and your guests.
  • Martial arts school websites: Enroll students online, share class schedules, highlight events, and build a digital community.
  • Real Estate websites: Highlight property listings with interactive galleries, virtual tours, and advanced search filters.


Boost Your Marketing: Integrating Newsletter Signups with HubSpot API

hubspot api

I do a lot of in-person prospecting to win new business. I used to focus on giving out my business card, and then hoping the potential client would reach out to me. I learned that its better to capture their information, and then follow up. I used to collect so many business cards. Now I use a CRM, Customer Relationship Manager, called HubSpot. It does a lot of things, but primarily it helps to manage contacts. I want to let users sign up to my newsletter, and add themselves as a HubSpot contact, directly from my website.

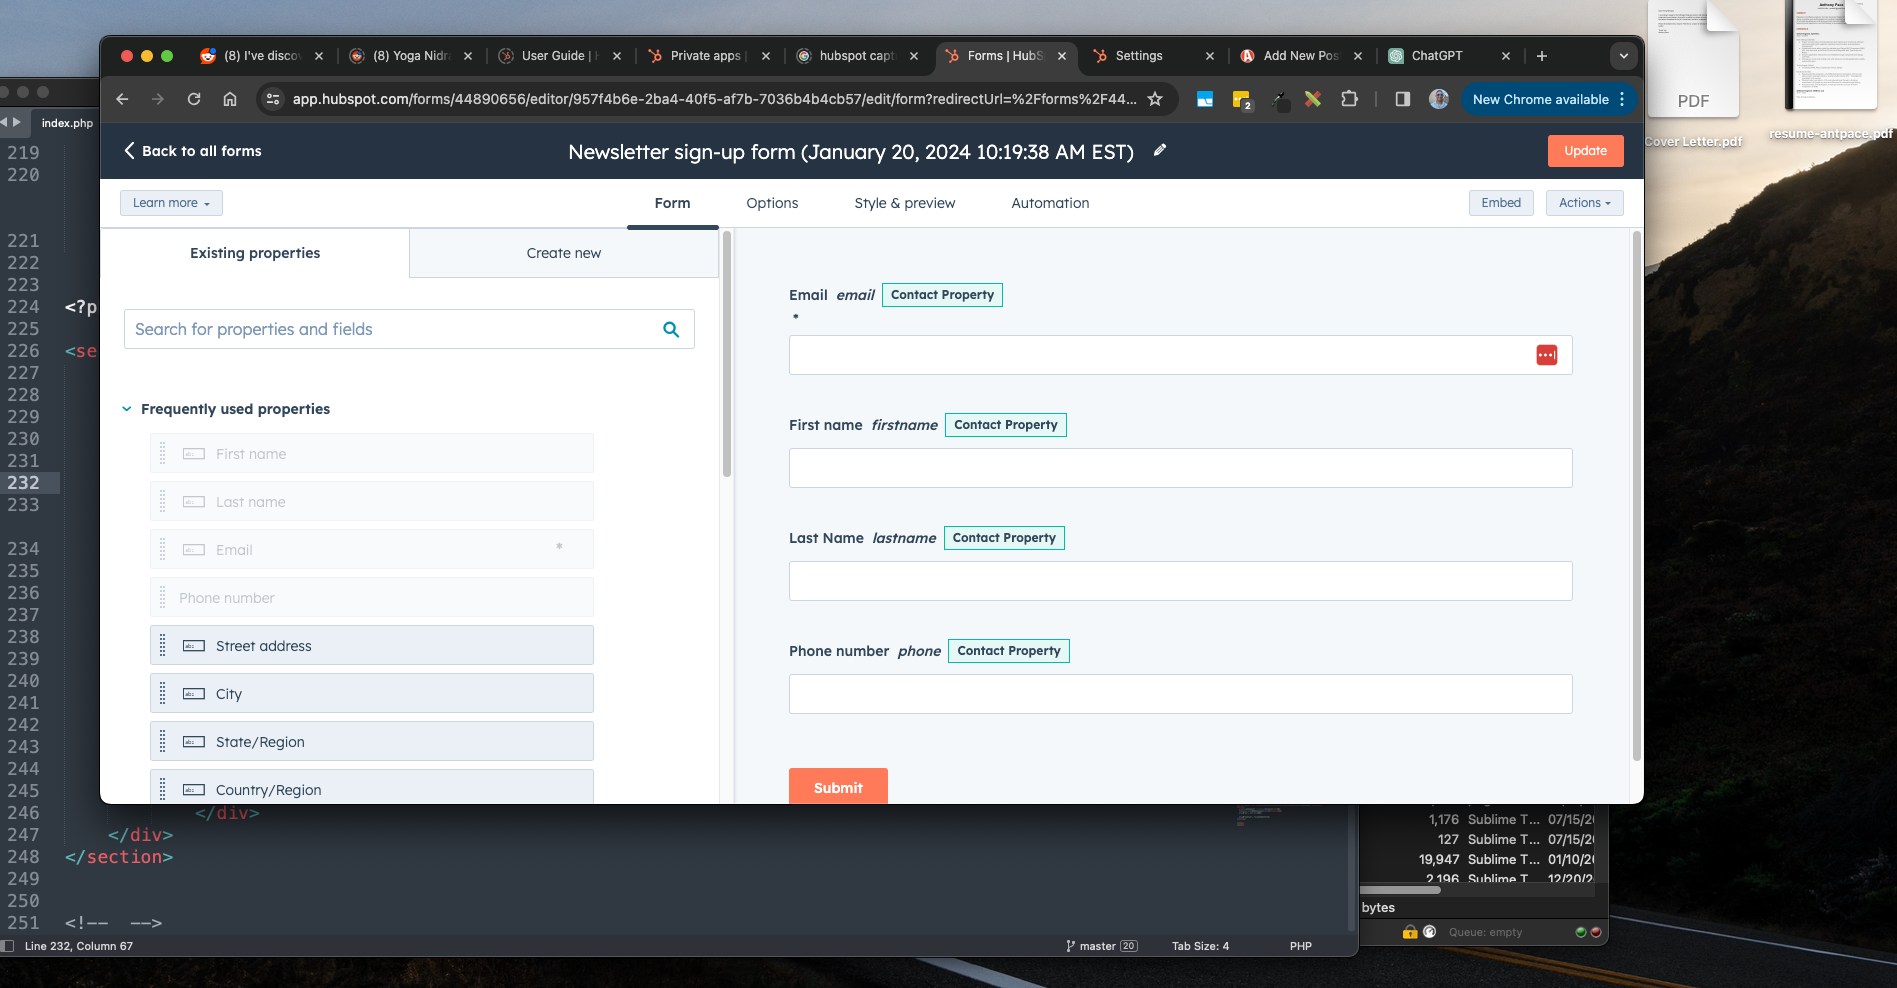
hubspot forms

Create a Custom Newsletter Sign Up Form on Your Website Powered by HubSpot

Out-of-the-box, HubSpot can generate a number of different web forms that can be easily embedded into any website. These forms are used to capture leads and contacts.

HubSpot Private App

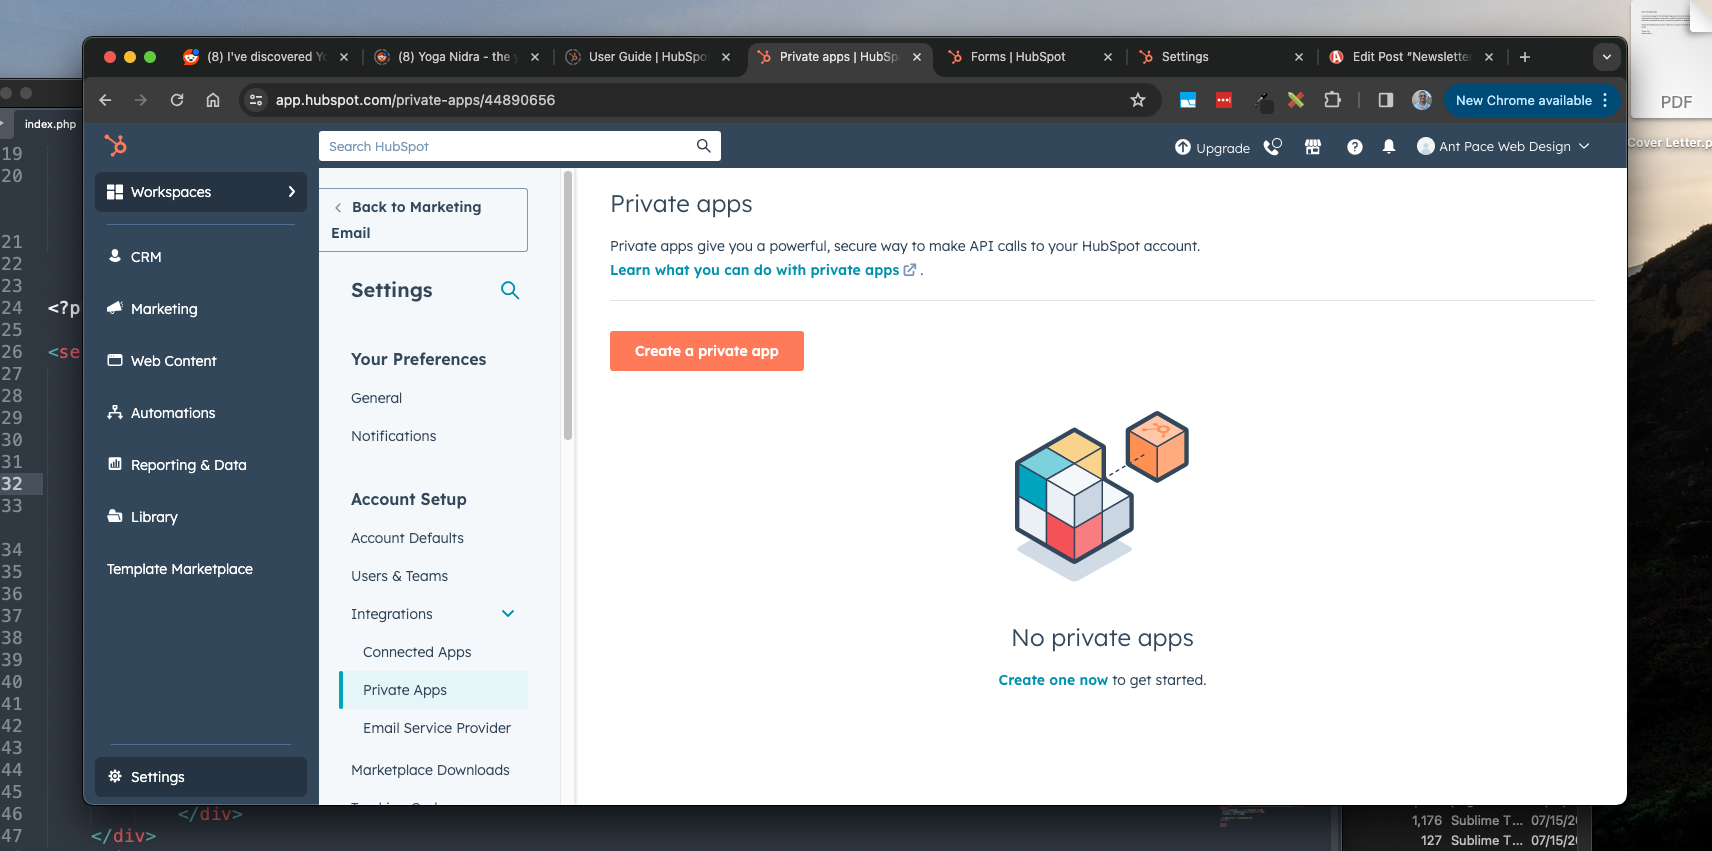
My website (this website) is mostly hand-coded. I want to build my own custom form, and submit the data to the HubSpot service. This is possible with the “Private app” feature. You can find this under ‘Settings -> Integrations -> Private Apps’. This strategy acts as a work-around to remove the HubSpot logo from forms without having to upgrade to premium.

HubSpot Private Apps

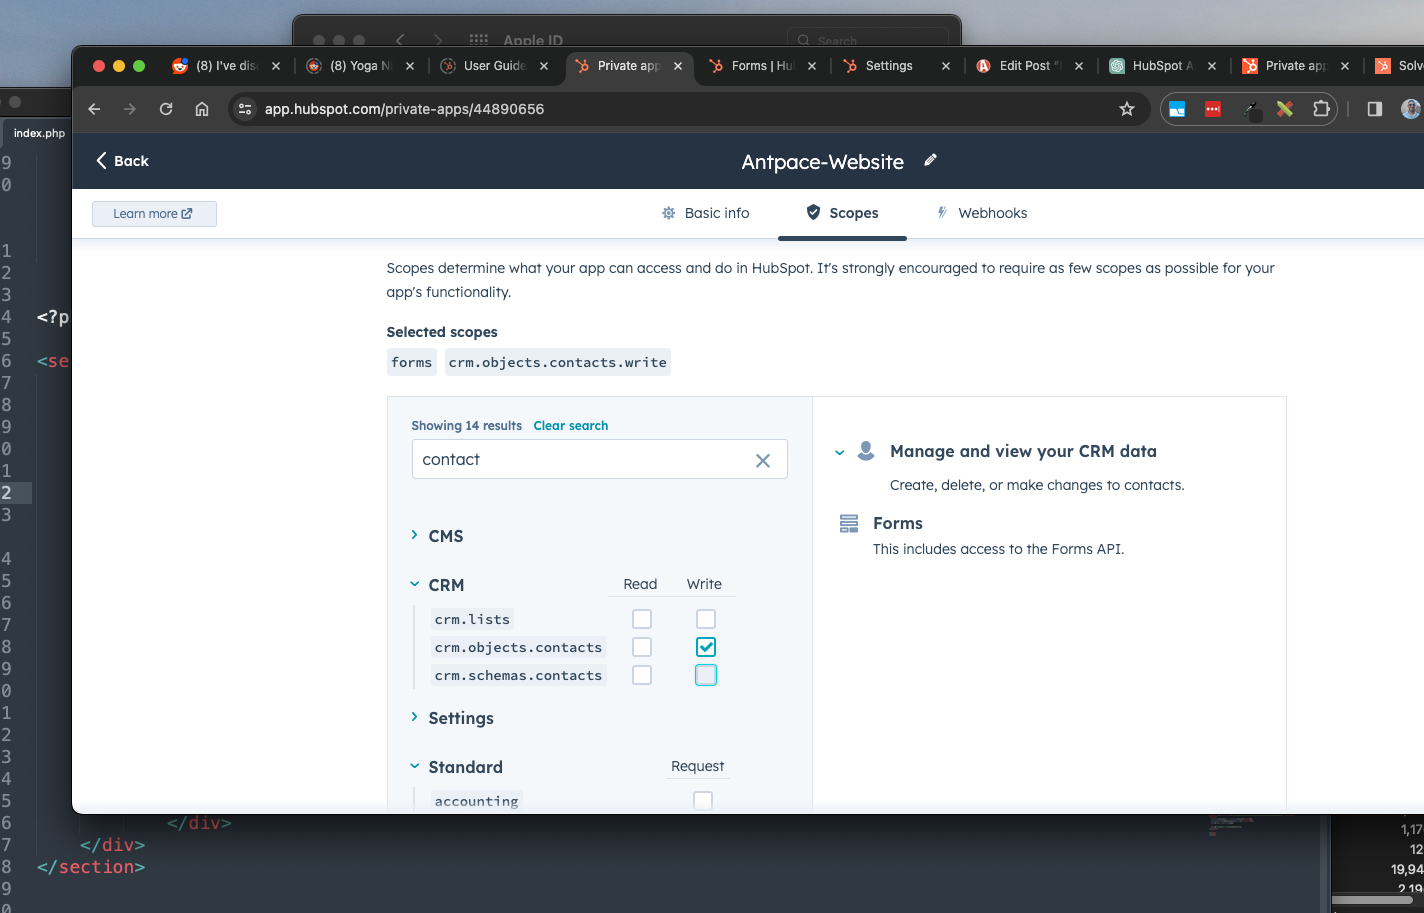
After entering a name and description for your “app”, you’ll need to select permission scopes. I called mine “Antpace-Website” and described it “signup forms on antpace.com”. The only scope is gave it was called `crm.objects.contacts.write`

hubspot permission scopes

CRM API – Create Contact

To create a contact programmatically through the HubSpot API, we use our private app’s access token. In my website’s HTML, I create a simple form:

<div class="col-md-12">
    <h1 style="text-align: center;">Newsletter</h1>
    	<p>Joining the mailing list!</p>
        <form id="hubspotForm" class="styled-form">
            <input type="hidden" value="subscriber" name="lifecyclestage">
            <div>
            	<div><input type="email" placeholder="Email *" value="" id="hubspot-email" name="email" class=""></div>    
                <div><input type="text" placeholder="First Name" name="firstname" value="" class=""></div>
                <div><input type="text" placeholder="Last Name" name="lastname" value="" class=""></div>        
                <div><input type="tel" placeholder="Phone" value="" name="phone" class=""></div>            
                <div><input type="text" placeholder="Company" value="" name="company" class=""></div>            
                <div><input type="text" placeholder="Website" value="" name="website" class=""></div>            
                
                <div><button type="button" id="signupButton" class="btn">Sign Up</button></div>
            </div>
	</form>
</div>

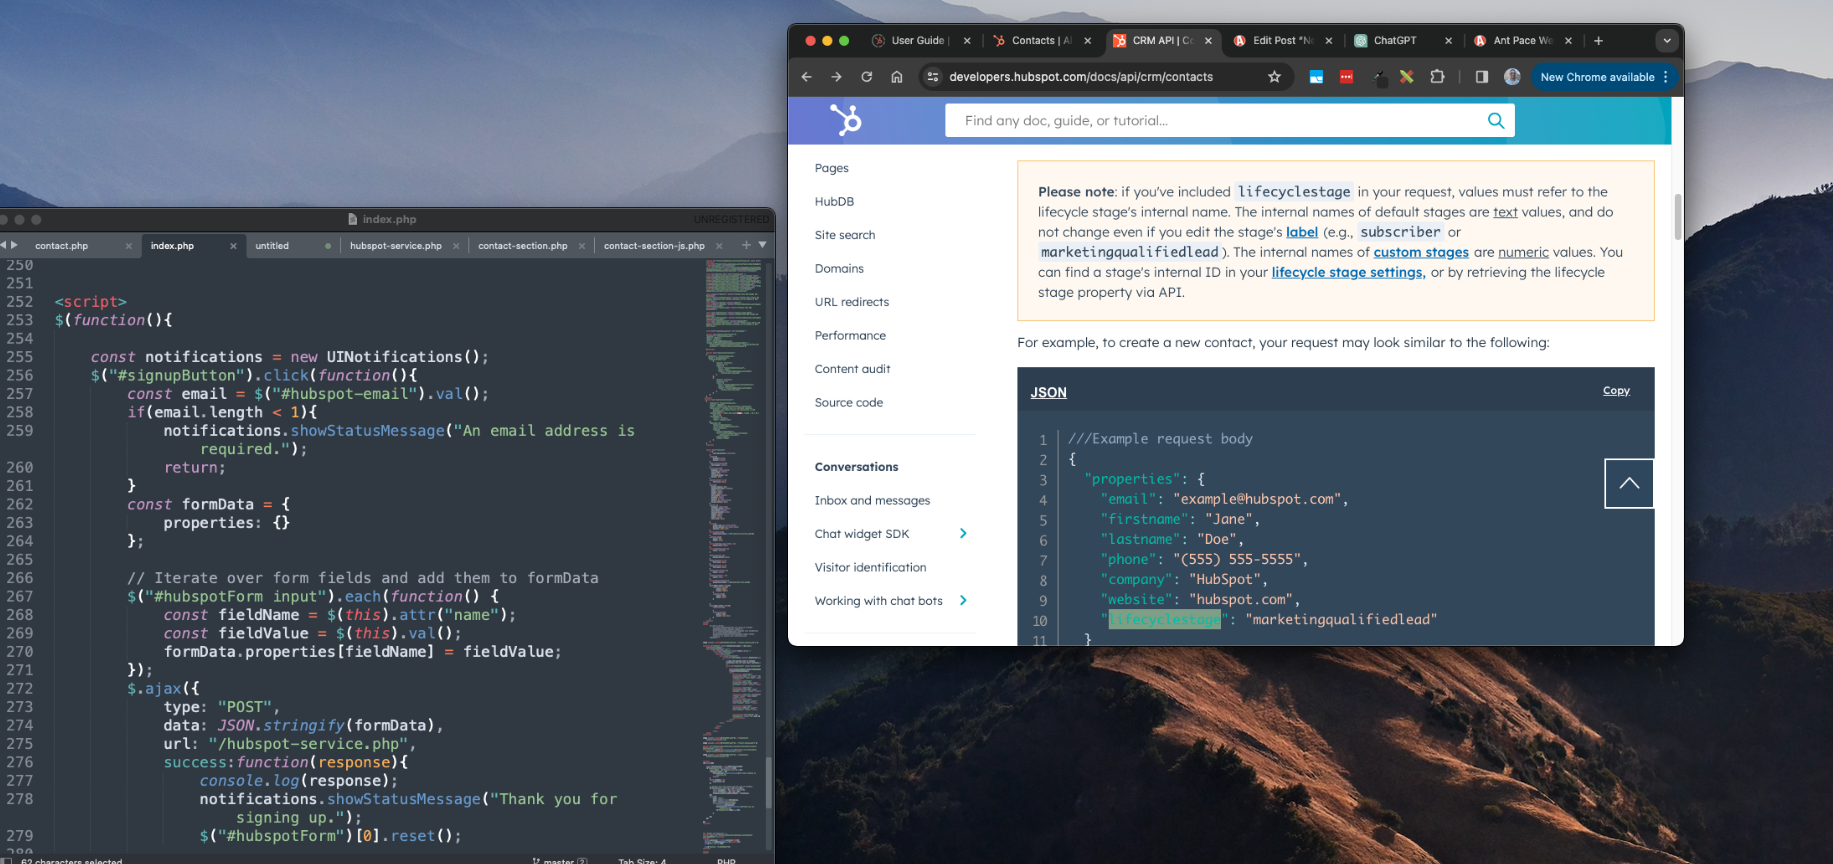
I add basic jQuery JavaScript to pass the form data along to my backend service when the button is clicked:

<script>
$(function(){
	const notifications = new UINotifications();
	$("#signupButton").click(function(){
		const email = $("#hubspot-email").val();
		if(email.length < 1){
			notifications.showStatusMessage("An email address is required.");
			return;
		}
		const formData = {
			properties: {}
		};

		// Iterate over form fields and add them to formData
		$("#hubspotForm input").each(function() {
			const fieldName = $(this).attr("name");
			const fieldValue = $(this).val();
			formData.properties[fieldName] = fieldValue;
		});
		$.ajax({
			type: "POST",
			data: JSON.stringify(formData),
			url: "/hubspot-service.php",
			success:function(response){
				console.log(response);
				notifications.showStatusMessage("Thank you for signing up.");
                                $("#hubspotForm")[0].reset();
			
			}
			
		});
	});

});
</script>

The HubSpot API documentation says, “To create new contacts, make a POST request to /crm/v3/objects/contacts“. Some simple PHP cURL commands accomplishes this. Here is the content of hubspot-service.php:

<?php

$url = 'https://api.hubapi.com/crm/v3/objects/contacts';
$accessToken = 'xxx';

$headers = array(
    'Authorization: Bearer ' . $accessToken,
    'Content-Type: application/json',
);

$postData = file_get_contents("php://input");

$ch = curl_init($url);

curl_setopt($ch, CURLOPT_POST, 1);
curl_setopt($ch, CURLOPT_POSTFIELDS, $postData);
curl_setopt($ch, CURLOPT_RETURNTRANSFER, true);
curl_setopt($ch, CURLOPT_HTTPHEADER, $headers);

$response = curl_exec($ch);

if (curl_errno($ch)) {
    echo 'Error: ' . curl_error($ch);
}

curl_close($ch);
echo $response;

?>

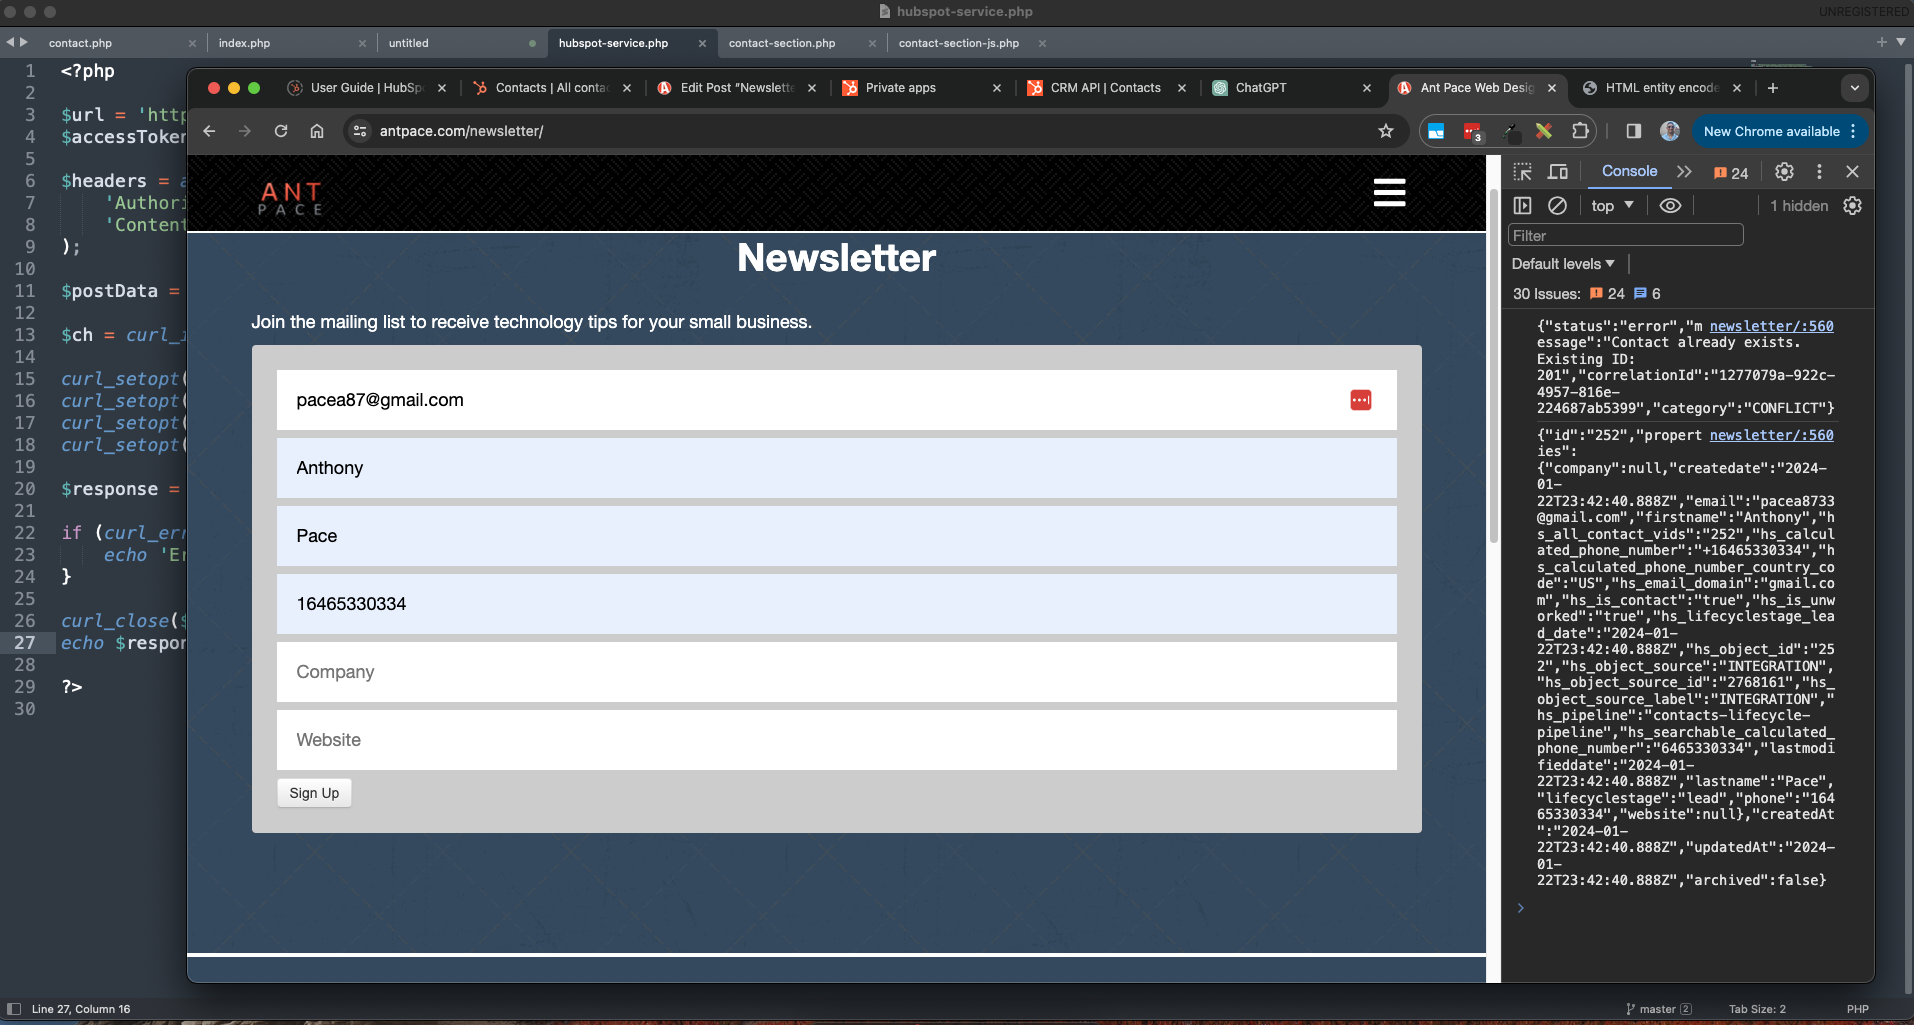
You can see the end result by visiting my newsletter sign up page. Make sure you add yourself so you can stay up-to-date with technology tips for business.

Newsletter sign up page

I can use this same PHP service file for other HubSpot email sign up forms throughout my website.

Freelance Web Development: Delivering Value to Clients

freelance web dev process

When I win a new web development client I follow a structured progress. This ensures high quality results. Years of refinement and experience continue to define how I work with people and businesses to help them succeed.

Discussion

This is the first step. Communication is key.

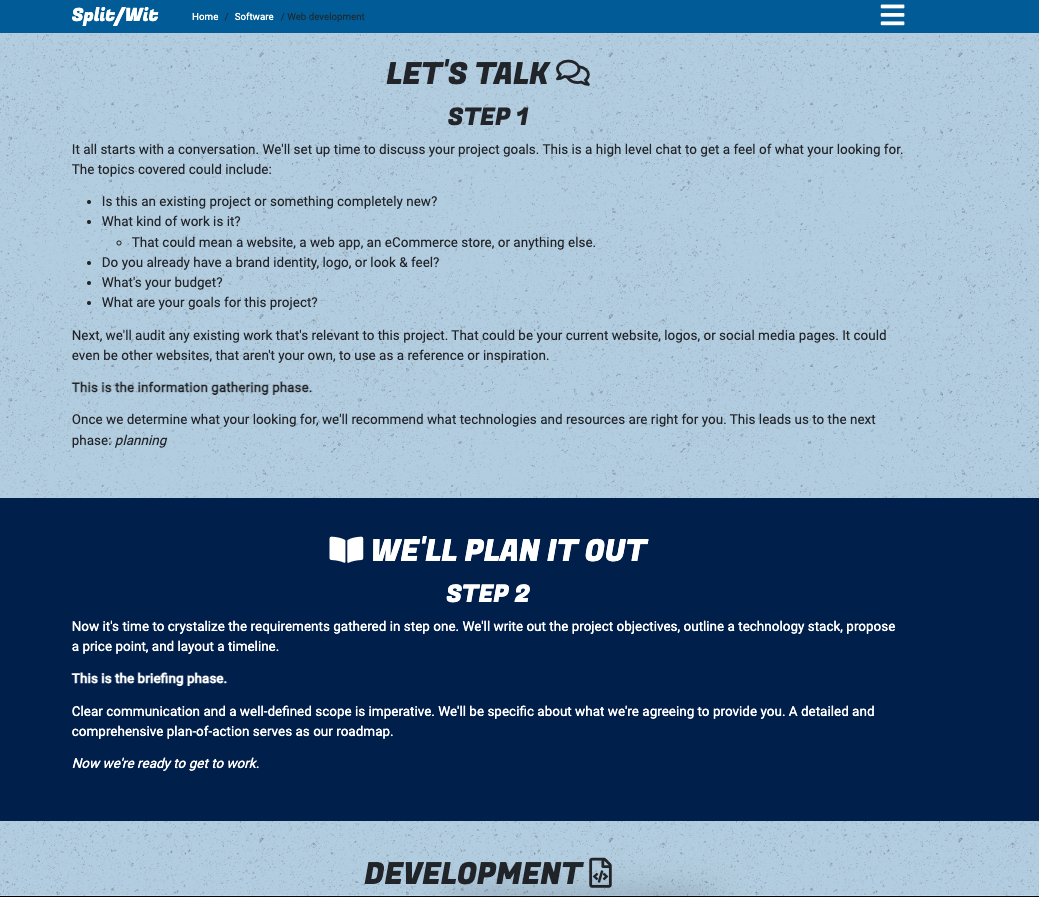
This initial discussion allows us to explore your project’s overarching goals. It’s a high-level chat to understand your aspirations and ensure our visions align. We’ll delve into:

  • Nature of the Project: Is this a revamp of an existing platform or the birth of something entirely new?
  • Scope of Work: What exactly are we building? It could range from a website, a dynamic web application, an eCommerce storefront, to other web-based projects.
  • Branding Elements: Have you established a brand identity already? Do you possess logo designs or specific themes you want incorporated?
  • Budget Considerations: A transparent conversation about the budget ensures we shape the project according to the resources available.
  • Project Goals: What do you hope to achieve with this project? Understanding your objectives ensures we’re steering in the right direction from the get-go.

After our conversation, we’ll examine any pre-existing materials that are pertinent. Perhaps you have an existing website that needs sprucing up or logos that you’d love incorporated. Alternatively, you might point to other inspiring sites or platforms, even if they’re not yours, to give a clearer picture of your vision. This step is all about gathering resources and setting a concrete foundation.

Based on our dialogue and the data collated, I’ll recommend the best technologies and tools. This could encompass anything from choosing the right content management system, database technologies, or frontend frameworks.

Planning

Step two. Every element discussed in our initial conversation is now put down in black and white. It’s our chance to reiterate the goals and ensure we’re on the same page. This documentation becomes a reference point, ensuring we stay aligned with the project’s vision.

We detail objectives, decide on the most fitting technology stack, outline the budget, and establish a clear timeline.

Development

As we progress through this building phase, you’ll have access to a private server for reviews and approvals. Everything—from the user-friendly experience to backend configurations like domain setup, security measures, and CMS installation—is shaped by our prior discussions, ensuring both aesthetics and functionality are on point.

Content

During the website’s initial build, I typically use placeholder content. With the design and layout set, it’s your cue to provide the actual content. While you can opt to share materials earlier, this phase is ideal. And rest assured, you’ll retain full control to modify content as needed later on.

Quality Review

Before launching, I rigorously test the product across various devices, browsers, and screen dimensions to ensure quality. This phase is dedicated to refining the detail, ensuring both appearance and functionality are flawless.

Final Touches

I ensure that your website is fully optimized for SEO, integrating structured data, sitemaps, and relevant keywords. By enhancing its security, mobile responsiveness, and speed, your SEO score will naturally improve. Further bolstering this, I can register your site with Google Search Console and activate AMP (Accelerated Mobile Pages) to amplify its prominence in Google searches. Additionally, I’m here to guide you in devising a content strategy tailored to elevate your online visibility.

For those seeking email hosting, I offer solutions tailored to your needs, with Google Workspace being a top recommendation for those starting afresh. When it comes to choosing a CMS, WordPress or Shopify are often top picks for businesses.

Beyond these services, I specialize in web design, crafting a visual identity that seamlessly embodies your brand. And rest assured, user experience is a top priority; I design ensuring visitors experience positive, smooth interactions across your digital platform.

This framework is described and outlined on another page of this website. It is what I use when I engage a client that has an existing website that might need maintenance or improvements.

Ensure Your Website’s Success: Maintenance, Audit, and Enhancement Plans

Existing website work

This post is all about how I help clients with their existing websites. If you are a fellow web developer reading this, use it for ideas on how to serve more people. My mission is to help businesses achieve more through their web presence.

If your curious about how I can help you with your website, send me a message. Below are some ways I will serve you.

Content updates & maintenance

I try to be a company’s go-to guy that can be called whenever anything comes up with their website.

If someone has a website, even if it is a static brochure site, it will eventually need help. It could be small content updates to reflect inevitable changes to the business. Or, one day something goes wrong. The website suddenly doesn’t work at all. Maybe someone notices something broken, be it major or minor. I want them to think of me and know that I can help.

There’s some businesses that regularly make content updates themselves using a CMS (like WordPress, Wix, Shopify, etc.). They could need occasional help with customizations, CMS or plugin update issues, and more. I let clients know that when issues arise, I’m just a text message away.

Audit & enhancement

A client usually requests this service in the form of a complaint: “My website is too slow”, “I’m not getting enough sales/conversions/leads from my website”. My response is to do a formal audit and analysis. The result includes recommendations for improvement and an estimate (time/price) for implementation.

Other times, clients do not even know that there is a potential risk (security issues) or unrealized upside (UX issues) that needs attention. Providing those insights with empathy and transparency helps businesses see that value. Below is a list of audit types I offer:

  • Security: Is your website secure? Does it use https? Is WordPress up-to-date? Is your site vulnerable to being taken over by hackers?
  • Accessibility: Is your website usable for people with disabilities? Many businesses don’t realize that this is a legal requirement under the ADA.
  • SEO: Technical SEO, optimization, and more
  • Design UI/UX: Does your website look like it’s stuck in the past? How does it perform on different mobile devices? Is there brand consistency? Is the user experience the best that it can be? Maybe it is slow and bloated from plugins/integrations and needs a refresh.

Once we figure out what needs attention, I can create a plan and strategy to enhance your website. We can take it one step and a time, and focus on what will have the greatest impact for you and your business. You can read more about my process for web development with freelance clients in another post.

steps to handling a web development client

Preemptive audits to win new clients

I approach clients (existing or perspective) with a value proposition from a place of wanting to give. This is especially true for small businesses that appear to be leaving honey 🍯  on the table.

My process for engaging a new client, especially cold ones, is to review their website and make note of any obvious improvements. One example is using a generic email address (ExampleBusiness@gmail.com) instead of their own domain. Others include broken 404 links and bad mobile UX.

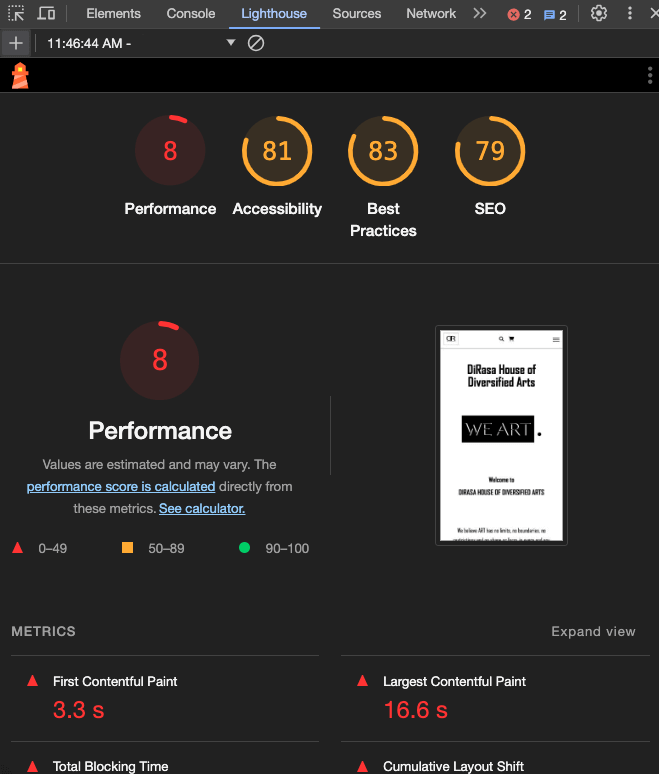
Google Chrome’s built in Lighthouse feature helps me to highlight low performance in existing websites of potential clients.

low performing lighthouse scores for a small business

Screaming Frog SEO Spider is another utility that I use to identify (and pitch) improvements to new client web projects.


Training & education

Sometimes, managers and stakeholders want to know how things work or how to make some changes themselves. That’s why I offer technical training, education, and tutoring.

Your business might have a designer or marketer that is ready to add some tech skills to the mix. I can help with that too. Contact me about the personalized tech training that I offer.

Disaster recovery & best practices

When a tech disaster happens you need to have a plan for recovery. Do you have backups? What is the RPO and RTO for your organization when “the business is on fire”? Work with me to be prepared in these situations. I apply proven strategies and make sure your digital presence is resilient.

A moment of preparation is worth a week of remediation. Sailing ahead of the storm is possible by following best practices  How does your organization manage passwords and credentials? What apps do your employees use? Knowing the right questions is the only way to build valuable answers.

Online Ordering for a Restaurant Website

online ordering system

A Digital Transformation Case Study: Boosting Restaurant Sales with Custom Web Development and Online Ordering Integration

Client background & challenge

When I was younger I worked as a pizza delivery driver. Years later, the pizzeria where I once worked commissioned me to build their website. They were busier than ever thanks to online ordering (GrubHub, Seamless, UberEats), but were getting hit with high service fees.

They wanted their own website to be able to take orders for food online and send a notification to their iPad. That way they could avoid using apps like GrubHub that charged additional fees.

Project overview & execution

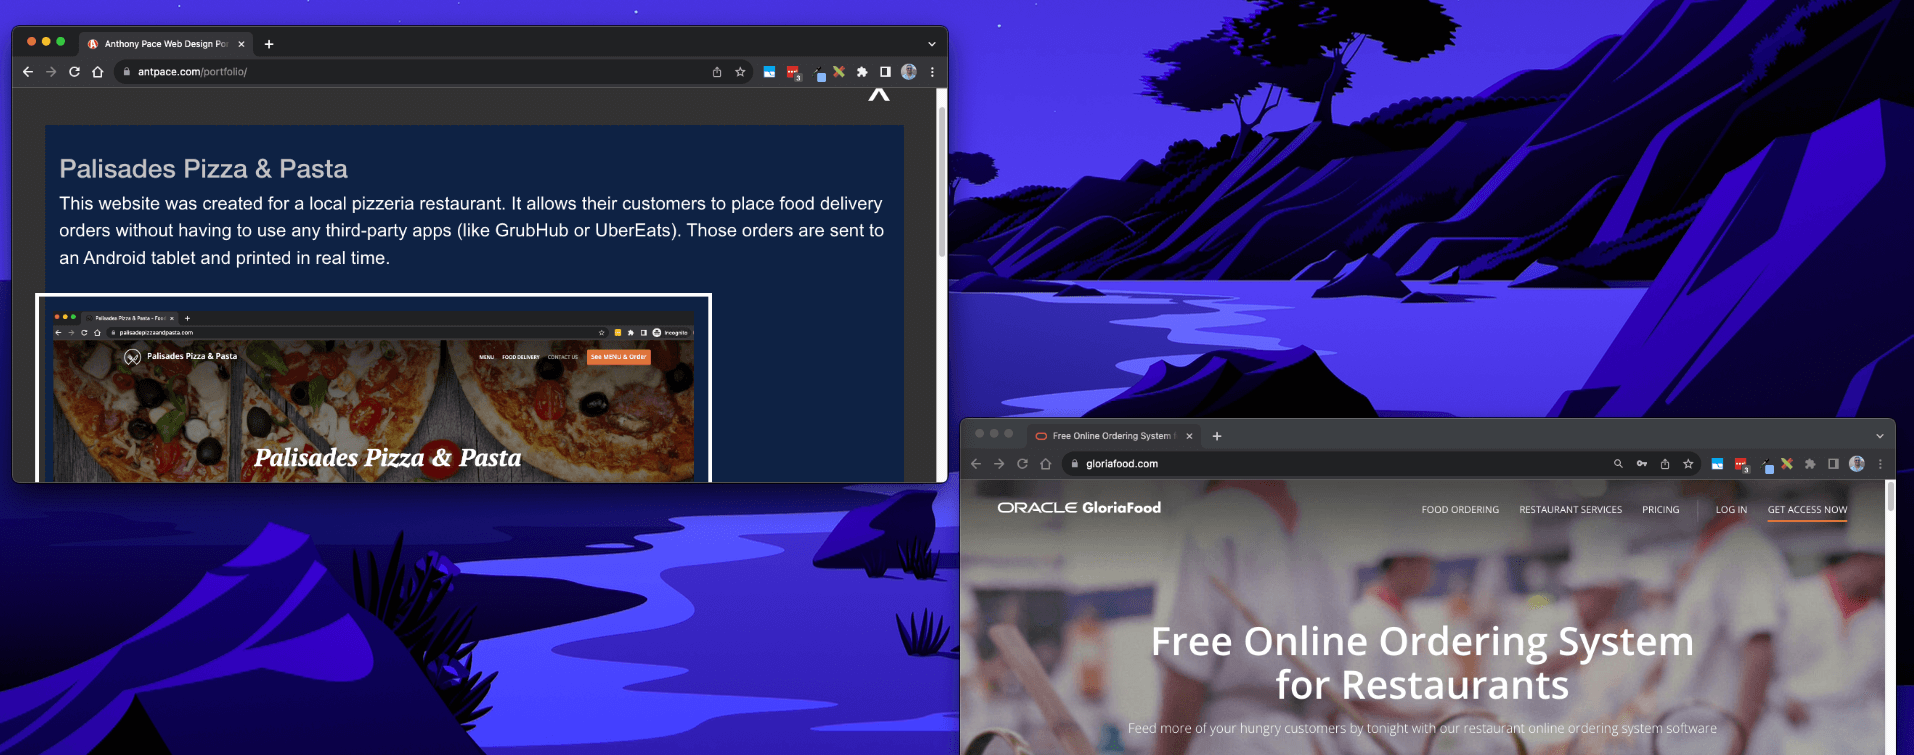
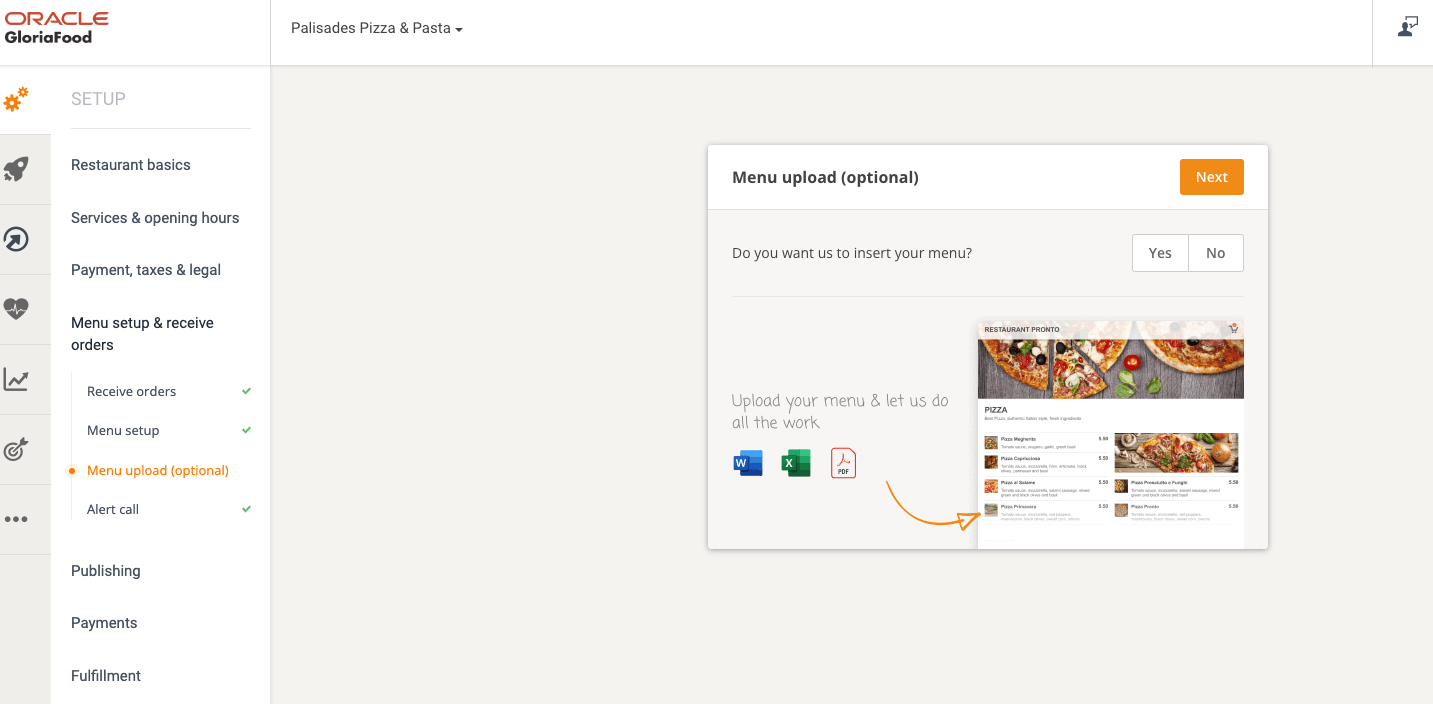
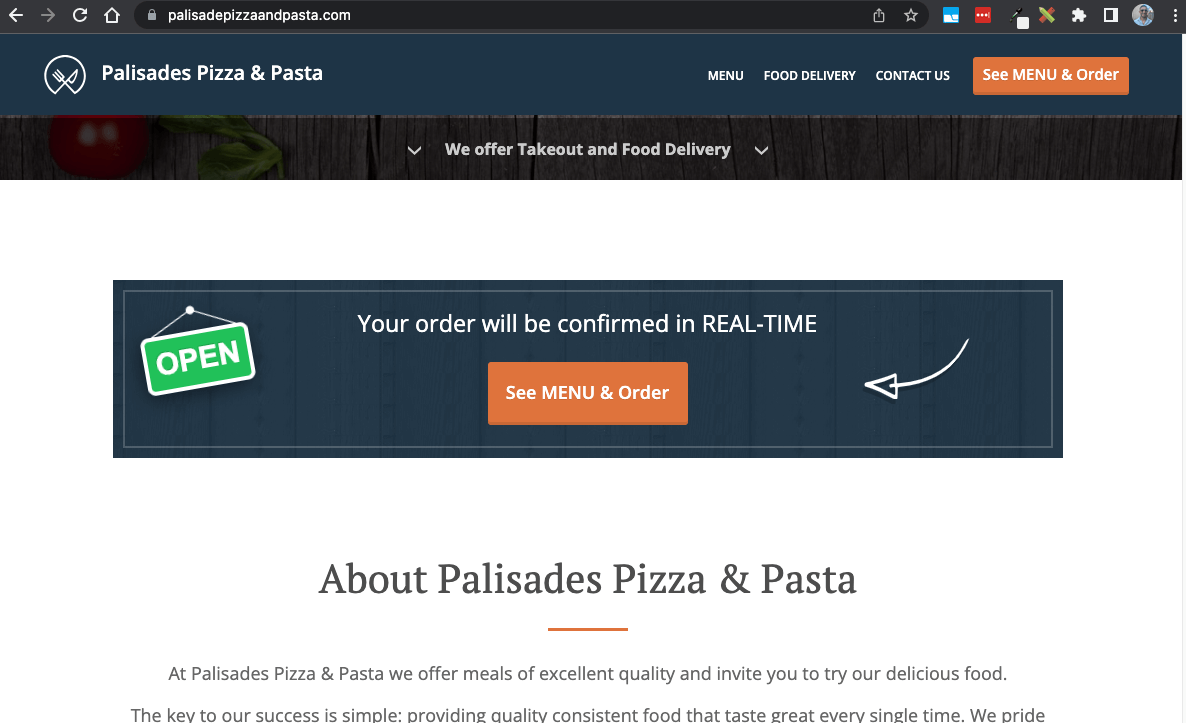
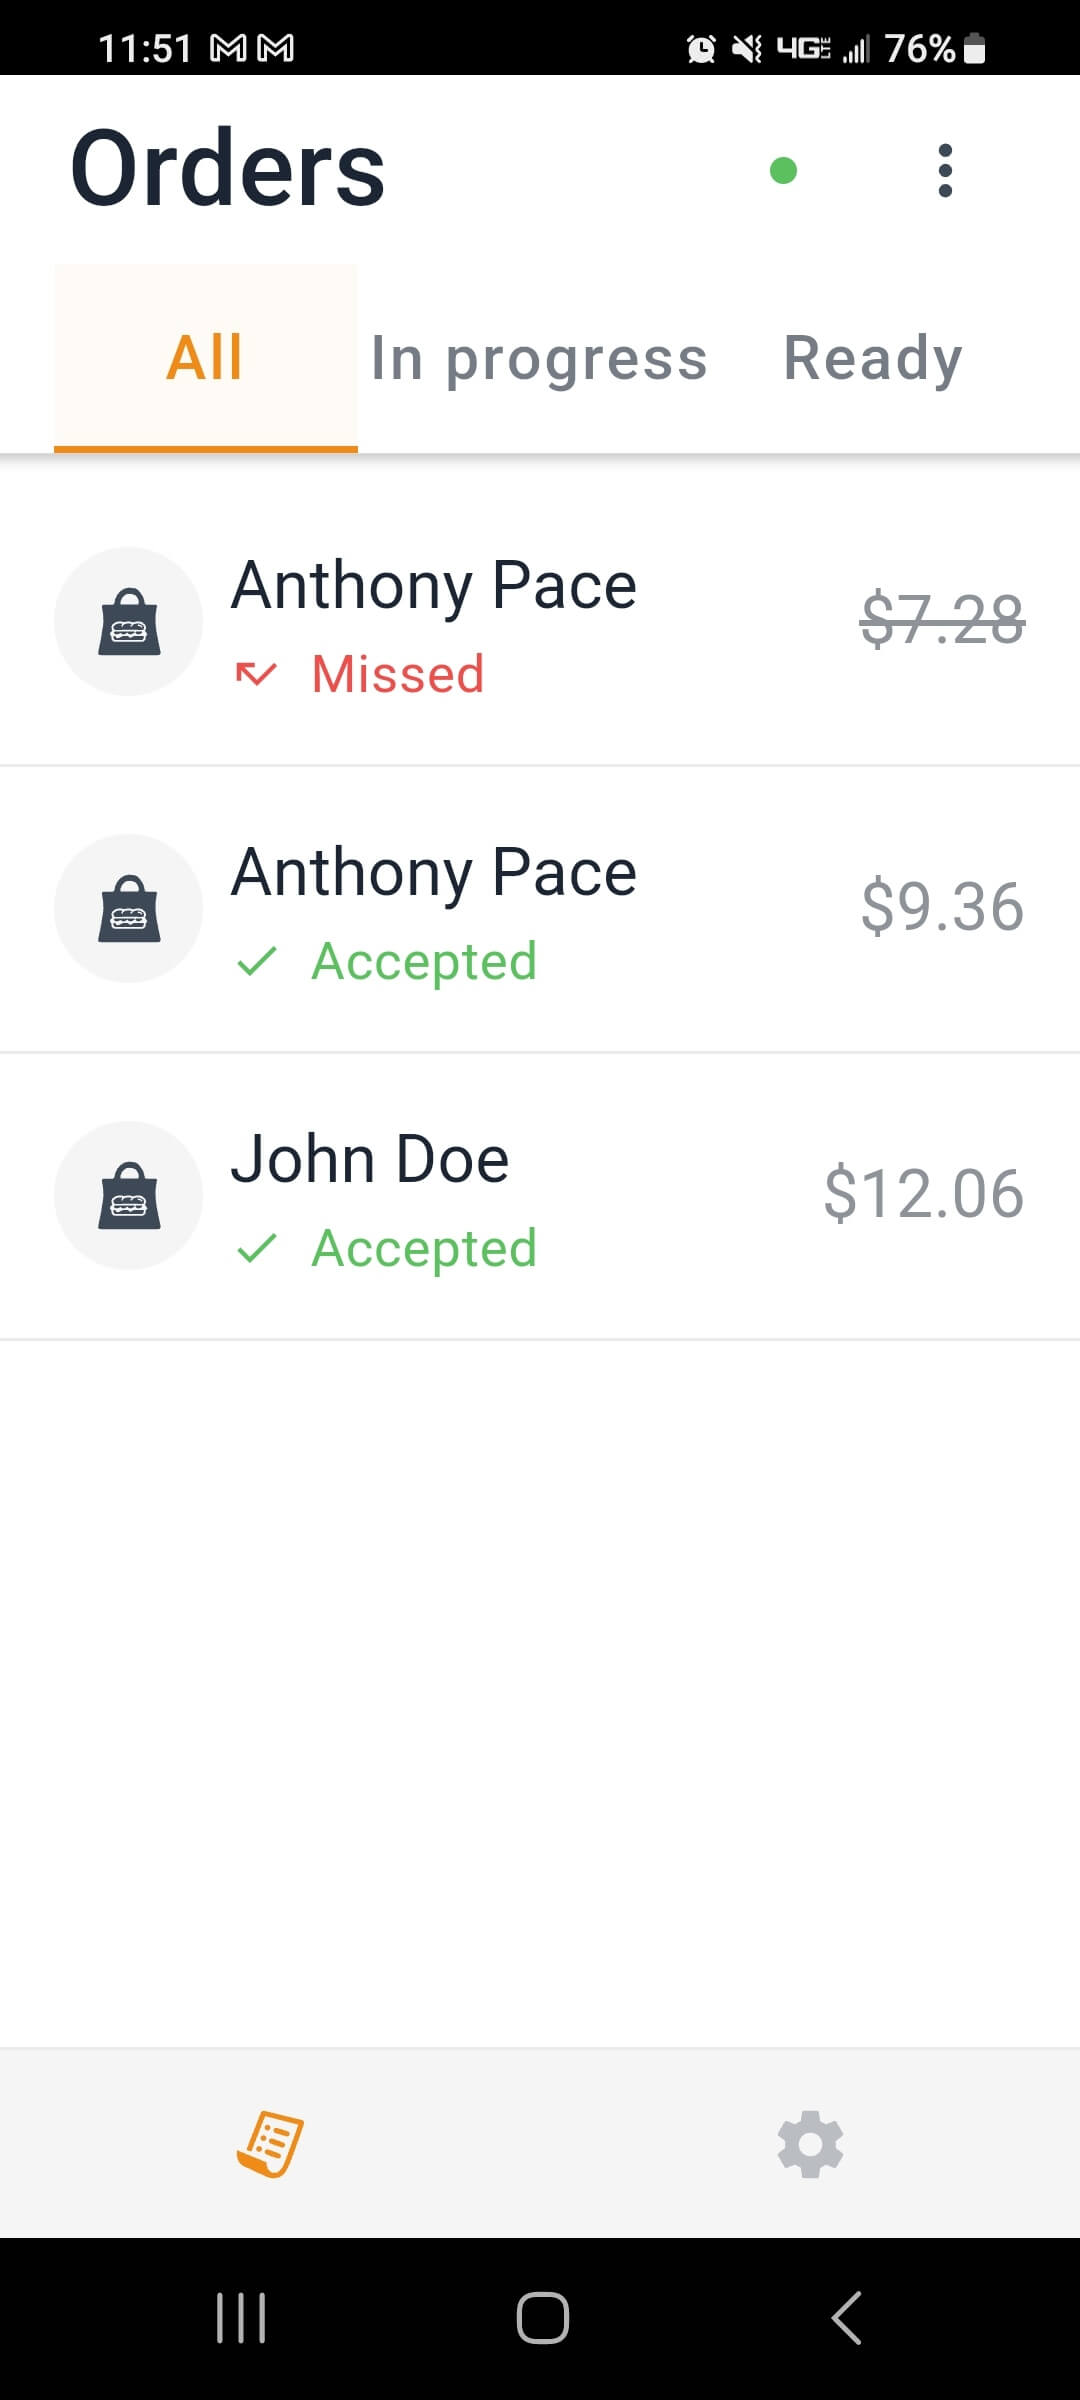
I used a service called GloriaFood that provides ready-made website templates, a secure payment process, and a messaging system. It integrates with Stripe for processing payments. There is an iPad app that receives push notifications when new orders are placed. The website builder required no code, and had a ton of options. I was able to register the pizzeria’s domain name directly though the admin portal, and generate a sales optimized website with hosting all setup.  It was “seamless” – pun intended!

GloriaFood admin panel

There are also options for integrating their ordering UI with an existing website, a Facebook page, or a dine-in QR code. The an option to publish a custom app required an additional cost per month.

pizza website

I even traveled to this restaurant’s physical location, selected and purchased a tablet computer for them, installed the GloriaFood app to receive orders, and connected it to their mobile printer.

gloriafood order received

It’s amazing how much I was able to accomplish without writing a single line of code. The most technical part of this project was setting up a Stripe account and putting the API keys into the GloriaFood admin panel. GloriaFood is a product by Oracle, a company that specializes in providing a wide range of software and hardware products and services.

Print Design

As an extra part of this project, I designed a business card with a QR code linking to the new website. The business owner planned to give this to customers who ordered through other food ordering apps such as GrubHub, Seamless, UberEats, and Slice.

Business card for pizza business website

Results

Sales Increase

Since the launch of the new website, the restaurant has witnessed a notable surge in online orders, marking a 25% increase. This substantial rise not only signifies a successful digital transformation but also illustrates the growing customer preference for a seamless, direct ordering experience. The intuitive interface and easy navigation on the restaurant’s website have played a strong role in attracting and retaining customers, driving a higher volume of online orders and significantly contributing to the restaurant’s revenue growth.

Cost Savings

Transitioning from third-party ordering platforms like GrubHub, Seamless, and UberEats to a self-hosted online ordering system through has led to big cost savings. Third-party platforms usually charge hefty commissions, which eat into the restaurant’s profits and inflate prices for customers. With the new website, the restaurant has eliminated these intermediary costs, ensuring better profitability while also offering customers more competitive pricing.

Customer Feedback

The feedback received from both the restaurant management and its customers has been overwhelmingly positive.  The restaurant staff has praised the streamlined process, which has simplified order management and allowed for a smoother operation during busy hours.

How I Helped a Business Optimize Their Google Ads

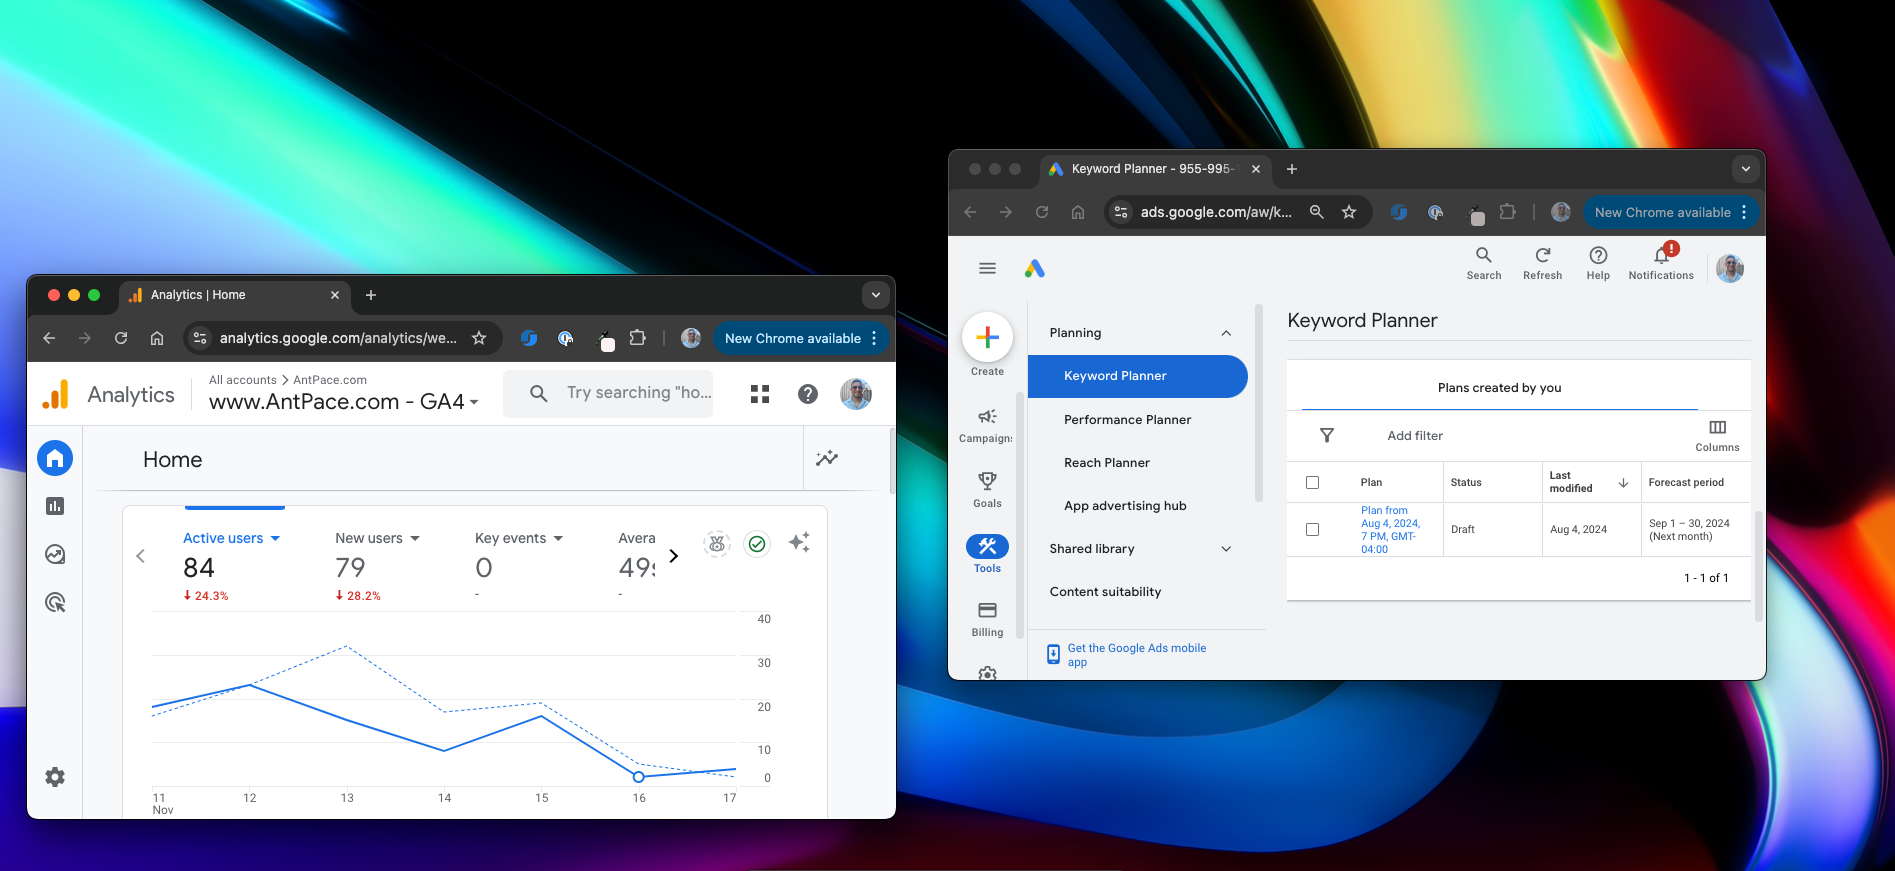
Google Ads being set up

After a client approached me about improving their Google Ads campaign, I could tell they were doing a lot of things right—but they weren’t getting the results they wanted. Their ads were active, their click-through rate was decent, and they were spending about $650 per month. On the surface, everything seemed fine.

But as I dug deeper, I saw an opportunity to transform their campaign from “good enough” into something that could truly drive new clients to their business.

Google Ad Account Audit

The first thing I noticed was that their ads setup was missing some key pieces. For starters, there was no way to measure what happened after someone clicked on an ad. Conversion tracking hadn’t been set up, so there was no way to tell if those clicks led to sign-ups, contact form submissions, or any other meaningful action. It’s like running a sales campaign and never finding out how many people bought something.

Another issue was the structure of the ads themselves. Everything was running through a single ad and ad group, all of which pointed to their homepage. While this kind of setup can work as a starting point, it’s not ideal for targeting specific audiences. Imagine searching for “self-defense classes” and landing on a generic homepage with no mention of self-defense—it’s a missed opportunity to connect with a potential client.

Finally, their campaign wasn’t linked to Google Analytics, which meant there was no insight into what visitors did once they arrived on the site. Did they spend time exploring? Did they leave immediately? Did they look at multiple pages? These questions were left unanswered.

Google Ad Campaign Improvements Plan

After reviewing their campaign, I proposed a complete overhaul. First, I explained the importance of defining what success looks like—what actions do we want people to take when they click on an ad? For this client, it made sense to track things like contact form submissions and clicks to their scheduling platform. By setting up conversion tracking, we could finally measure the real impact of their ad spend.

Next, I suggested restructuring their campaign into three distinct ad groups, each with its own audience and purpose. The first ad group would target people new to their services, highlighting beginner-friendly options. The second would focus on fitness enthusiasts looking for a fun and effective workout. The third would spotlight programs for women, emphasizing empowerment and inclusion.

Each ad group would feature two different ads to test different messages and see what resonated most with each audience. And instead of pointing all traffic to the homepage, I recommended creating dedicated landing pages tailored to the ad group. If someone clicked on an ad for fitness classes, they’d land on a page showcasing the physical and mental benefits of their programs. If they clicked on an ad for women’s classes, they’d be greeted with content specifically designed for that audience.

Finally, I emphasized the need to connect Google Analytics to their campaign. This would give us a clearer picture of how people interacted with the site after clicking on an ad, providing valuable insights for ongoing optimization.

Marketing & Development Implementation

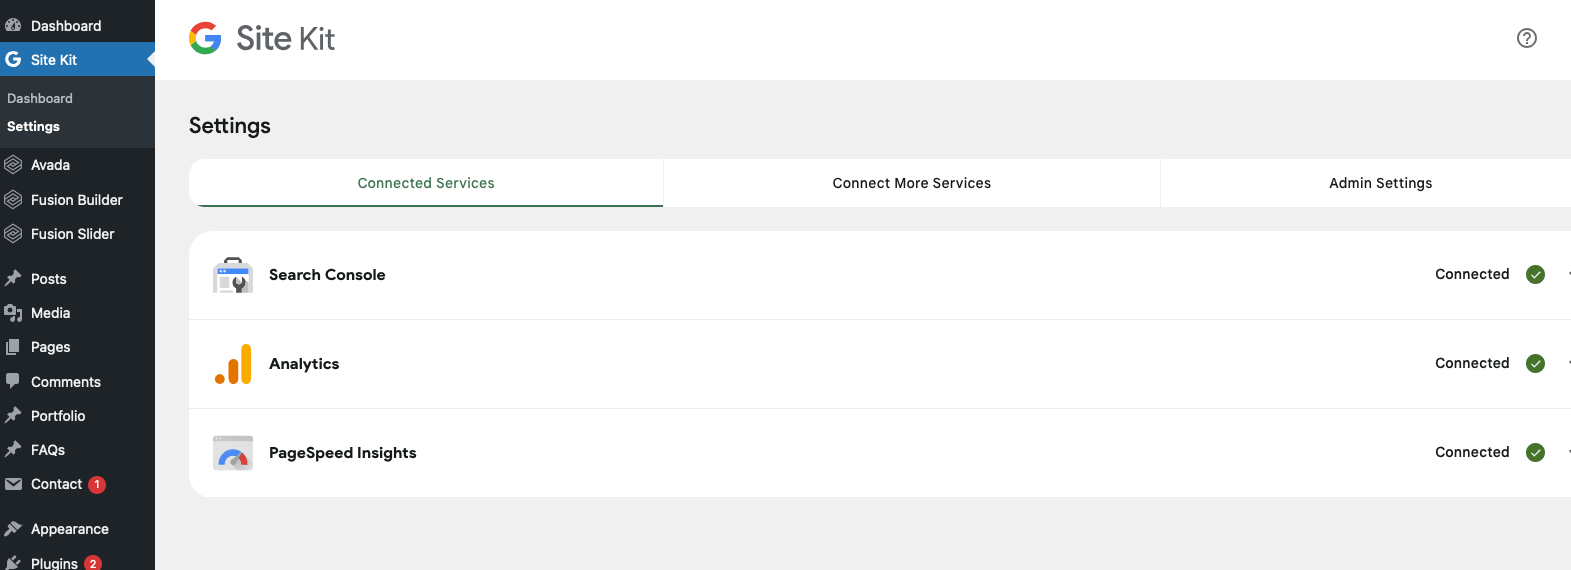
The client loved the plan, and here’s what I did next. I spent a couple of hours implementing these changes, setting up the ad groups, writing the ads, building the landing pages, and integrating analytics and conversion tracking. Once that was done, we were ready to relaunch the campaign with a much stronger foundation. I used the Google Site Kit plugin for WordPress to manage analytics.

Google site kit integrations

I built the landing pages as part of their WordPress website. I drafted the copy for each page, added relevant photos, and applied proven design principles that would guide potential customers through the sales funnel. I used the same copy outline and content layout for each.

Landing Page Content Outline

  1. Hero Section
    1. Headline
    2. Subheadline
    3. CTA Button
  2. Benefits Section
    Headline: Why this offer is valuable

    1. Highlight key benefit 1
    2. Highlight key benefit 2
    3. Highlight key benefit 3
  3. What to Expect / Program Details
    1. Headline: Set expectations
    2. Short paragraph explaining details or structure
    3. CTA button
  4. Testimonials
    Headline (Social Proof): “What are customers are saying”

    1. Testimonial 1
    2. Testimonial 2
  5. FAQ Section
    Headline: Answer common questions

    1. Q1 & Answer
    2. Q2 & Answer
    3. Q3 & Answer
  6. Final CTA Section
    1. Headline (Closing statement)
    2. CTA button

Getting Results with Google Ads

Of course, ads don’t run themselves. The client will need to decide when they want to turn the campaign back on and how much they’re comfortable spending each month. But with these optimizations in place, they’ll be able to make data-driven decisions and see exactly how their investment is paying off.

Every business wants to get the most out of their marketing budget. For this client, that means attracting new customers who are truly interested in their services. By taking the time to set up conversion tracking, target specific audiences, and create tailored landing pages, we’re turning their Google Ads campaign into a powerful tool for growth.

If you’re running Google Ads and feel like you’re not getting the results you should, you’re not alone. With the right strategy and a little bit of work, you can transform your campaign into something that delivers real, measurable value.

Want to learn more about how I can help your business grow? Let’s talk.

The Great Resignation

end session

The Great Resignation is an early 2020s buzz phrase. It describes a large portion of the workforce quitting. This Big Quit has been precipitated by numerous factors, but most obviously the CoVid-19 pandemic. Truthfully, the snowball started rolling prior to the worldwide shutdown. Online freelancing and digital nomadism have been picking up steam for nearly a decade. Ubiquitous Wi-Fi, inexpensive devices, and on-demand cloud computing paved the road of the Extraordinary Exodus. The ability to work remotely, I believe, is one of the strongest drivers of this cultural shift.

Employment as we know it is a raw deal. It exploits workers and business owners. Only since the advent of the industrial revolution has the modern work schedule and environment taken this shape.

Employees are tasked to toil in serfdom. The employer is expected to be a parent. Those costs, risks, and responsibilities weigh heavily on executive shoulders. And that gravity ultimately crushes workers as exploitation.

Employer sponsored medicine took hold after World War 2. To fight inflation, the 1942 Stabilization Act was passed. That law prevented employers’ from raising wages. As a work-around to compete for high-demand workers, companies began offering health benefits as a competitive incentive. Nearly a century later, healthcare and employment are intertwined in the bleakest of scenarios.

Now can be the epoch of freedom. It’s the original promise of all the technological advances we now enjoy. Greater prosperity, with fewer shackles to hold us down. That also means businesses can enjoy larger output with less overhead.

When writing this, I was careful not to refer to employers as bosses. Ultimately, they are the clients. Workers should be expected to “manage up”, as they control labor, and in turn, production output and capital income.

What about health insurance?

It’s an absurd burden that businesses are expected to provide employees with healthcare. With that type of expectation, employers feel justified squeezing out every last drop of labor juice – be it sweat or tears.

Even worse, as workers, it’s crazy that access to medicine is tied to employment. Public health should be a public service, paid for by taxes. And, I’m not suggesting that taxes should be raised, but instead reallocated from bureaucratic waste, corruption, and cruelty.

Healthcare is among numerous benefits subsidized and off-loaded to the private sector. It has a taste similar to the Western tipping scheme found in the restaurant service industry.

Freedom

Nine hours in an office each day doesn’t leave time for much else. It was a routine I faced for years, along with many other New York straphangers. A long daily commute was the little time I could find to read, meditate, or relax. My only exercise came from pushing deadlines, jumping through hoops, and squeezing in meetings.

An age of abundance is possible within our lifetime. Laborers are being replaced by technology. Remember, most jobs are bullshit anyway. Humanity can feed itself, and anything more is just pollution.

Freelance

A freelance side hustle is the first step in buying your freedom. Owning, and running, your own remote business comes pretty close to what I imagine as the Digital Dream. When working as a freelance web developer I follow a process to ensure success. I am able to pitch potential clients on improvements, audits, and maintenance agreements.