Background Parallax Webpage with CSS

parallax website CSS

Parallax scrolling is a technique where the background moves at a different speed than the foreground. Ideally, the effect has many layers: a background, a mid-ground, and a foreground. These layers moving at different speeds create the illusion of depth and immersion

  • The background layer forms the foundation of the parallax effect. It typically consists of large, visually captivating images or patterns that set the scene and establish the mood of the website.
  • The mid-ground layer serves as an intermediary between the background and foreground, providing additional visual interest and depth.
  • The foreground layer contains the primary content and interactive elements that users engage with directly.

My favorite example comes from the classic Sonic the Hedgehog game on the Sega Genesis. In that game, the background layer encompasses lush landscapes, while the intermediate layer consists of trees and obstacles that add depth to the scene. Sonic and collectibles represent the foreground layer, with Sonic’s speedy movements contrasting the slower-paced background and intermediate layers.

HTML & CSS Parallax Effect

We can use HTML and CSS to achieve a parallax scrolling effect by manipulating the position and properties of background images or layers.

HTML:

<div class="parallax-container">
  <div class="parallax-background"></div>
  <div class="content">
    <!-- Your content here -->
  </div>
</div>

CSS:

.parallax-container {
  position: relative;
  overflow-x: hidden;
  overflow-y: auto; /* Enable vertical scrolling */
  height: 100vh; /* Set the container height to full viewport height */
}

.parallax-background {
  position: absolute;
  top: 0;
  left: 0;
  width: 100%;
  height: 200%; /* Adjust height to create a taller background for parallax effect */
  background-image: url('background.jpg');
  background-size: cover;
  background-position: center;
  z-index: -1; /* Ensure background is behind content */
}

.content {
  padding: 20px;
  /* Other styles for your content */
}

  1. The .parallax-container serves as the main container for the parallax effect. It has relative positioning to contain the absolutely positioned background layer.
  2. The .parallax-background div contains the background image. It’s absolutely positioned to cover the entire container and set behind the content with a negative z-index.
  3. Adjusting the height of .parallax-background to be taller than the container creates the parallax effect when the user scrolls.
  4. The .content div holds the content and is positioned over the parallax background.

My Background Webpage

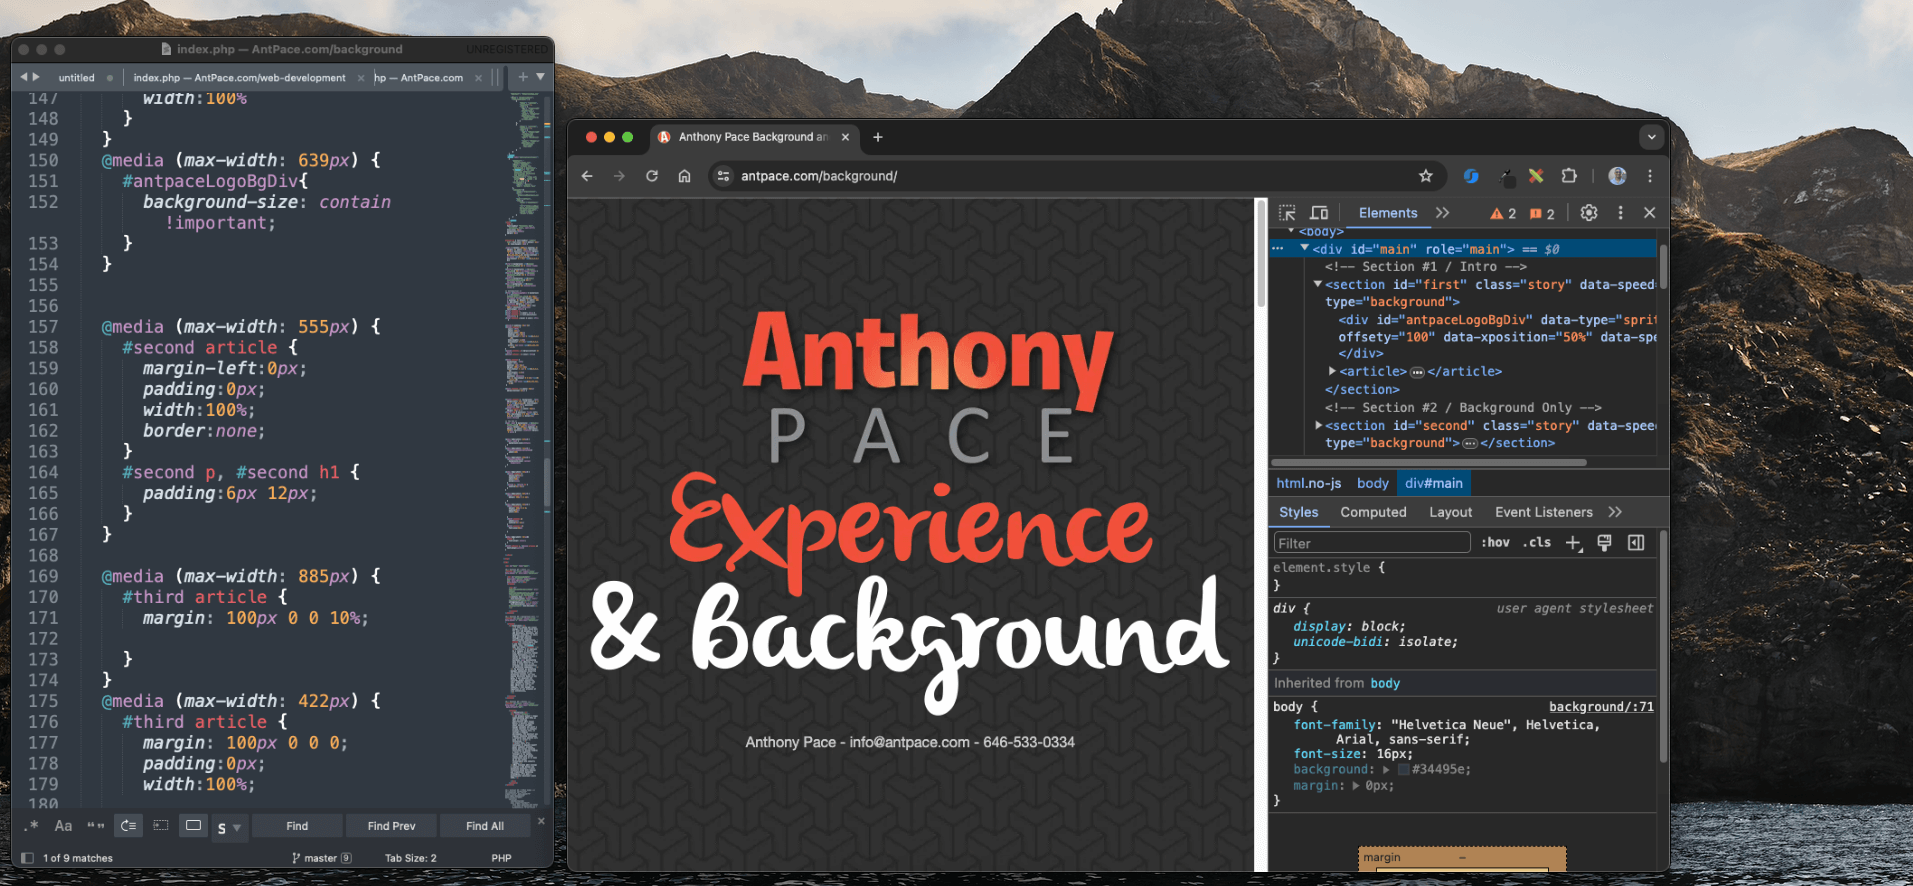
A few years ago, I made a single webpage to describe my professional background and experience. I decided to use a parallax background effect for this page. You can visit it here.

I really love the way the main logo text initially seems to blend into the foreground but remains static as you scroll. Upon scrolling, you’ll observe that the top text remains fixed while the second line moves independently, creating a distinct visual effect. It feels unexpected. The contrasting image backgrounds creates a fun juxtaposition.

And, it’s all done with CSS (no JavaScript necessary). You can create a simple parallax effect by adjusting the positioning of background images or layers using CSS properties like background-position and background-attachment. This allows the background to move at a different rate than the foreground content as the user scrolls, creating the illusion of depth.

Here is the code that I used to build this example:

<!doctype html>
<html class="no-js" lang="en">
<head>
<meta charset="utf-8">
<meta http-equiv="X-UA-Compatible" content="IE=edge,chrome=1">
<link rel="shortcut icon" href="https://www.antpace.com/favicon.ico" />
<link rel="apple-touch-icon-precomposed" sizes="144x144" href="https://www.antpace.com/apple-touch-icon-144x144-precomposed.png">
<link rel="apple-touch-icon-precomposed" sizes="114x114" href="https://www.antpace.com/apple-touch-icon-114x114-precomposed.png">
<link rel="apple-touch-icon-precomposed" sizes="72x72" href="https://www.antpace.com/apple-touch-icon-72x72-precomposed.png">
<link rel="apple-touch-icon-precomposed" sizes="57x57" href="https://www.antpace.com/apple-touch-icon-57x57-precomposed.png">
<link rel="apple-touch-icon-precomposed" href="https://www.antpace.com/apple-touch-icon-precomposed.png">
<title>Anthony Pace Background and Experience</title>
<meta name="description" content="Anthony Pace is a web developer, designer, and database architect. His daily work includes writing software and creating user-centered experiences. The technologies that he use most frequently are HTML5, CSS3, Javascript, PHP, and MySql.">
<meta name="keywords" content="Anthony Pace, web, development, design, marketing, websites, creative services, Bronx, New York">
<meta name="viewport" content="width=device-width">
<link rel="stylesheet" href="https://use.fontawesome.com/releases/v5.5.0/css/all.css" integrity="sha384-B4dIYHKNBt8Bc12p+WXckhzcICo0wtJAoU8YZTY5qE0Id1GSseTk6S+L3BlXeVIU" crossorigin="anonymous">
<link href='https://fonts.googleapis.com/css?family=Lobster+Two:700&v2' rel='stylesheet' type='text/css'>
 	<script type="application/ld+json">
	    {
	      "@context": "http://schema.org",
	      "@type": "BreadcrumbList",
	       "itemListElement": [
	            {
	                "@type": "ListItem",
	                "position": 1,
	                "item": {
	                  "@id": "https://www.antpace.com",
	                  "name": "Home",
	                  "image": "https://www.antpace.com/images/anthony-pace-logo.webp"
	                }
	            }, 
	            {
	                "@type": "ListItem",
	                "position": 2,
	                "item": {
	                  "@id": "https://www.antpace.com/background",
	                  "name": "Background",
	                  "image": "https://www.antpace.com/background/logo.webp"
	                }
	            } 
	        ]
	    }
	  </script>
	  <script type="application/ld+json">
	    {
	        "@context": "http://schema.org",
	        "@type": "WebPage",
	        "name": "Anthony Pace Background & Experience",
	        "description": "The page describes Anthony's professional background and experience.",
	        "lastReviewed": "<?php echo date("Y-m-d", time() - 60 * 60 * 24); ?>",
	        "reviewedBy": {
	            "@type": "Person",
	            "name": "Anthony Pace"
	        },
	        "publisher":{
	            "@type":"Organization",
	            "url":"https://www.antpace.com",
	            "name":"AntPace",
	            "logo":{
	                "@type":"ImageObject",
	                "url":"https://www.antpace.com/images/anthony-pace-logo.webp",
	                "width":"490px",
	                "height":"230px"
	            }
	        }
	    }
	    </script>
  <style>
  	body { 
		font-family: "Helvetica Neue", Helvetica, Arial, sans-serif;
		font-size: 16px;
		background:#34495e;
		margin: 0px;
	} 
	 
	 
	article h1 { font-family: 'Lobster Two'; font-size: 60px; margin: 25px 0; line-height: 1em; }

	.story { height: 1000px; padding: 0; margin: 0; width: 100%; max-width: 1920px; position: relative; margin: 0 auto; border-top: 1px solid rgba(255,255,255,0.3); border-bottom: 1px solid rgba(0,0,0,0.4); box-shadow: 0 0 50px rgba(0,0,0,0.8);}

	#first { background: url(images/textured.webp) 50% 0 repeat fixed; }
	#second { background: url(images/ufo.webp) 50% 0 no-repeat fixed; }
	#fourth { background: url(images/abstract2.webp) 50% 0 no-repeat fixed; }
	#third { background: url(images/desertEarthSet.webp) 50% 0 no-repeat fixed; }
	#last { background: url(images/textured.webp) 50% bottom repeat fixed; }

	/* Introduction */
	#first #antpaceLogoBgDiv { background: url(/images/anthony-pace-logo.webp) 50% 100px no-repeat fixed; min-height: 1000px; padding: 0; margin: 0; width: 100%; max-width: 1920px; position: relative; margin: 0 auto; }
	#first article { width: 100%; top: 300px; position: absolute; text-align: center; }
	#first article p,
	#first article a { color: #ccc; }
	#first article a { text-decoration: underline; }
	#first article a:hover { color: #fff; }

	 
	#second { padding: 50px 0;}
	#second article { 
		 color: #fff; 
		 width: 445px;
		 margin-left: 100px; 
		 padding: 10px 20px; 
		 text-shadow: 0 -1px 0 rgba(0,0,0,0.5); 
		 line-height: 1.5em; 
		 box-shadow: 0 0 25px rgba(0,0,0,0.3); 
		 border: 1px solid rgba(150,150,150,0.1); 
	}
	#second article p { margin-bottom: 25px; }
	#second article a { color: #ff0;}

	 
	#third article {
		background:  #333; 
		color: #fff; 
		padding: 10px 20px; 
		margin: 100px 0 0 60%; 
		text-shadow: 0 -1px 0 rgba(0,0,0,0.5); 
		line-height: 1.5em; 
		color: #fff; 
		position: absolute; 
		top: 0; box-shadow: 0 0 25px rgba(0,0,0,0.3); 
		border: 1px solid rgba(150,150,150,0.1); 
	 }

	#third article p { width: 300px; margin-bottom: 25px; }


	#fourth article {  background:  #333;margin-left: 10%; text-shadow: 0 -1px 0 rgba(0,0,0,0.5); line-height: 1.5em; color: #fff; position: absolute; top: 0; }
	#fourth article p { width: 300px; margin: 50px 0; }
	#fourth img { position: fixed; left: 50%; box-shadow: 0 0 25px rgba(0,0,0,0.7); z-index: 1; border:5px solid white;}

	/* The End */
	#last .last { background: url(images/thanks.webp) 50% 100px no-repeat fixed; height: 1000px; padding: 0; margin: 0; width: 100%; max-width: 1920px; position: relative; margin: 0 auto; }


	@media (max-width: 625px) {
		#last .last {
			background-size:contain;
		}
	}
	@media (max-width: 711px) {
		#experienceAndBackgroundImg{
			width:100%
		}
	}
	@media (max-width: 639px) {
		#antpaceLogoBgDiv{
			background-size: contain !important;
		}
	}


	@media (max-width: 555px) {
		#second article {
			margin-left:0px;
			padding:0px;
			width:100%;
			border:none;
		}
		#second p, #second h1 {
			padding:6px 12px;
		}
	}

	@media (max-width: 885px) {
		#third article {
			margin: 100px 0 0 10%; 
			 
		}
	}
	@media (max-width: 422px) {
		#third article {
			margin: 100px 0 0 0; 
			padding:0px;
			width:100%;
			 
			 
		}
		#third article p{
			width:auto;
			padding:6px 12px;
		}
		#third article h1{
			font-size:50px;
			 
		}
		 
	}  
	@media (max-width: 767px){
		footer {
			text-align: center;
		}
	}
	#third article p, #second article p{
		text-align:justify;
	}


  </style>
  
</head>

<body>

  <div id="main" role="main">

	<!-- Section #1 / Intro -->
	<section id="first" class="story" data-speed="8" data-type="background">    	
		<div id="antpaceLogoBgDiv" data-type="sprite" data-offsetY="100" data-Xposition="50%" data-speed="-2"></div>		
		<article>

			<img id="experienceAndBackgroundImg" src="images/experienceAndBackground.webp" alt="Experience and Background"  />
			<p>Anthony Pace - <a style="text-decoration: none;" href="mailto:info@antpace.com">info@antpace.com</a> - <a style="text-decoration: none;" href="tel:6465330334">646-533-0334</a></p>
			
	    </article>
	</section>

	<!-- Section #2 / Background Only -->
	<section id="second" class="story" data-speed="4" data-type="background">
		<article>
			<h1>Experience</h1>
		    	<p>I love coding and visual design. I've been doing both for over two decades. I am a web developer, designer, and database architect. My daily work includes writing software and creating user-centered experiences. <strong>The technologies that I use most frequently are HTML5, CSS3, Javascript, PHP, and MySQL.</strong> </p>
		    	<p>Currently, I am employed by a company in New York City where I directly manage other developers. I am in charge of developing apps (native and HTML5) and building &amp; maintaining data driven websites. I also play a large role in the strategy and implementation of marketing campaigns.  </p>
				<p> My position as marketing manager emphasizes measuring the effectiveness of our marketing actions, and then making decisions based on the data. I use advanced A/B testing, google analytics, email campaign reports, and user surveys to figure out what works best for the company. I also manage the logistics of our presence at live exhibitions.
				</p>
		    			
		</article>
	</section>
	
	<!-- Section #3 / Photos -->
	<section id="third" class="story" data-speed="6" data-type="background" data-offsetY="250">    	
		 
    	<article>
    		<h1>Background</h1>
	    	<div class="textbox">    	
		    	<p>In primary school I began experimenting with HTML as well as creating applications with Visual Basic. I quickly learned about various software design concepts and built a strong interest in Computer Science. Despite this, in college I studied philosophy. The abstract and logical thinking techniques I fostered have applied very much to my career in technology. </p>
		    	<p>Since then, I've continued to educate myself about computer science. Books and online lectures facilitate me moving towards a level of expertise relevant to my career. Social media and online communities help me to keep up on the latest technologies and industry trends.</p>
				<p>When finished with college I created a web design and marketing business. I built clientele using both digital and traditional marketing strategies. I've been a professional developer since 2008.</p>
				
		    </div>
    	</article>
	</section>	
	

	<!-- Section #4 / HTML5 Video -->
	<!--<section id="fourth" class="story" data-speed="8" data-type="background" data-offsetY="250">
    	<article>
    		<h2>Skills</h2>
	    	<div class="textbox">    	
		    	<p>I have acquired and honed a variety of abilities as a technologist. I am a full stack web developer with a passion for programming. Some of the most useful skills that I have built include:
					<ul>
						<li>Project Management
						<li>Business Management
						<li>Design
						<li>Software Engineering
						<li>Marketing
					</ul>
				</p>For a more technical description of my abilites please visit my <a style="color:white;" href="http://antpace.com/resume" target="_blank">resum&eacute;</a>.</p>
		   
		    </div>
    	</article>
		 
	</section>	-->

	<!-- Section #5 / The End-->
	<section id="last" data-speed="8" data-type="background" data-offsetY="250">    
	
		<a href="/blog/"><div class="last" data-type="sprite" data-offsetY="-1600" data-Xposition="50%" data-speed="-2"></div>	</a>
		<p style=" text-align: center; padding: 50px;font-size: 24px;"><a href="/blog/about/" style="color:white; text-decoration: none;">Continue to my blog &nbsp;&nbsp;<i class="fas fa-arrow-right"></i></a></p>
	</section>
	
  </div> <!-- // End of #main -->
  
<?php include $_SERVER["DOCUMENT_ROOT"] . '/footer-shared.php'; ?>
<?php include $_SERVER["DOCUMENT_ROOT"] . '/components/analytics.php'; ?>

</body>
</html>

Take a look:

References:

  1. https://www.clickrain.com/blog/parallax-scrolling-examples-and-history
  2. https://en.wikipedia.org/wiki/Parallax_scrolling
  3. https://www.w3schools.com/howto/howto_css_parallax.asp

Freelance Web Development: Delivering Value to Clients

freelance web dev process

When I win a new web development client I follow a structured progress. This ensures high quality results. Years of refinement and experience continue to define how I work with people and businesses to help them succeed.

Discussion

This is the first step. Communication is key.

This initial discussion allows us to explore your project’s overarching goals. It’s a high-level chat to understand your aspirations and ensure our visions align. We’ll delve into:

  • Nature of the Project: Is this a revamp of an existing platform or the birth of something entirely new?
  • Scope of Work: What exactly are we building? It could range from a website, a dynamic web application, an eCommerce storefront, to other web-based projects.
  • Branding Elements: Have you established a brand identity already? Do you possess logo designs or specific themes you want incorporated?
  • Budget Considerations: A transparent conversation about the budget ensures we shape the project according to the resources available.
  • Project Goals: What do you hope to achieve with this project? Understanding your objectives ensures we’re steering in the right direction from the get-go.

After our conversation, we’ll examine any pre-existing materials that are pertinent. Perhaps you have an existing website that needs sprucing up or logos that you’d love incorporated. Alternatively, you might point to other inspiring sites or platforms, even if they’re not yours, to give a clearer picture of your vision. This step is all about gathering resources and setting a concrete foundation.

Based on our dialogue and the data collated, I’ll recommend the best technologies and tools. This could encompass anything from choosing the right content management system, database technologies, or frontend frameworks.

Planning

Step two. Every element discussed in our initial conversation is now put down in black and white. It’s our chance to reiterate the goals and ensure we’re on the same page. This documentation becomes a reference point, ensuring we stay aligned with the project’s vision.

We detail objectives, decide on the most fitting technology stack, outline the budget, and establish a clear timeline.

Development

As we progress through this building phase, you’ll have access to a private server for reviews and approvals. Everything—from the user-friendly experience to backend configurations like domain setup, security measures, and CMS installation—is shaped by our prior discussions, ensuring both aesthetics and functionality are on point.

Content

During the website’s initial build, I typically use placeholder content. With the design and layout set, it’s your cue to provide the actual content. While you can opt to share materials earlier, this phase is ideal. And rest assured, you’ll retain full control to modify content as needed later on.

Quality Review

Before launching, I rigorously test the product across various devices, browsers, and screen dimensions to ensure quality. This phase is dedicated to refining the detail, ensuring both appearance and functionality are flawless.

Final Touches

I ensure that your website is fully optimized for SEO, integrating structured data, sitemaps, and relevant keywords. By enhancing its security, mobile responsiveness, and speed, your SEO score will naturally improve. Further bolstering this, I can register your site with Google Search Console and activate AMP (Accelerated Mobile Pages) to amplify its prominence in Google searches. Additionally, I’m here to guide you in devising a content strategy tailored to elevate your online visibility.

For those seeking email hosting, I offer solutions tailored to your needs, with Google Workspace being a top recommendation for those starting afresh. When it comes to choosing a CMS, WordPress or Shopify are often top picks for businesses.

Beyond these services, I specialize in web design, crafting a visual identity that seamlessly embodies your brand. And rest assured, user experience is a top priority; I design ensuring visitors experience positive, smooth interactions across your digital platform.

This framework is described and outlined on another page of this website. It is what I use when I engage a client that has an existing website that might need maintenance or improvements.

Diagnosing and Resolving Disk Space Issues on AWS EC2 with MariaDB

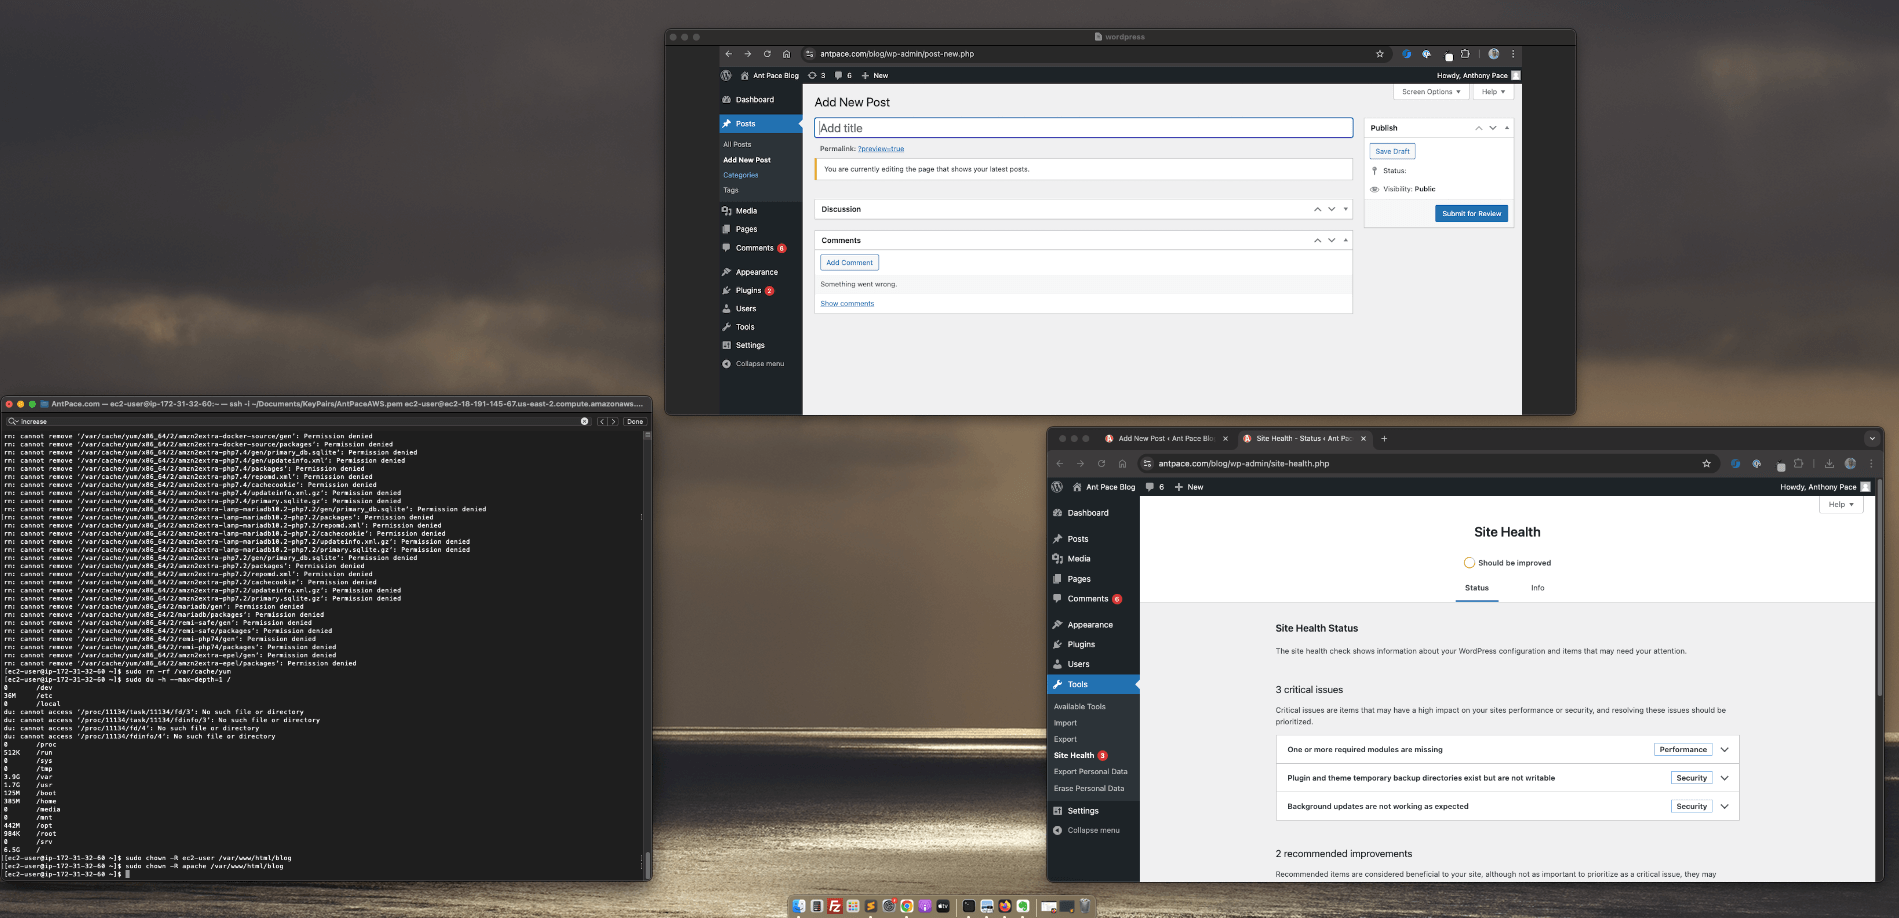
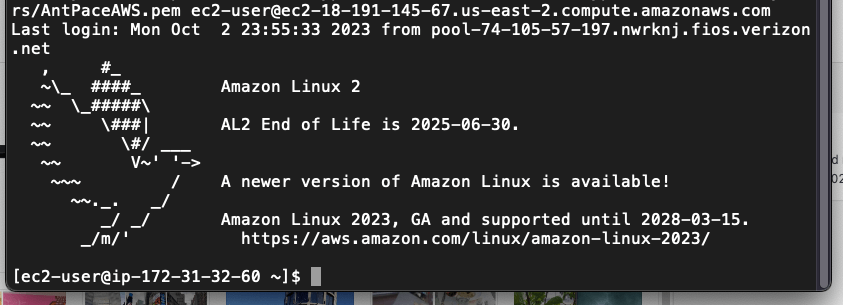
I run this website on a t2.micro EC2 instance. It only has 8 gigabytes of storage space. The blog runs on WordPress. I tried creating a new post recently, but it wouldn’t let me publish.

A vague message told me I was “editing the page that shows your latest posts” – even though I wasn’t. I checked the dashboard site health, and noticed that somethings needed updating, but disk space was critically low.

WordPress site health

I SSH’d into the instance was able to confirm that 100% of the 8 gigabytes was in use: `df -h`

hardrive space

I was able to use the ‘disk usage’ command to drill down and find large directories: ‘sudo du -h –max-depth=1 /var’. I was able to clean up unused yum packages, logs, and cache to clear up over a gigabyte of space.

sudo journalctl --vacuum-size=100M
sudo yum clean all
rm -rf /var/cache/yum

It looks like there are some database files that could be cleaned up too, but I’ll wait for now. I think my next course of action, when this inevitably happens again, will be to increase my disk space by expanding my EBS volume and resizing the file system.

Playing with databases and storage can be dangerous. Make sure you always have a back-up strategy and disaster recovery plan.

How to Fix a GoDaddy Parked Page and Revive Your Website

godaddy parked page fixed

It all started with a client text message that was hard to miss — their website was suddenly showing a GoDaddy “parked” page. This unexpected hiccup was more than just a minor inconvenience; it was a full-blown business disruption for my client.

The Challenge

When the client reached out, he was understandably frustrated. His website, which was supposed to be active and processing sign-ups, was inactive, displaying a message typically associated with unconfigured or newly registered domains. This was particularly perplexing as the site had been running smoothly just days before.

My first step was to verify the DNS settings. A parked domain page usually indicates issues with domain pointing, possibly due to changes in DNS or hosting services. The client told me he had tried to create a subdomain through his domain registrar, GoDaddy. It turned out that his domain’s name servers pointed to his web hosting company, DreamHost. Making DNS changes directly in GoDaddy led to a change in the domain’s nameserver records so that it became managed by GoDaddy directly, removing any reference to the web hosting package where the site actually lived.

The Solution

After identifying the mismatch, the next step was clear but not simple—access the DreamHost account to find the correct nameserver value to point the domain to. However, the client didn’t have the DreamHost login credentials readily available, which added another layer to our challenge.

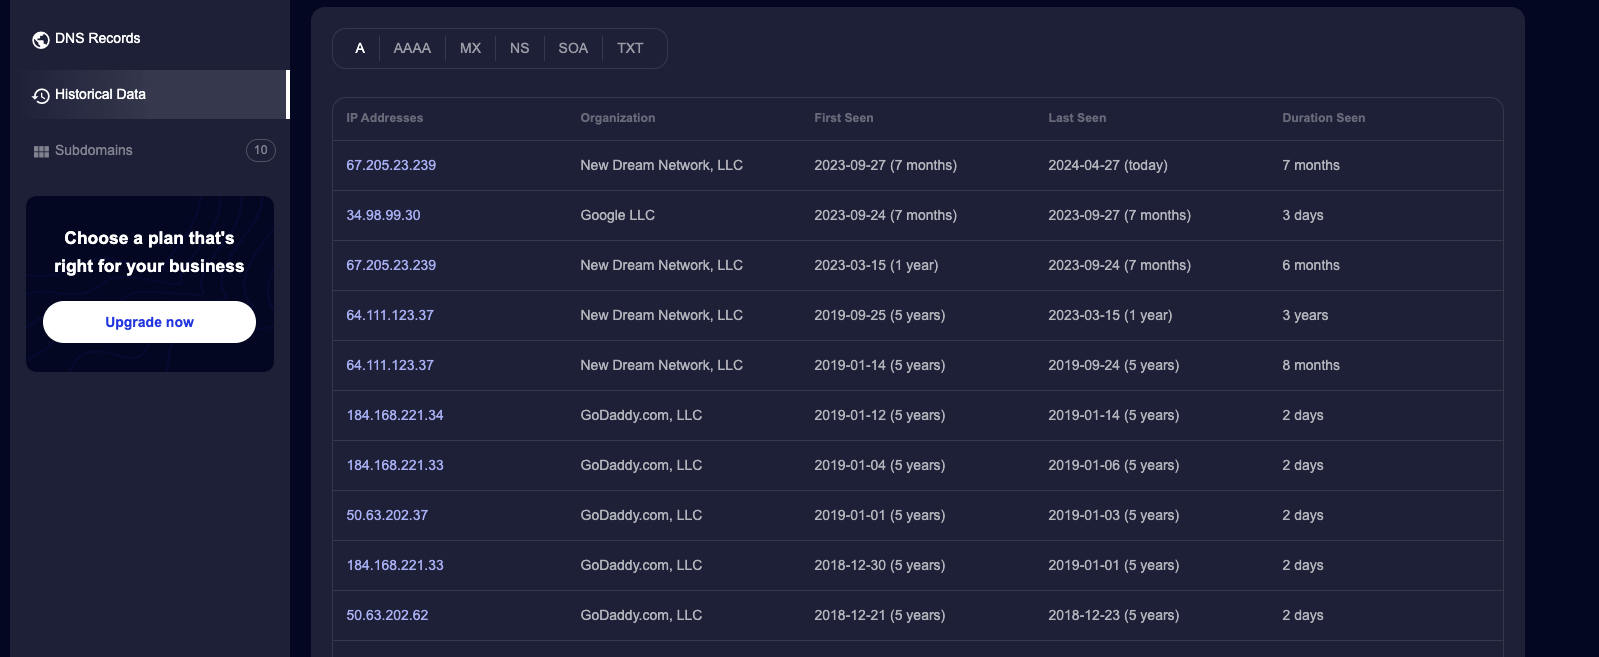
Using SecurityTrails, I conducted a DNS history check. This not only confirmed that the name servers were indeed pointing to DreamHost but also provided a clear historical view of the DNS changes over time. I was able to copy and paste the name server values from the history log. Subsequently, we were able to recover access to the DreamHost account by going through account recovery processes, which involved verifying the client’s identity and ownership of the domain.

dns log

Once we regained access, I immediately updated the DNS records to ensure they correctly pointed to the client’s active web server. This change effectively removed the parked page error, restoring the site’s functionality.

Conclusion

This scenario underscored the critical importance of keeping domain and hosting details organized and accessible. It also highlighted how easy it is for essential information to become overlooked, especially when multiple service providers are involved over the years. Effective disaster recovery strategies are crucial for quickly restoring operations in the event of a service disruption, whether caused by human error, technical failures, or external threats.

With the website back up and running, and the domain correctly configured, the client was relieved and could focus on his business again. For me, it reinforced a key aspect of my work: solving complex tech puzzles not only requires technical know-how but also an investigative approach to untangle the often convoluted web of digital assets. My role transcends building websites—it’s about ensuring they continue to serve their purpose, even when unexpected disruptions occur.

While my tagline says, “I can build your website,” days like these remind me it should also include, “and I can rescue it too.” This experience serves as a testament to the value of professional web management, especially in a world where digital presence is synonymous with business viability.

Binary Search in JavaScript

binary search in javascript code

“Binary search” is a computer science term used in programming and software engineering. It is a way of determining if a value exists in an ordered data set. It’s considered a textbook algorithm. It is useful because it reduces the search space by half on each iteration.

Imagine we are asked to search for an integer in an array that is sorted in ascending order. The challenge is to return the target number’s index.

binary search

We could use a built in JavaScript function indexOf():

var search = function(nums, target) {
    var answer = nums.indexOf(target);
    console.log(answer);
    return answer;
};
console.log(search([-1,0,3,4,5,9,12], 5)); // returns '4'

But that is an abstraction, which can be slow and expensive. Instead, we should implement our own binary search code.

Binary Search Implementation

Binary search starts in the middle of a collection, and checks if that is the requested term. The initial middle position is determined by taking the length of the array and dividing it by two. If the array has an even number of elements, then the ‘halfway position’ is considered close enough. I use a JavaScript Math function to round down, making sure I am not left with a decimal floating number:

cursor =  Math.floor( ((left + right) / 2) ); // about the middle

If the search term is not found, the position (the cursor) is moved. Since the collection is ordered from smallest to largest we know which direction to move the search cursor. If the target is less than the current value, we shift one to the left. If the target is greater than the current value, we shift two to the right.

This continues until the target query is found. That sequence is ran inside of a loop. The loop repeats while the left boundary is less than (or equal to) the right. The search cursor’s index is changed by adjusting the left or right bounds. Once adjusted, the cursor is recalculated on the subsequent iteration.

var search = function(nums, target) {
    var left = 0; // first element, initial left boundary
    var right = nums.length;
    right = right - 1; // last element, initial right boundary
    var cursor = 0;
    while(left <= right){
        cursor =  Math.floor( ((left + right) / 2) ); // about the middle to start
        console.log(cursor + ": " + nums[cursor]);
        if(nums[cursor] === target){
            return cursor; // query found!
        }
        if(target < nums[cursor]){
            right = cursor - 1; // move cursor to the left by one
            console.log("cursor moved to the left  by one")
        }else{
            left = cursor + 1; // move cursor to the right by two
            console.log("cursor moved to the right by two")
        }
    }
    return "false"; // not found
};
console.log(search([-1,0,1,2,3,4,5,6,7,8,9,10,11,12], 10));

The above code starts to search in the central location, nums[6] == 5. Look at the output below to see how the cursor moves until it finds the target value of 10 (at a zero-based index of 11):

binary search output

This algorithm has an O(log n) runtime complexity. That Big-O notation describes how it would scale as the input increases. Imagine an array with thousands of elements. O(log n) means that the time to execute this code will increase linearly only as the number of input items increase exponentially. That means our code is performant and efficient.

Why did the computer scientist use binary search to find his lost pencil? Because he wanted to reduce the search space by half every time he checked a desk drawer!

Square root algorithm using binary search

Another implementation example of using binary search in a JavaScript function is to calculate the square root of a number. Now, of course, Javascript has a built in Math.sqrt() function that is highly performant compared to any custom code we will write. But, it is a good exercise to think about how this works.

The square root of a number is a value that, when multiplied by itself, gives the original number. To solve for it when given an input, we are going to take a guess at what the answer (square root) is, starting with itself divided by two (giving us the midpoint between it and zero). We multiply that midpoint by itself to check our guess. It will only be correct on the first iteration if the input is the number four (four divided by two is two; two times two is four). Otherwise, we will move the cursor (halving the search range) to either the left or the right, depending on if the square of our guess is larger or smaller than the original input.

The concept of “moving the cursor” helps to visualize how the binary search algorithm zeroes in on the square root by iteratively narrowing down the search range based on the comparison of the square of the midpoint to the target number.

I accounted for two special cases in my code. For negative numbers we return false because negative numbers have imaginary square roots. For numbers smaller than one we set the range’s end to one because the square root of a fraction is larger than the fraction itself. Additionally, I set a precision threshold (0.0000000001), because some numbers have square roots that are irrational.

function binarySearchSquareRoot(n, precision = 1e-10) {
    if (n < 0) {
        throw new Error('Input must be a non-negative number');
    }

    let start = 0;
    let end = n;

    // If the number is less than 1, set end to 1 to handle fractions
    if (n < 1) {
        end = 1;
    }

    while (end - start > precision) {
        const mid = (start + end) / 2;
        const midSquared = mid * mid;

        if (midSquared === n) {
            return mid;  // Found exact square root
        } else if (midSquared < n) {
            start = mid;
        } else {
            end = mid;
        }
    }

    return (start + end) / 2;  // Return approximate square root
}

// Usage:
const number = 25;
const squareRoot = binarySearchSquareRoot(number);
console.log(`The square root of ${number} is approximately ${squareRoot}`);

Alternatively, the Babylonian algorithm can be  implemented to solve for square roots.

Additional References

https://delboy1978uk.wordpress.com/2018/02/06/binary-search-trees-in-php/
https://research.google/blog/extra-extra-read-all-about-it-nearly-all-binary-searches-and-mergesorts-are-broken/

Redirecting Traffic from EC2 Public DNS to a Domain Name

301 redirect from hostname

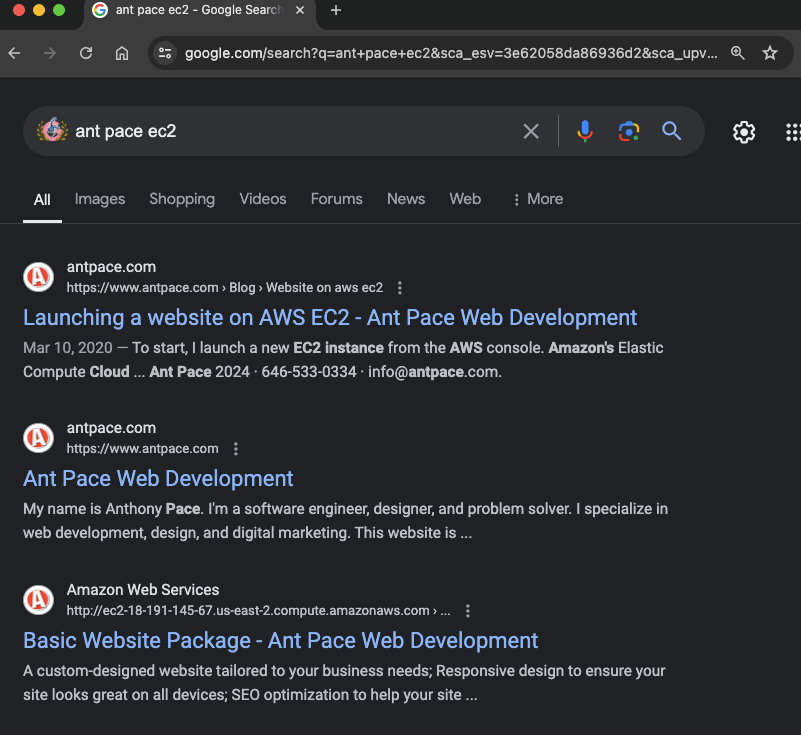
I searched Google for my own website, and noticed that some results were returning with my EC2 instance’s public hostname: http://ec2-18-191-145-67.us-east-2.compute.amazonaws.com/ – That’s a bad look for branding, and I figured it couldn’t be good for SEO. I fixed it by adding a new rewrite condition to my apache server’s httpd.conf file. The server runs on a Linux 2 image, and I found that file in this directory: /etc/httpd/conf/.

Initial Configuration

I already had a Virtual Host block that listens on port 80, responsible for making sure all traffic going through my domain name goes to the https://www.antpace.com. I just had to add the public DNS to the ServerAlias statement and add an additional RewriteCond statement:

    
<VirtualHost *:80>
    DocumentRoot "/var/www/html"
    ServerName "antpace.com"
    ServerAlias "www.antpace.com" "ec2-18-191-145-67.us-east-2.compute.amazonaws.com"
    RewriteEngine on
    RewriteCond %{HTTP_HOST} ^ec2-18-191-145-67.us-east-2.compute.amazonaws.com$ [OR]
    RewriteCond %{SERVER_NAME} =antpace.com [OR]
    RewriteCond %{SERVER_NAME} =www.antpace.com
    RewriteRule ^ https://www.antpace.com%{REQUEST_URI} [END,NE,R=permanent]
</VirtualHost>

Handling SSL Traffic

After restarting the server, I did another search, and saw some pages still returning with the SSL encrypted address https://ec2-18-191-145-67.us-east-2.compute.amazonaws.com/.

SERP

To handle traffic going there, I needed to add another Virtual Host block that would listen on port 443. You’ll notice that I had to reference my SSL certificates that were installed via Let’s Encrypt.

<VirtualHost *:443>
    DocumentRoot "/var/www/html"
    ServerName "antpace.com"
    ServerAlias "www.antpace.com" "ec2-18-191-145-67.us-east-2.compute.amazonaws.com"
    
    SSLEngine on
    SSLCertificateFile /etc/letsencrypt/live/antpace.com/fullchain.pem
    SSLCertificateKeyFile /etc/letsencrypt/live/antpace.com/privkey.pem
    SSLCertificateChainFile /etc/letsencrypt/live/antpace.com/chain.pem
    
    RewriteEngine on
    RewriteCond %{HTTP_HOST} ^ec2-18-191-145-67.us-east-2.compute.amazonaws.com$ [OR]
    RewriteCond %{HTTP_HOST} ^antpace.com$ [OR]
    RewriteCond %{HTTP_HOST} ^www.antpace.com$
    RewriteRule ^ https://www.antpace.com%{REQUEST_URI} [END,NE,R=permanent]
</VirtualHost>

Unfortunately, adding this block broke the site temporarily. It resulted in a redirect loop, in tandem with the previous block. I tried to adjust them both, resulting in the following:

<VirtualHost *:80>
    DocumentRoot "/var/www/html"
    ServerName "antpace.com"
    ServerAlias "www.antpace.com" "ec2-18-191-145-67.us-east-2.compute.amazonaws.com"

    RewriteEngine on
    # Redirect all HTTP traffic to HTTPS
    RewriteCond %{HTTPS} off
    RewriteRule ^ https://%{HTTP_HOST}%{REQUEST_URI} [L,R=301]
</VirtualHost>

<VirtualHost *:443>
    DocumentRoot "/var/www/html"
    ServerName "antpace.com"
    ServerAlias "www.antpace.com" "ec2-18-191-145-67.us-east-2.compute.amazonaws.com"

    SSLEngine on
    SSLCertificateFile /etc/letsencrypt/live/antpace.com/fullchain.pem
    SSLCertificateKeyFile /etc/letsencrypt/live/antpace.com/privkey.pem
    SSLCertificateChainFile /etc/letsencrypt/live/antpace.com/chain.pem

    RewriteEngine on
    # Redirect all non-preferred hostnames to the preferred hostname
    RewriteCond %{HTTP_HOST} ^ec2-18-191-145-67.us-east-2.compute.amazonaws.com [NC,OR]
    RewriteCond %{HTTP_HOST} ^antpace.com [NC]
    RewriteRule ^ https://www.antpace.com%{REQUEST_URI} [L,R=301]
</VirtualHost>

Although this configuration resolved the redirect loop, it failed to address the original issue. I discovered that my system had a separate configuration file for SSL traffic: /etc/httpd/conf.d/ssl.conf. I added the redirect rule and certificate references to the 443 Virtual Host block within this file, but the redirect issue persisted.

Diagnosing the Issue

Executing sudo apachectl -S revealed a conflicting Virtual Host on port 443 in httpd-le-ssl.conf. I moved the rewrite rules to this file, yet the redirect remained elusive. Suspecting a browser cache issue, I verified the redirect using curl:

301 redirect via CLI CURL

The 301 Moved Permanently response confirmed the redirect to https://www.antpace.com. Since the redirection works when tested with curl -k but not in a browser, the issue likely stems from the browser not accepting the SSL certificate due to the mismatch. Browsers are more strict with SSL certificate validation than curl -k.

I attempted to add the public host name as a subject alternative name (SAN) in my existing SSL certificate, but Let’s Encrypt refuses to issue certificates for EC2 hostnames. This restriction is due to Let’s Encrypt’s policy to prevent abuse. To circumvent this, I generated a self-signed certificate:

sudo mkdir -p /etc/ssl/private 
sudo mkdir -p /etc/ssl/certs
sudo chmod 700 /etc/ssl/private
sudo openssl req -x509 -nodes -days 365 -newkey rsa:2048 -keyout /etc/ssl/private/ec2-selfsigned.key -out /etc/ssl/certs/ec2-selfsigned.crt

Final Configuration

I created a new Apache configuration file for the EC2 redirection and ensured no conflicts with existing configurations:

sudo nano /etc/httpd/conf.d/ec2-redirect.conf

Here’s the contents:

<IfModule mod_ssl.c>
<VirtualHost *:443>
    DocumentRoot "/var/www/html"
    ServerName "ec2-18-191-145-67.us-east-2.compute.amazonaws.com"

    SSLEngine on
    SSLCertificateFile /etc/ssl/certs/ec2-selfsigned.crt
    SSLCertificateKeyFile /etc/ssl/private/ec2-selfsigned.key

    RewriteEngine on
    # Redirect EC2 URL to the preferred domain
    RewriteRule ^ https://www.antpace.com%{REQUEST_URI} [L,R=301]
</VirtualHost>
</IfModule>

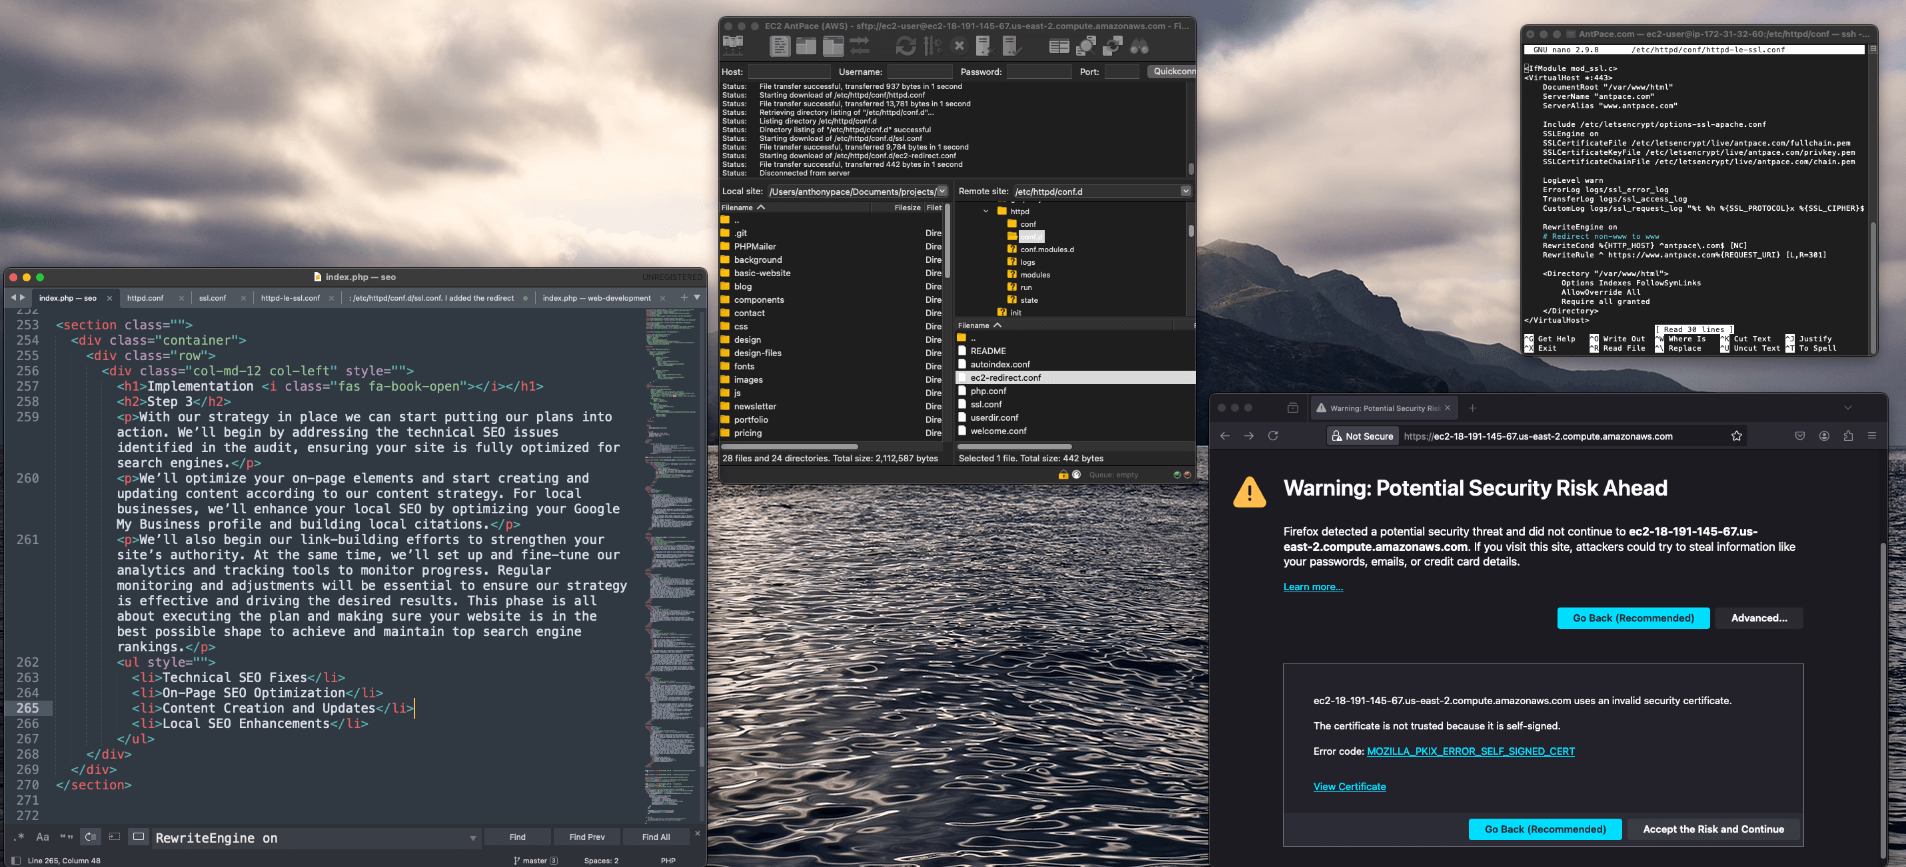
Upon restarting Apache, the 301 redirect functioned correctly in the browser, albeit with an initial security warning due to the self-signed certificate. Accepting the certificate led me to the desired URL. This project underscored the importance of meticulous configuration and validation in managing web traffic and ensuring optimal SEO performance.

Pro-tip: Each time I had to edit any of these sever configuration files, I did so from the command line using the Nano text editor. I learned along the way that I could select multiple lines of text by pressing “Ctrl + Shift + 6”, pressing the arrows to expand the selection, and then “Ctrl + K” to remove content.

Alternative Approaches

To stop this problem from arising, even to begin with, we can take an alternative approach. It is possible, when creating a new EC2 instance, to disable the auto-assign public IP address in the network settings. This will launch the instance without a public IP address.

Identify Unused Image Files in a Code Project

Searching for image files

I wrote a script to list (and optionally delete) the image files it finds in a directory that are not referenced any where.  I specified a single sub-directory at a time. If you do the entire project it may take long to complete.

#!/bin/bash

PROJECT_DIR="$PWD"
IMAGE_DIR="$PWD"

DELETE_FLAG=false

# Check for -d (delete) flag
if [[ $1 == "-d" ]]; then
    DELETE_FLAG=true
fi

# Find all image files
find $IMAGE_DIR -type f \( -iname \*.png -o -iname \*.jpg -o -iname \*.jpeg -o -iname \*.gif -o -iname \*.webp -o -iname \*.svg -o -iname \*.ico \) | while read img_file; do
    # Extract the basename of the image file
    img_basename=$(basename "$img_file")
    
    # Search for it in the project, excluding .zip files and .git directories
    result=$(grep -ril --exclude=*.zip --exclude-dir=.git "$img_basename" "$PROJECT_DIR")
    
    # If not found, print it or delete it based on flag
    if [ -z "$result" ]; then
        echo "Unused image: $img_file"
        if $DELETE_FLAG; then
            rm "$img_file"
            echo "Deleted: $img_file"
        fi
    fi
done

Be sure to edit the code to include the image file types that you want to target. Make the file executable before trying to use it:

chmod +x find_unused_images.sh

Run the script (without deletion)

./find_unused_images.sh

To run the script with the delete functionality:

./find_unused_images.sh -d

Find unused images in a project

In an early version, my script was leaving behind files that appeared to be completely unreferenced in the code base (I checked manually by searching the project via IDE). To troubleshoot, I ran grep from the command line:

grep -ril "experienceLogo2.png" "$PWD"

It turned out that those files were referenced in a zip file and in git objects (and therefore considered not unused). I fixed this bug by adding the flags –exclude=*.zip –exclude-dir=.git to my grep command in find_unused_images.sh.

grep to find a file reference within a directory
I had lots of unused stock images and old designs that felt good to purge. Now with generative image AI, I know I could create assets easily as I need them in the future.

I used this script during a project to upgrade my website to use next generation file formats. If you liked this post, read another one where I discuss managing graphic assets for a web project.

Update

Identify any unused files in a code project

This code can be changed to search for any kind of file. Here’s an updated version I used to see if some old Bootstrap files were being used any where:

#!/bin/bash

PROJECT_DIR="$PWD"
FILE_DIR="$PWD/css"

DELETE_FLAG=false

# Check for -d (delete) flag
if [[ $1 == "-d" ]]; then
    DELETE_FLAG=true
fi

# Find all image files
# find $FILE_DIR -type f \( -iname \*.png -o -iname \*.jpg -o -iname \*.jpeg -o -iname \*.gif -o -iname \*.webp -o -iname \*.svg -o -iname \*.ico \) | while read my_file; do
find $FILE_DIR -type f \( -iname \*.css -o -iname \*.js \) | while read my_file; do
    # Extract the basename of the image file
    file_basename=$(basename "$my_file")
    
    # Search for it in the project, excluding .zip files and .git directories and .xml directories
    result=$(grep -ril --exclude=*.zip --exclude-dir=.git --exclude=*.xml "$file_basename" "$PROJECT_DIR")
    
    # If not found, print it or delete it based on flag
    if [ -z "$result" ]; then
        echo "Unused file: $my_file"
        if $DELETE_FLAG; then
            rm "$my_file"
            echo "Deleted: $my_file"
        fi
    fi
done

This didn’t work perfectly. I had to add an exclusion condition for .xml files because my WordPress blog archive files were being highlighted in the search. (EOD, I ended up zipping the few .xml archive files anyway. I also keep them on an S3 bucket, but I enjoy redundancy.)

The file name “bootstrap.css” was being found in its own file.

Bootstrap source code

This, at least, gave me enough confidence to just delete the files manually. I can’t call this a perfect tool (and I don’t think it would scale well), but it is a utility for a practical use-case.

I saw other examples of it acting funny. For instance, I had an old stock photo file named ‘5.jpg’. It was coming up as being used in the project because, for some reason, that string was found in another image file – ‘jimmy.webp’.

using grep to search image file names

Ensure Your Website’s Success: Maintenance, Audit, and Enhancement Plans

Existing website work

This post is all about how I help clients with their existing websites. If you are a fellow web developer reading this, use it for ideas on how to serve more people. My mission is to help businesses achieve more through their web presence.

If your curious about how I can help you with your website, send me a message. Below are some ways I will serve you.

Content updates & maintenance

I try to be a company’s go-to guy that can be called whenever anything comes up with their website.

If someone has a website, even if it is a static brochure site, it will eventually need help. It could be small content updates to reflect inevitable changes to the business. Or, one day something goes wrong. The website suddenly doesn’t work at all. Maybe someone notices something broken, be it major or minor. I want them to think of me and know that I can help.

There’s some businesses that regularly make content updates themselves using a CMS (like WordPress, Wix, Shopify, etc.). They could need occasional help with customizations, CMS or plugin update issues, and more. I let clients know that when issues arise, I’m just a text message away.

Audit & enhancement

A client usually requests this service in the form of a complaint: “My website is too slow”, “I’m not getting enough sales/conversions/leads from my website”. My response is to do a formal audit and analysis. The result includes recommendations for improvement and an estimate (time/price) for implementation.

Other times, clients do not even know that there is a potential risk (security issues) or unrealized upside (UX issues) that needs attention. Providing those insights with empathy and transparency helps businesses see that value. Below is a list of audit types I offer:

  • Security: Is your website secure? Does it use https? Is WordPress up-to-date? Is your site vulnerable to being taken over by hackers?
  • Accessibility: Is your website usable for people with disabilities? Many businesses don’t realize that this is a legal requirement under the ADA.
  • SEO: Technical SEO, optimization, and more
  • Design UI/UX: Does your website look like it’s stuck in the past? How does it perform on different mobile devices? Is there brand consistency? Is the user experience the best that it can be? Maybe it is slow and bloated from plugins/integrations and needs a refresh.

Once we figure out what needs attention, I can create a plan and strategy to enhance your website. We can take it one step and a time, and focus on what will have the greatest impact for you and your business. You can read more about my process for web development with freelance clients in another post.

steps to handling a web development client

Preemptive audits to win new clients

I approach clients (existing or perspective) with a value proposition from a place of wanting to give. This is especially true for small businesses that appear to be leaving honey 🍯  on the table.

My process for engaging a new client, especially cold ones, is to review their website and make note of any obvious improvements. One example is using a generic email address (ExampleBusiness@gmail.com) instead of their own domain. Others include broken 404 links and bad mobile UX.

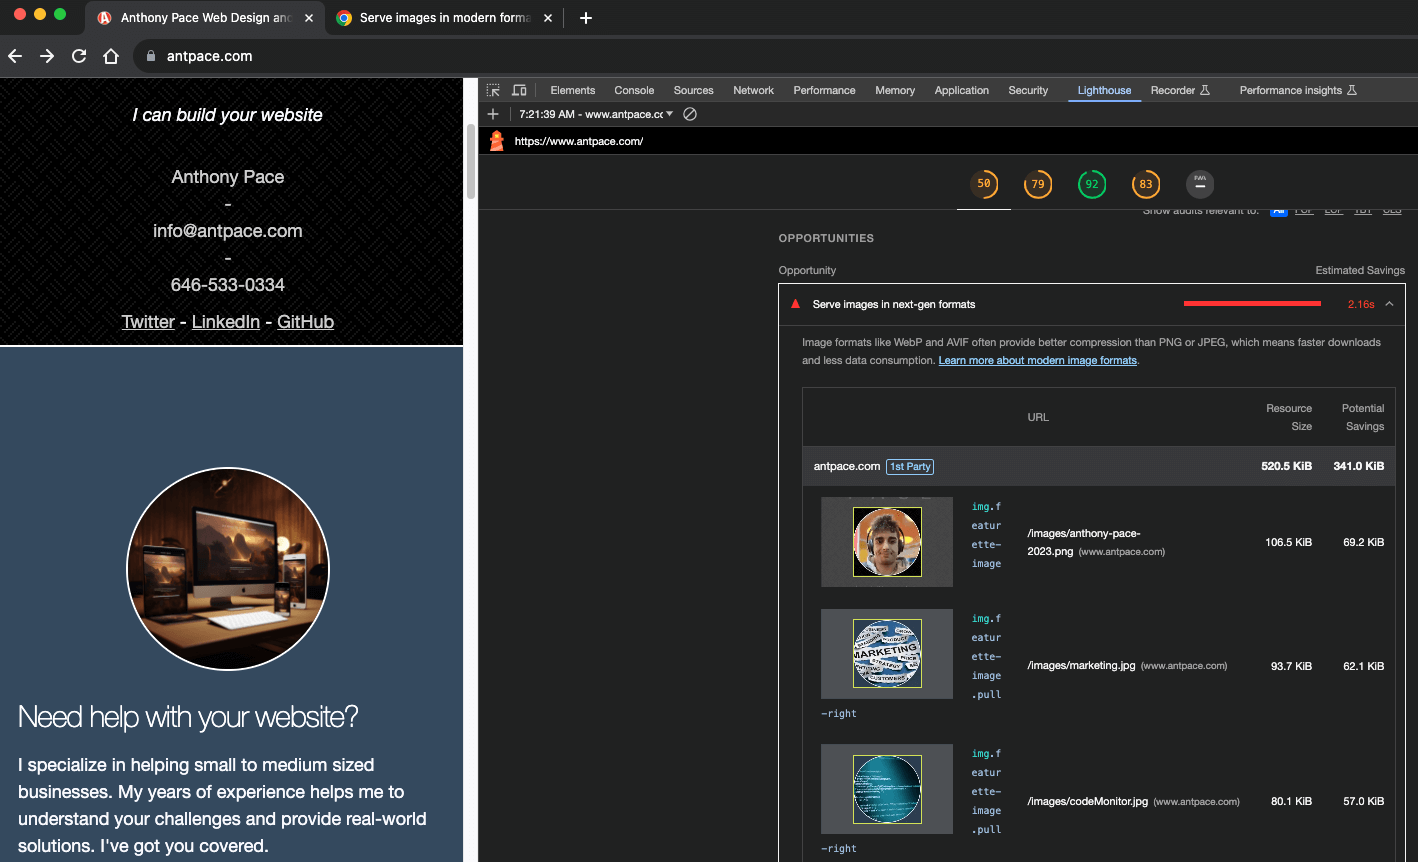
Google Chrome’s built in Lighthouse feature helps me to highlight low performance in existing websites of potential clients.

low performing lighthouse scores for a small business

Screaming Frog SEO Spider is another utility that I use to identify (and pitch) improvements to new client web projects.


Training & education

Sometimes, managers and stakeholders want to know how things work or how to make some changes themselves. That’s why I offer technical training, education, and tutoring.

Your business might have a designer or marketer that is ready to add some tech skills to the mix. I can help with that too. Contact me about the personalized tech training that I offer.

Disaster recovery & best practices

When a tech disaster happens you need to have a plan for recovery. Do you have backups? What is the RPO and RTO for your organization when “the business is on fire”? Work with me to be prepared in these situations. I apply proven strategies and make sure your digital presence is resilient.

A moment of preparation is worth a week of remediation. Sailing ahead of the storm is possible by following best practices  How does your organization manage passwords and credentials? What apps do your employees use? Knowing the right questions is the only way to build valuable answers.

React Redux Provider Store: No Overload Matches This Call

react redux IDE

This post documents a solution for the following error I encountered in a React TypeScript project that was using Redux:

No overload matches this call.
  Overload 1 of 2, '(props: ProviderProps<Action> | Readonly<ProviderProps<Action>>): Provider<Action>', gave the following error.
    Type '{ children: Element; store: Store<{ readonly [$CombinedState]?: undefined; } & { repos: ReposState; }, Action>; }' is not assignable to type 'IntrinsicAttributes & IntrinsicClassAttributes<Provider<Action>> & Readonly<ProviderProps<Action>>'.
      Property 'children' does not exist on type 'IntrinsicAttributes & IntrinsicClassAttributes<Provider<Action>> & Readonly<ProviderProps<Action>>'.
  Overload 2 of 2, '(props: ProviderProps<Action>, context: any): Provider<Action>', gave the following error.

React is a JavaScript framework used to build web apps. Redux is an open-source library used to manage the state of an application, and is often used along with React JS.

In this context, the Redux <Provider> component is used to pass application state along to its children components. It is best practice to wrap the entirety of your app in the <Provider> component, and pass the store object into it as an argument (property):

import React from 'react';
import ReactDOM from 'react-dom/client';
import './index.css';
import { Provider } from 'react-redux';
import App from './App';
import { store } from './state';

const root = ReactDOM.createRoot(
  document.getElementById('root') as HTMLElement
);

root.render(
  <React.StrictMode>
    <Provider  store={store}> 
      <App />
    </Provider>
  </React.StrictMode>
);

In my project, this was producing an error on the <Provider> component that said “No overload matches this call.” I knew this must have something to with the argument(s) being passed along.

No overload matches this call.

At first I thought it might have something to do with my store object, but that was not it. I was able to resolve this roadblock by explicitly passing a ProviderProps object into the Provider component.

import React from 'react';
import ReactDOM from 'react-dom/client';
import './index.css';
import { Provider, ProviderProps } from 'react-redux';
import App from './App';
import { store } from './state';


const providerProps: ProviderProps = {
  store: store,
};

const root = ReactDOM.createRoot(
  document.getElementById('root') as HTMLElement
);

root.render(
  <React.StrictMode>
    <Provider  {...providerProps}> 
      <App />
    </Provider>
  </React.StrictMode>
);

This worked because the store object is explicitly typed in the ProviderProps object. This ensures that it matches the type expected by the Provider component. Ultimately, it was a TypeScript error. TypeScript was not able to infer the store type correctly.

This was a bug I encountered while building a web app for an Udemy course called “React and Typescript: Build a Portfolio Project“.