If you’re a business owner or marketer, you’re likely familiar with Google Ads as a strong way to drive traffic to your website. Setting it up effectively can require some technical know-how, especially when integrating with WordPress. Allow me to walk you through properly integrating Google Ads with Google Analytics and Google Tag Manager, the right way, to maximize your website’s performance and data tracking capabilities.
Why Use Google Ads for Your Website?
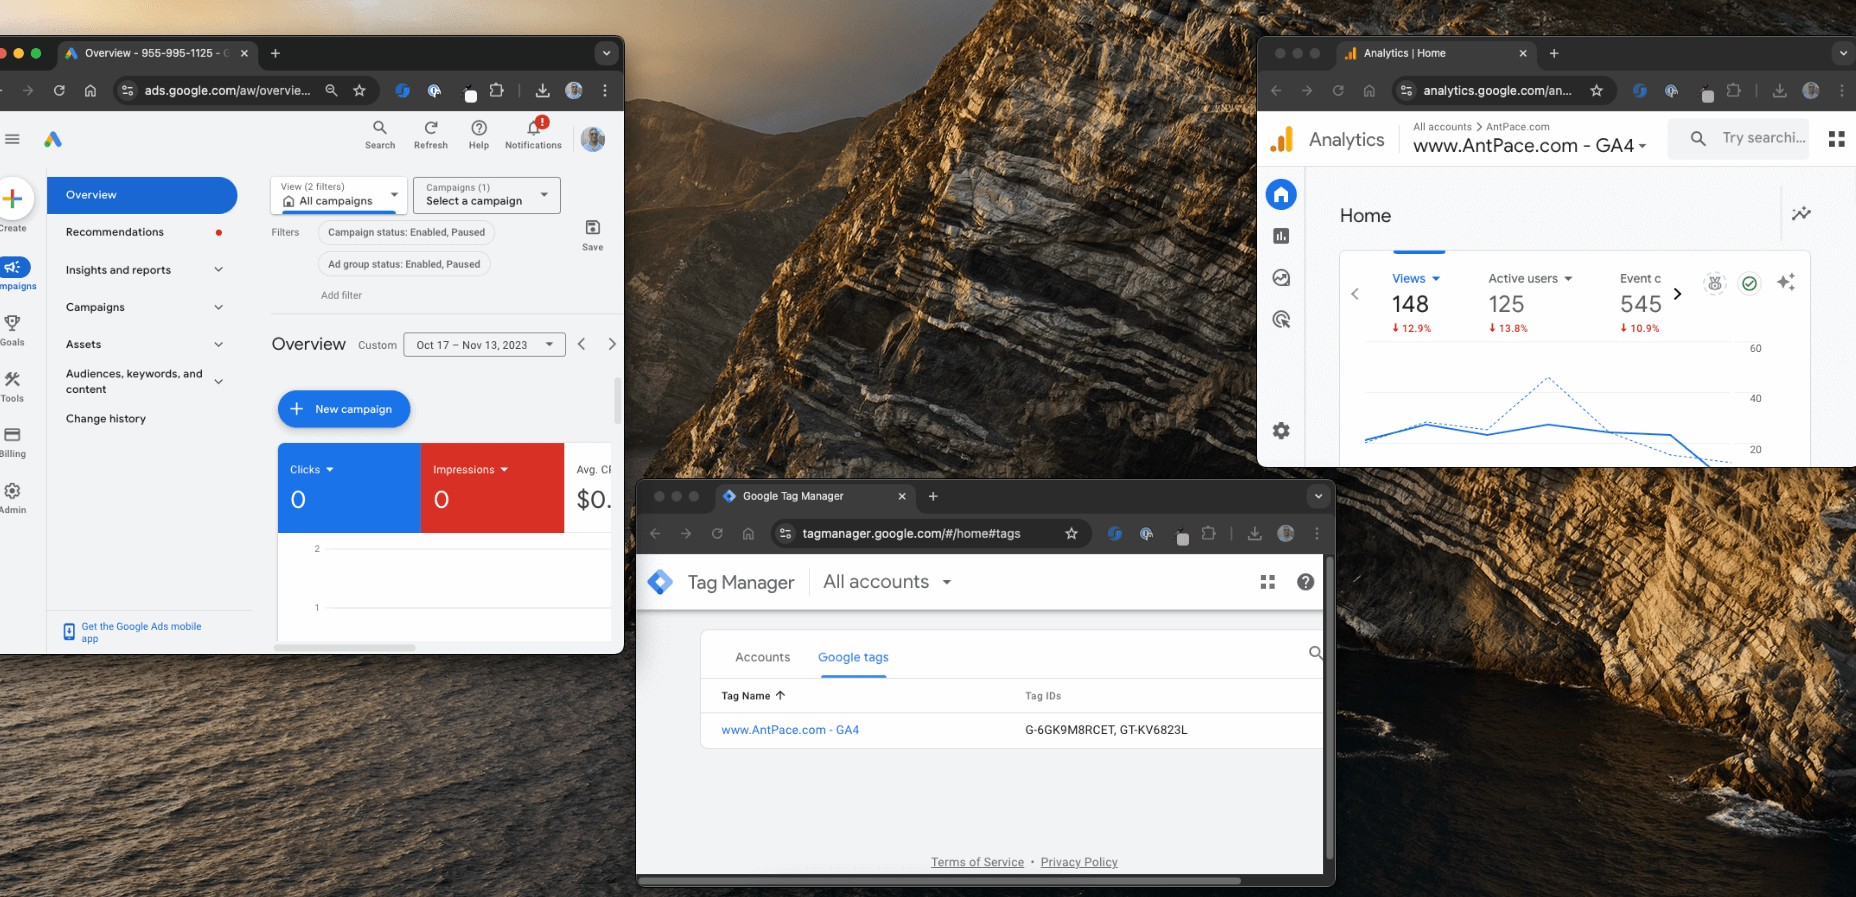
Google Ads is an excellent tool for driving targeted traffic to your website. By bidding on keywords relevant to your business, you can show ads to users actively searching for what you offer. But, to really understand the value of that traffic, it’s crucial to track it correctly. That’s where tools like Google Analytics and Google Tag Manager come in.
Option 1: Directly Connect Google Analytics and Google Ads with Custom JavaScript
For many businesses and marketers, a straightforward setup of Google Analytics and Google Ads is enough to track important website interactions without needing a more complex setup. If you’re looking to avoid additional tools or platforms, you can connect Google Analytics and Google Ads directly and use custom JavaScript to track key actions on your website. Here’s how to do it:
Step 1: Install Google Analytics (GA4)
To begin, you’ll need to install Google Analytics on your WordPress site. There are a couple of ways to do this:
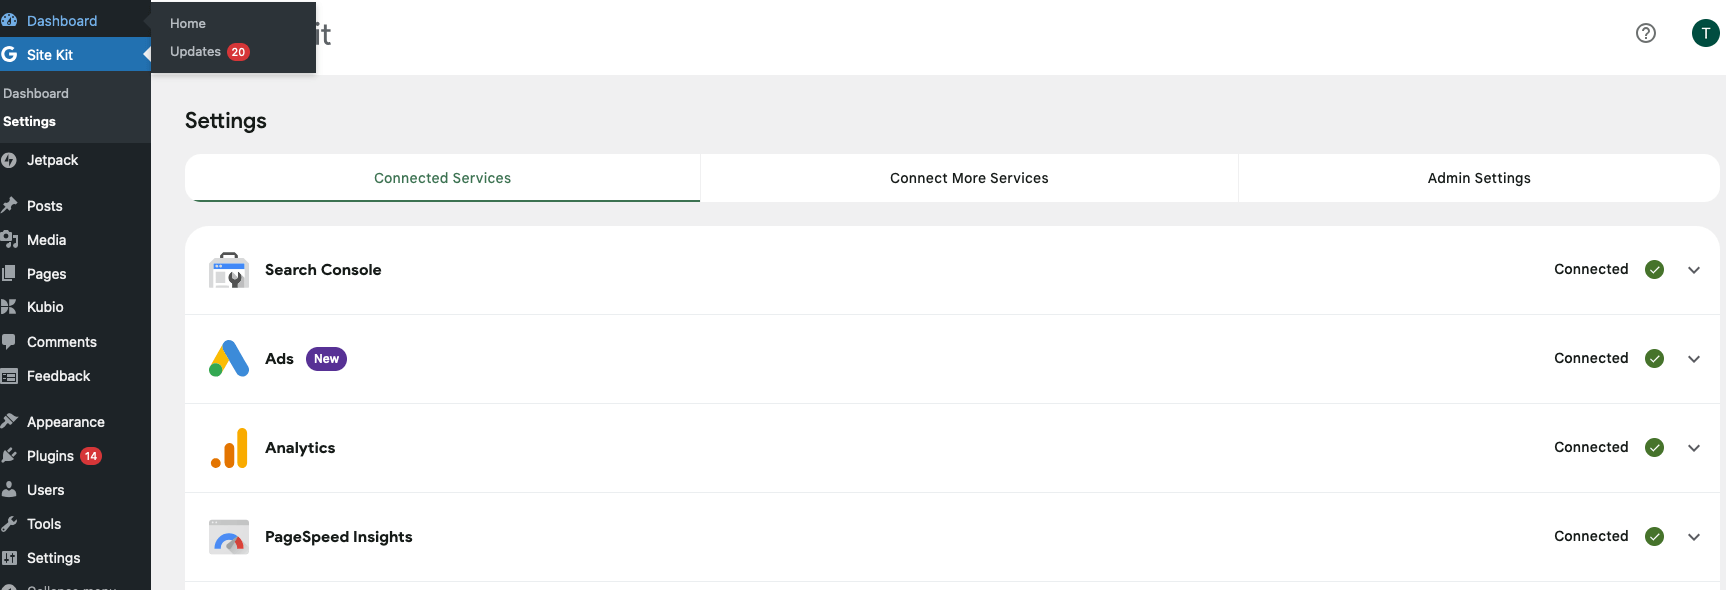
- Using a Plugin: WordPress plugins like Site Kit by Google simplify the process. After installation, the plugin will automatically insert the Google Analytics tracking code into your website, and you’ll be able to see key data like page views and user behavior within your Google Analytics dashboard.
- Manual Code Insertion: If you prefer not to use a plugin, you can manually add the GA4 tracking code to your WordPress site. To do this, copy the tracking script from your Google Analytics account and paste it into your site’s header or footer file (usually found in your theme settings or via your website’s code editor). This will start collecting data immediately.
Step 2: Link Google Analytics to Google Ads
Once Google Analytics is set up, the next step is to link it with your Google Ads account. This will allow you to see how your ad campaigns are performing in terms of real user behavior and conversions on your website.
- In Google Analytics, navigate to the Admin section and find the Google Ads Linking option under the Property settings.
- Follow the prompts to link your Google Ads account. Once linked, data such as user behavior, conversions, and audience insights will flow between Google Ads and Analytics, allowing you to optimize your campaigns based on how visitors interact with your site.
Step 3: Set Up Custom JavaScript for Conversion Tracking
For more advanced tracking, you can use custom JavaScript to monitor specific actions on your site, like button clicks, form submissions, or external link redirects. Here’s how you can do this:
- Google Ads Conversion Tracking: Google Ads provides a conversion tracking code that you can place directly into your website’s HTML. For example, if you want to track when users complete a form or click a specific button, you can insert this conversion tracking code into the relevant part of your site’s HTML.
- Navigate to your Google Ads account, go to Tools & Settings > Conversions, and create a new conversion action.
- Google Ads will generate a conversion tracking code that includes a JavaScript snippet. You can add this code directly into your website’s HTML (either through your WordPress editor or directly into the page code) to track actions.
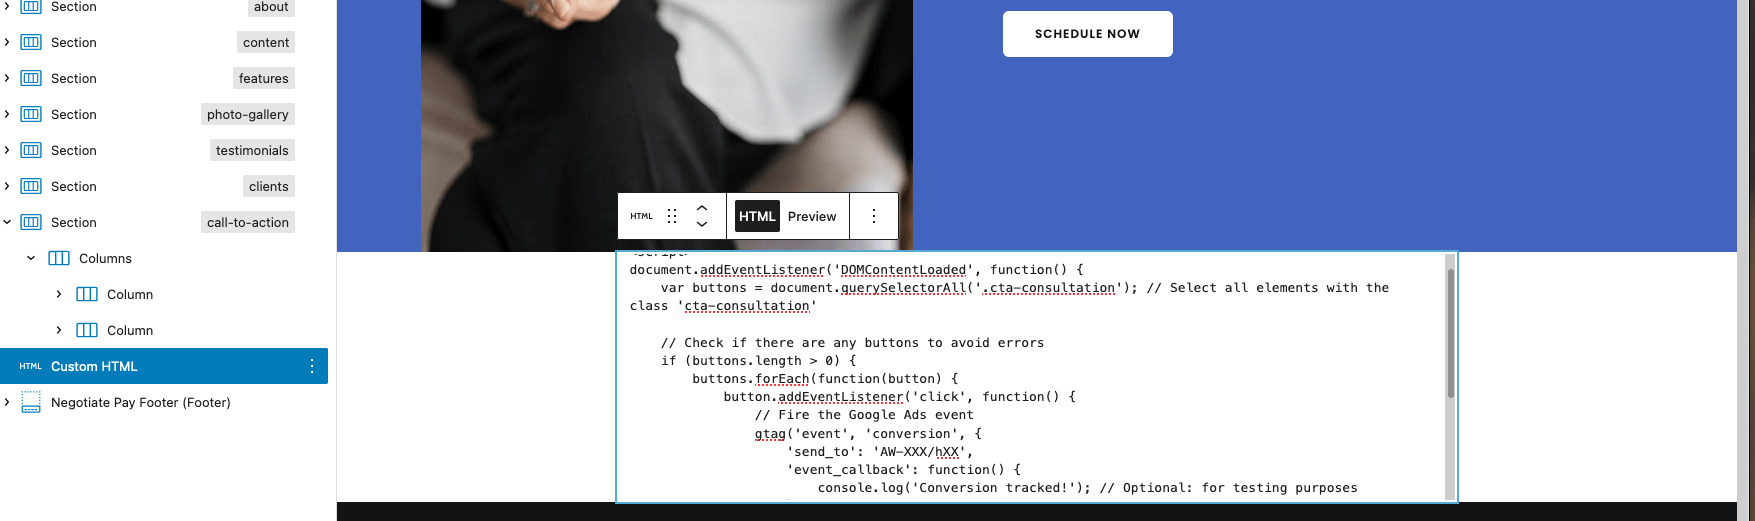
- Tracking Button Clicks: If you want to track a button click (for example, a “Contact Us” button), you can insert the conversion tracking code into the button’s HTML attributes. This will trigger a conversion event each time a user clicks the button, allowing you to monitor how often it leads to valuable actions on your site.
- Tracking Form Submissions: Similarly, if you want to track when users submit a contact form, you can embed the conversion tracking code into the form’s submission page or thank-you page. This is especially useful for tracking lead generation or contact inquiries.
Here is a sample of the code I used:
<script>
document.addEventListener('DOMContentLoaded', function() {
    var buttons = document.querySelectorAll('.cta-consultation'); // Select all elements with the class 'cta-consultation'

    // Check if there are any buttons to avoid errors
    if (buttons.length > 0) {
        buttons.forEach(function(button) {
            button.addEventListener('click', function() {
                // Fire the Google Ads event
                gtag('event', 'conversion', {
                    'send_to': 'AW-XXX/XXX',
                    'event_callback': function() {
                        console.log('Conversion tracked!'); // Optional: for testing purposes
                    }
                });
            });
        });
    }
});
</script>
Step 4: Monitor and Optimize Conversions
Once the custom JavaScript is in place, Google Analytics will start tracking the data, and you’ll be able to see how users are interacting with your site in the Conversions section of Google Ads. Over time, you can monitor the performance of your campaigns and make adjustments to improve your return on investment (ROI).
Key Advantages of This Approach
Simple and Direct: For small or less complex websites, directly connecting Google Analytics and Google Ads using custom JavaScript is a simple and effective solution.
Option 2: Integrating Google Analytics and Google Ads Using Google Tag Manager
For businesses that want more flexibility and control over their tracking setup, using Google Tag Manager (GTM) offers a more advanced approach compared to directly connecting Google Analytics (GA4) and Google Ads. By connecting GA4 through GTM and setting up Google Ads to pull conversion data from GA4, you can streamline the process and enable more precise tracking, including custom click tracking. Here’s how to do it:
Step 1: Set Up Google Analytics (GA4) Through Google Tag Manager
Instead of directly embedding Google Analytics code into your WordPress site, you can set up GA4 using Google Tag Manager. This allows for more flexibility in managing and customizing tracking tags without manually editing the site code. Be careful to not have it set up twice (once directly on its own, and also in GTM), or else you may see double measurements
Install Google Tag Manager on Your WordPress Site
First, install GTM by either using a plugin like Site Kit by Google or manually adding the GTM container code to your site’s header. This will serve as the foundation for all tracking scripts on your site.
- Create a GA4 Tag in GTM:
- In GTM, create a new tag by selecting Google Analytics: GA4 Configuration.
- Add your GA4 Measurement ID (found in your Google Analytics account) to the tag configuration.
- Navigate to the bottom left ‘Settings’, then ‘Data collection -> Data Streams’. Select your web stream and copy the ‘Measurement ID’
- Set the trigger to All Pages, so it tracks page views across your entire site.
- Save and publish the changes in GTM, and your website will now be tracking page views and user behavior through GA4 without needing any code embedded directly in your site.
Step 2: Set Up Custom Click Tracking Through GTM Triggers
One of the major advantages of using Google Tag Manager is the ability to create custom triggers to track specific user interactions, such as button clicks or link clicks, without having to modify the site’s code.
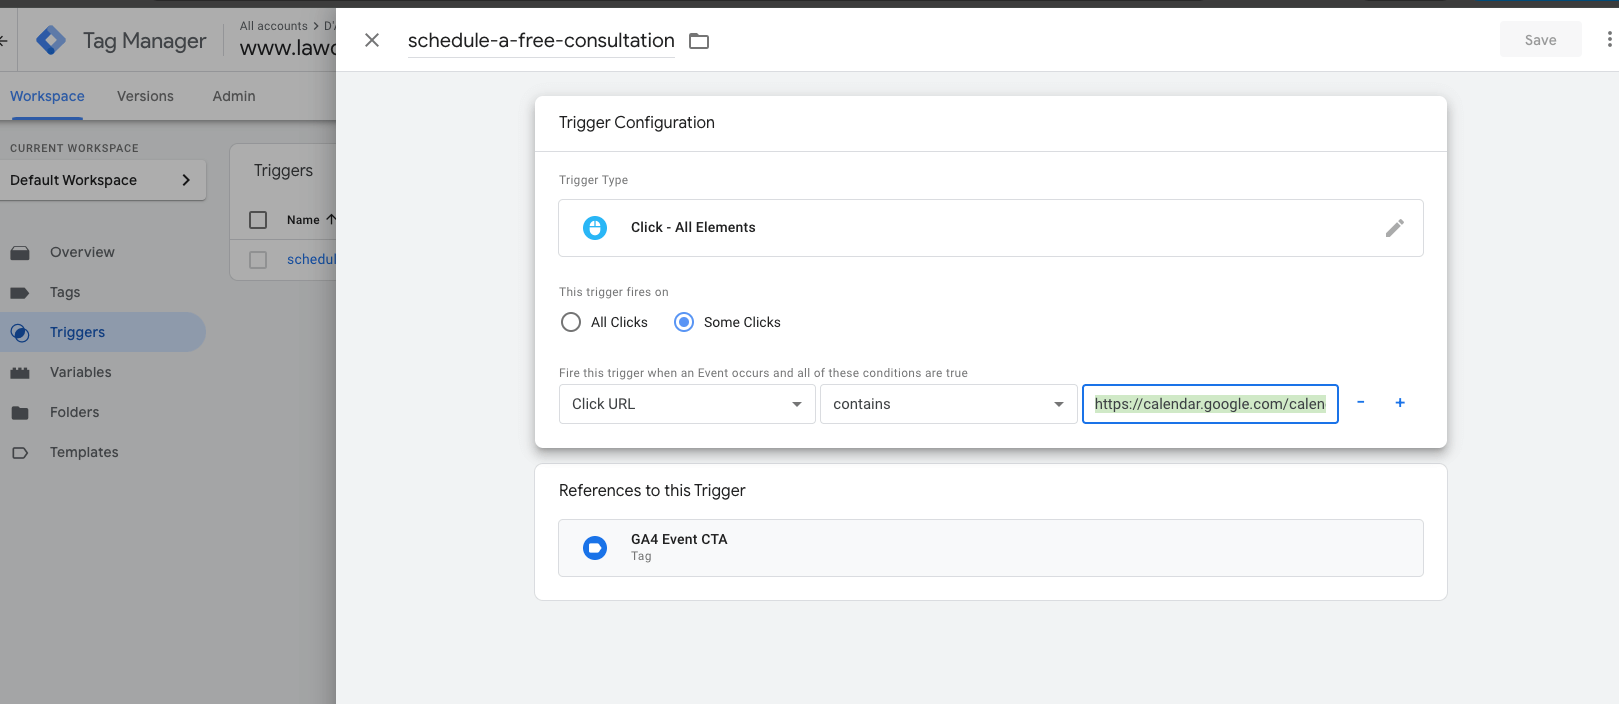
Create a Click Trigger in GTM
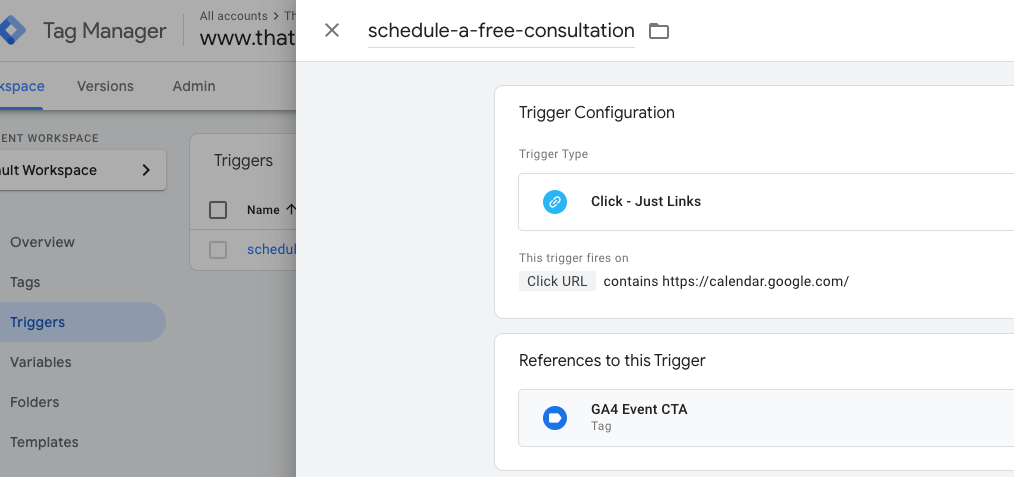
To track specific interactions like button clicks, you’ll need to set up a trigger in GTM. In GTM, create a new Trigger and select the Click – All Elements option. Define the conditions for your trigger, such as when a user clicks a specific button or link. For example, if you want to track a button leading to a third-party calendar page, you can set the trigger to fire when a user clicks on the button with that specific URL. My conversion was based on clicking any button or link that led to a Google Calendar scheduling page. Since the editor we were using (Kubio) generated complex HTML around the button, I was having trouble targeting exact clicks. Ultimately, I used a selector that targeted click URLs that contained part of the destination:
On another setup, I had to target “Just Links” for the event to fire. Make sure you test in preview mode to make sure it works!
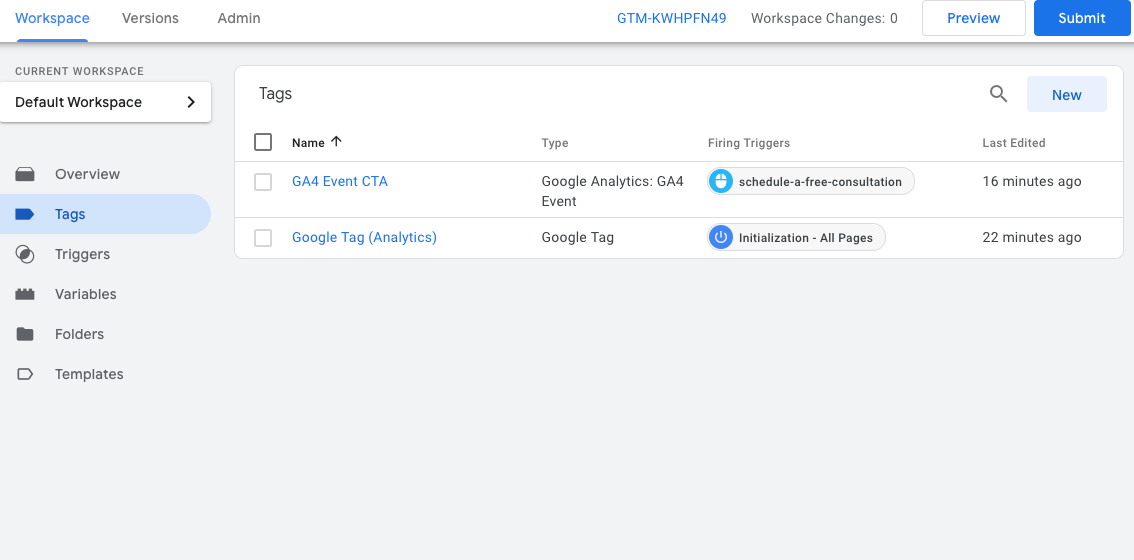
- Create a Google Analytics Event Tag:
- Create a new Google Analytics: GA4 Event tag in GTM.
- Set the event parameters, such as what action or label you want to track (e.g., “Button Click” or “Contact Form Submission”).
- Assign the click trigger you just created to this tag, so it fires when the user interaction happens.
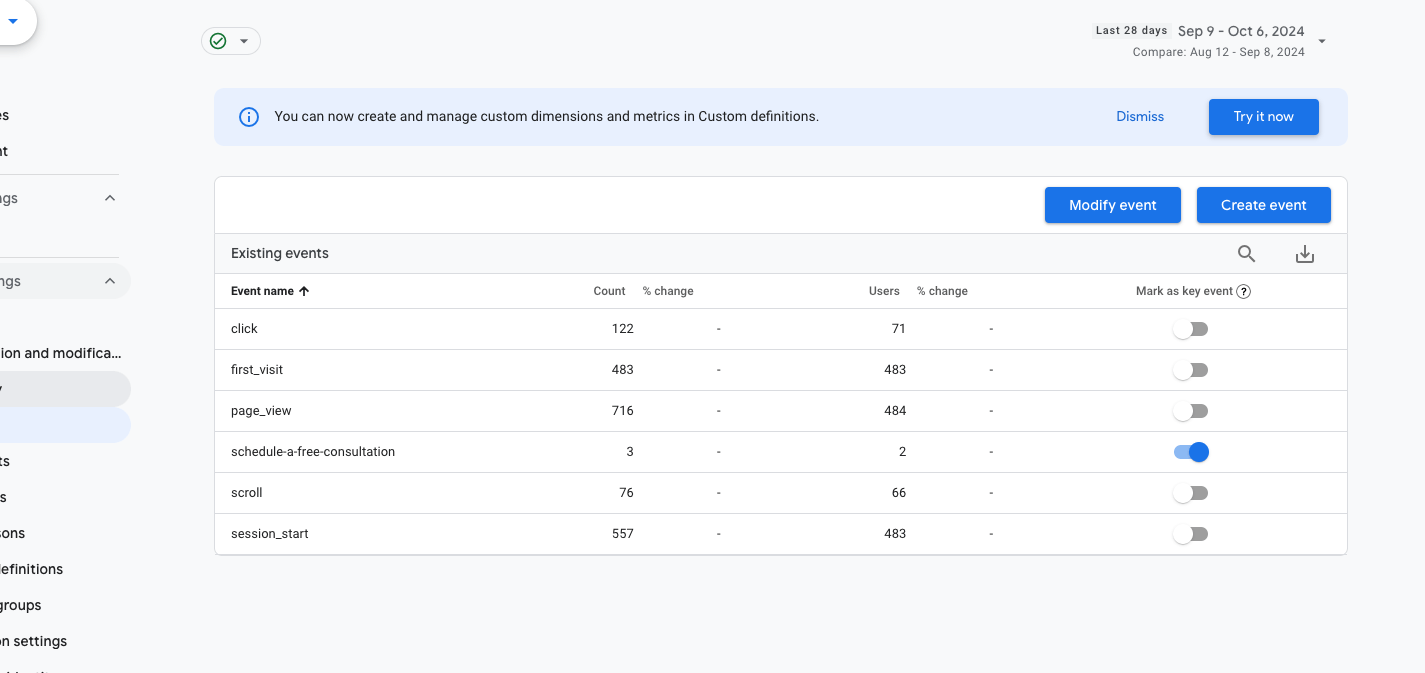
Once your trigger is firing, the event will be recorded in GA4. This allows you to see detailed analytics on how users interact with specific elements on your site. You may have to wait until the next day to see it showing up and to continue the rest of this process.
Step 3: Link Google Ads to GA4 for Conversion Tracking
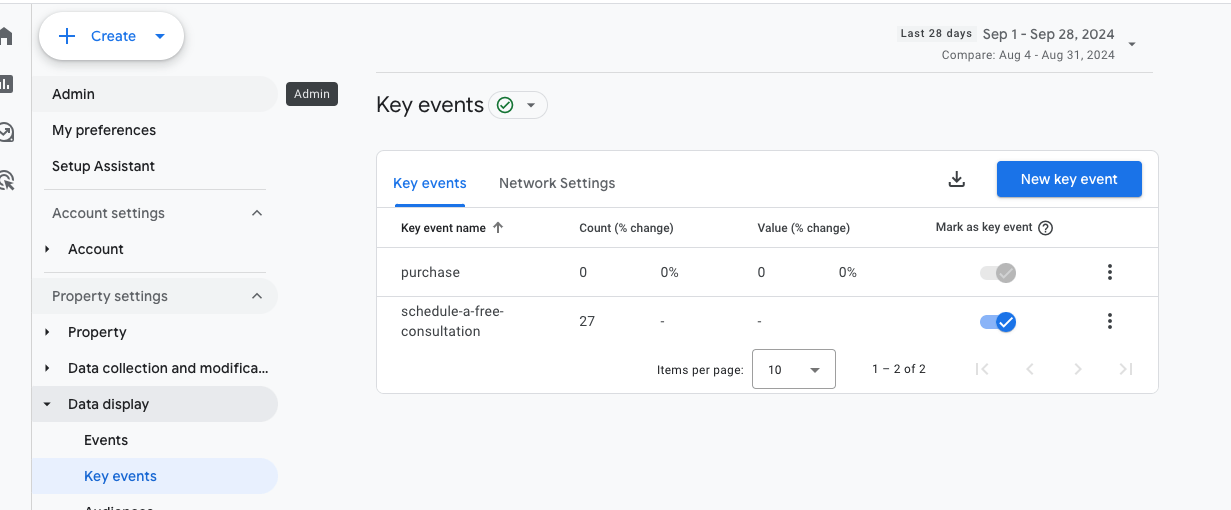
Once GA4 is collecting conversion data, you’ll want to make sure that Google Ads is also using this data for your ad campaigns. Instead of directly adding Google Ads tracking code to your website, you can import conversions from GA4 into Google Ads. Make sure you mark the event as a ‘Key Event’ in GA4:
- Link Google Ads to GA4: In your Google Analytics admin settings, find the Google Ads Linking option under the Property settings and link your Google Ads account.
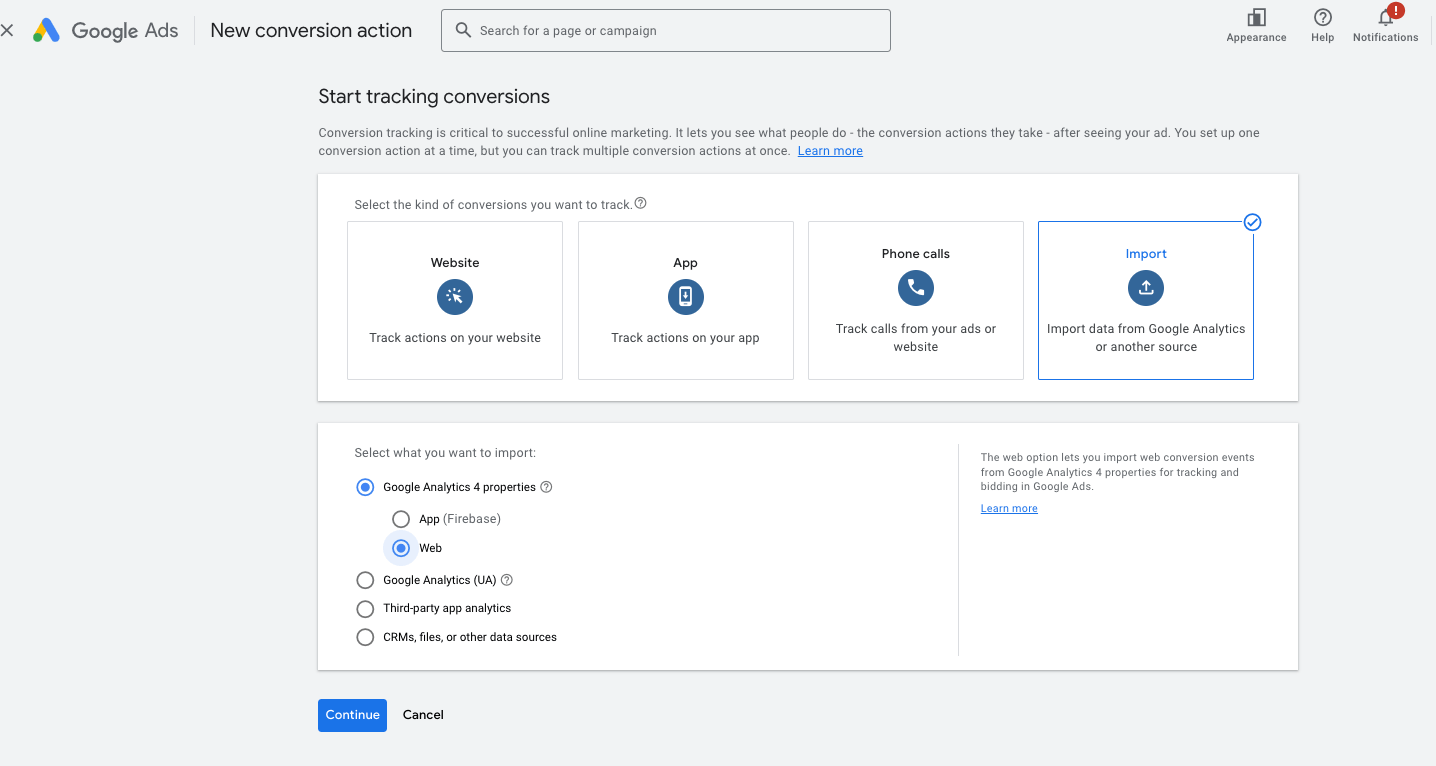
- Import Conversions into Google Ads: In your Google Ads account, navigate to Tools & Settings > Conversions. Click to import conversions from Google Analytics. You will now be able to track and optimize your Google Ads campaigns based on the conversion events recorded in GA4.
Step 5: Set Up Google Ads to Track Click Conversions
With the custom click tracking events flowing into GA4, you can now import these events into Google Ads as conversions.
- In GA4, mark the click event you created as a Conversion (similar to how you would for other key actions).
- Then, in Google Ads, import the conversion from GA4, so your ad campaigns can track the performance of these custom click actions.
This setup allows you to track highly specific user actions (like button clicks or form submissions) and optimize your Google Ads campaigns based on those actions.
GTM allows you to track custom events like button clicks, form submissions, and other interactions without modifying your site’s code. With Google Tag Manager, you can manage all of your tracking codes (for Google Analytics, Google Ads, and other tools) in one place. By pulling conversion data from GA4 into Google Ads, you can optimize your campaigns based on real user actions and get more detailed insights into how users interact with your site.